For Sarah Golden

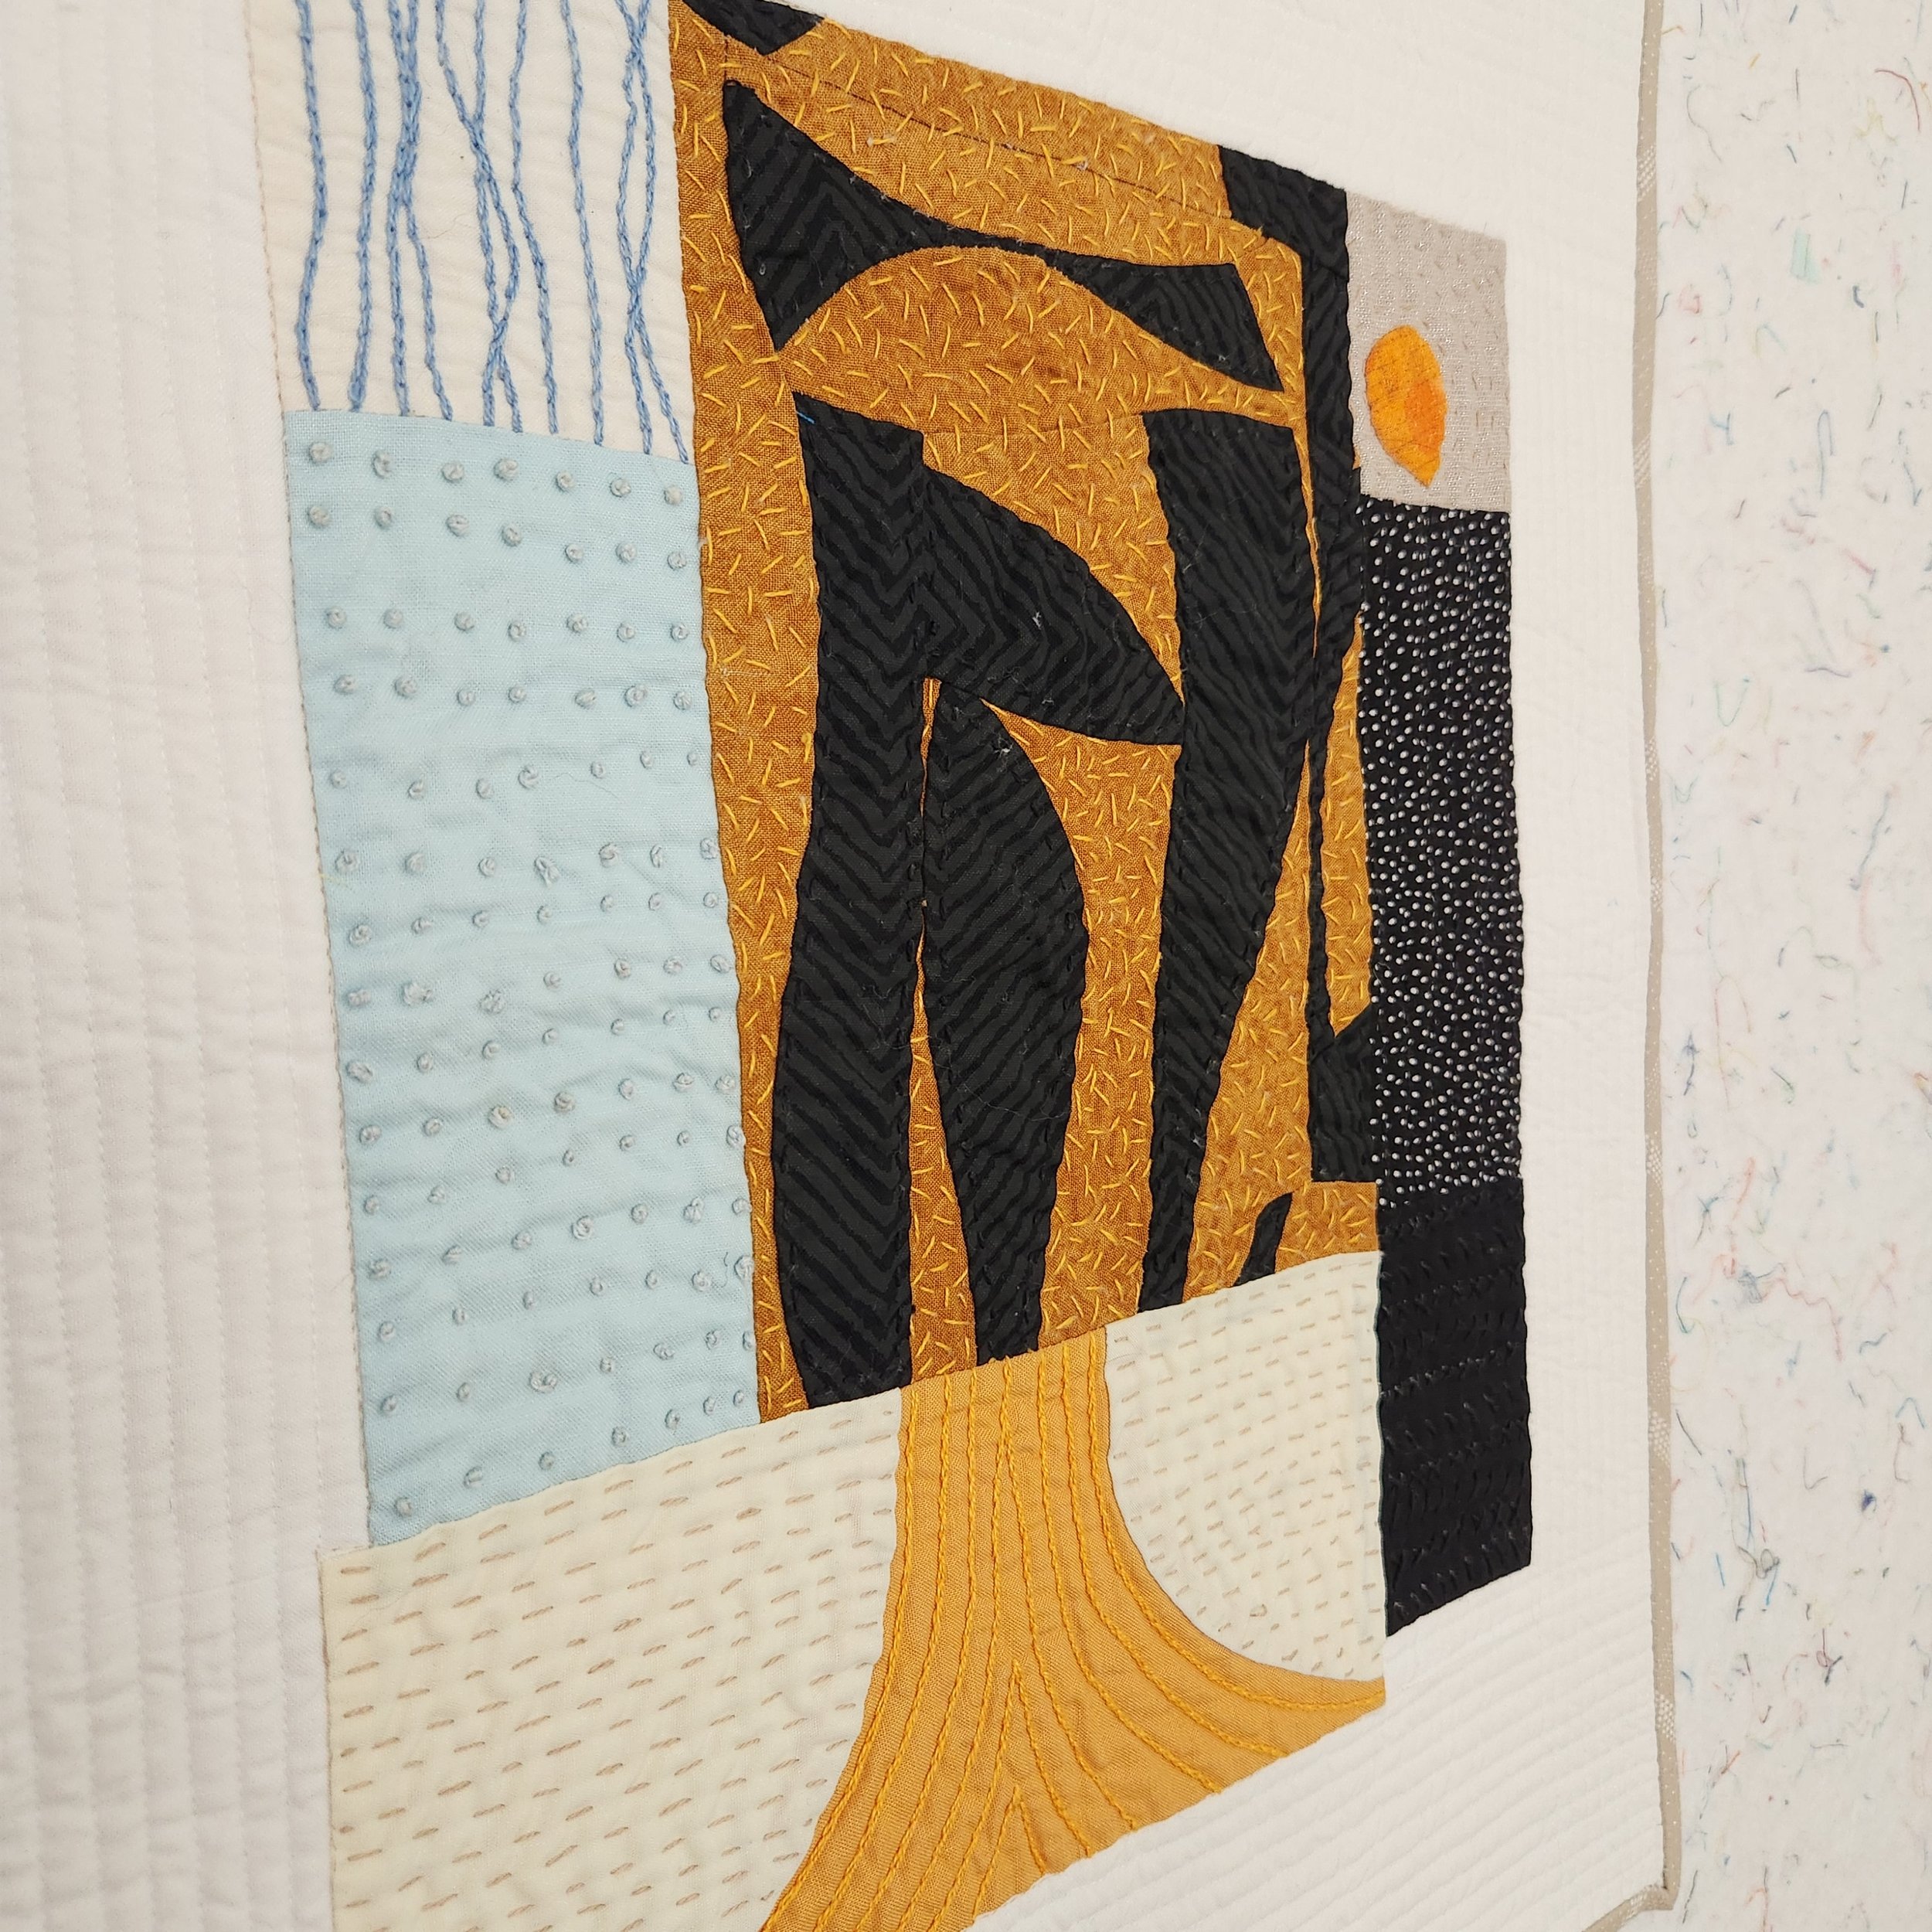
Sarah Gold Mini

16” x 20”

It was a few years ago, in the middle of another lockdown, that I became truly entranced with the work of Sarah Golden. Something about her shapes and colour use, not to mention that we are birthday twins, just got to me. One day she posted some paper collages she was making. It was instant inspiration and I wanted to turn it into a quilt. With her permission I explored the handmade and the shapes of her work but in fabric and thread.

Here is the inspiration image:

Sarah Golden paper and painting collage

To make the mini I dug through my stash for the right colours to reference her original piece. Some of my finds meant that I did not have to piece all the sections, but let the fabric talk. In the end, the components of my quilt collage were a combination of improv piecing, appliqué, and single fabrics. Then I used embroidery and hand quilting for additional details. I even matted my details like she did, with a ground of white.

Hand embroidery and quilting details on a gold, black, and blue improv quilt
Details of a gold, black, and blue improv quilt

Not entirely sure why it took me so long to finish this quilt. It’s just a mini! Yes, there is a lot of work in this small space, but that isn’t it. I just went in fits and starts on it. But it is finished now. Bound in a fabric to look like a wood frame. Sent to Sarah as a thank you for the inspiration.

August Morning Make 2022

Whenever people tell me that can’t sketch out quilts because they can’t draw I like to pull out my own sketchbook. Chicken scratch, random lines, and quite often things that only make sense in my head. You don’t NEED to draw to quilt. As long as you can think about where your seam lines go you are good. That being said, I always want to draw better.

I’ve done drawing for Morning Make before. Quick little still life sketches of things around me. It was a good exercise but building a skill isn’t a one and done thing. So in August I decided to set myself a drawing challenge again. This time, however, I explored a technique called contour drawing.

In contour drawing - at least the way I did it - your pen isn’t supposed to leave the paper. You are doing one continuous long line. Some people do it blind, as in they look at their subject and never the paper. I was not ready for that. But in slowing down to look at my starting image and translating it through a single line I was able to focus on shape and composition. You can’t draw everything in the picture. Well, you probably could, but I didn’t. Depending on the source image (pictures from my phone) I narrowed the focus to only certain elements. Sometimes background were completely eliminated, sometimes just enough to give context. It was an exercise in looking just as much as drawing.

I’ll be honest, I think some, if not all, are quite bad. That is, if you compare to people for whom drawing is a livelihood or serious endeavour. There was improvement, for sure. Some are even better than I would have expected. All were, at least, recognizable. Regardless of the results it was an enjoyable exercise.

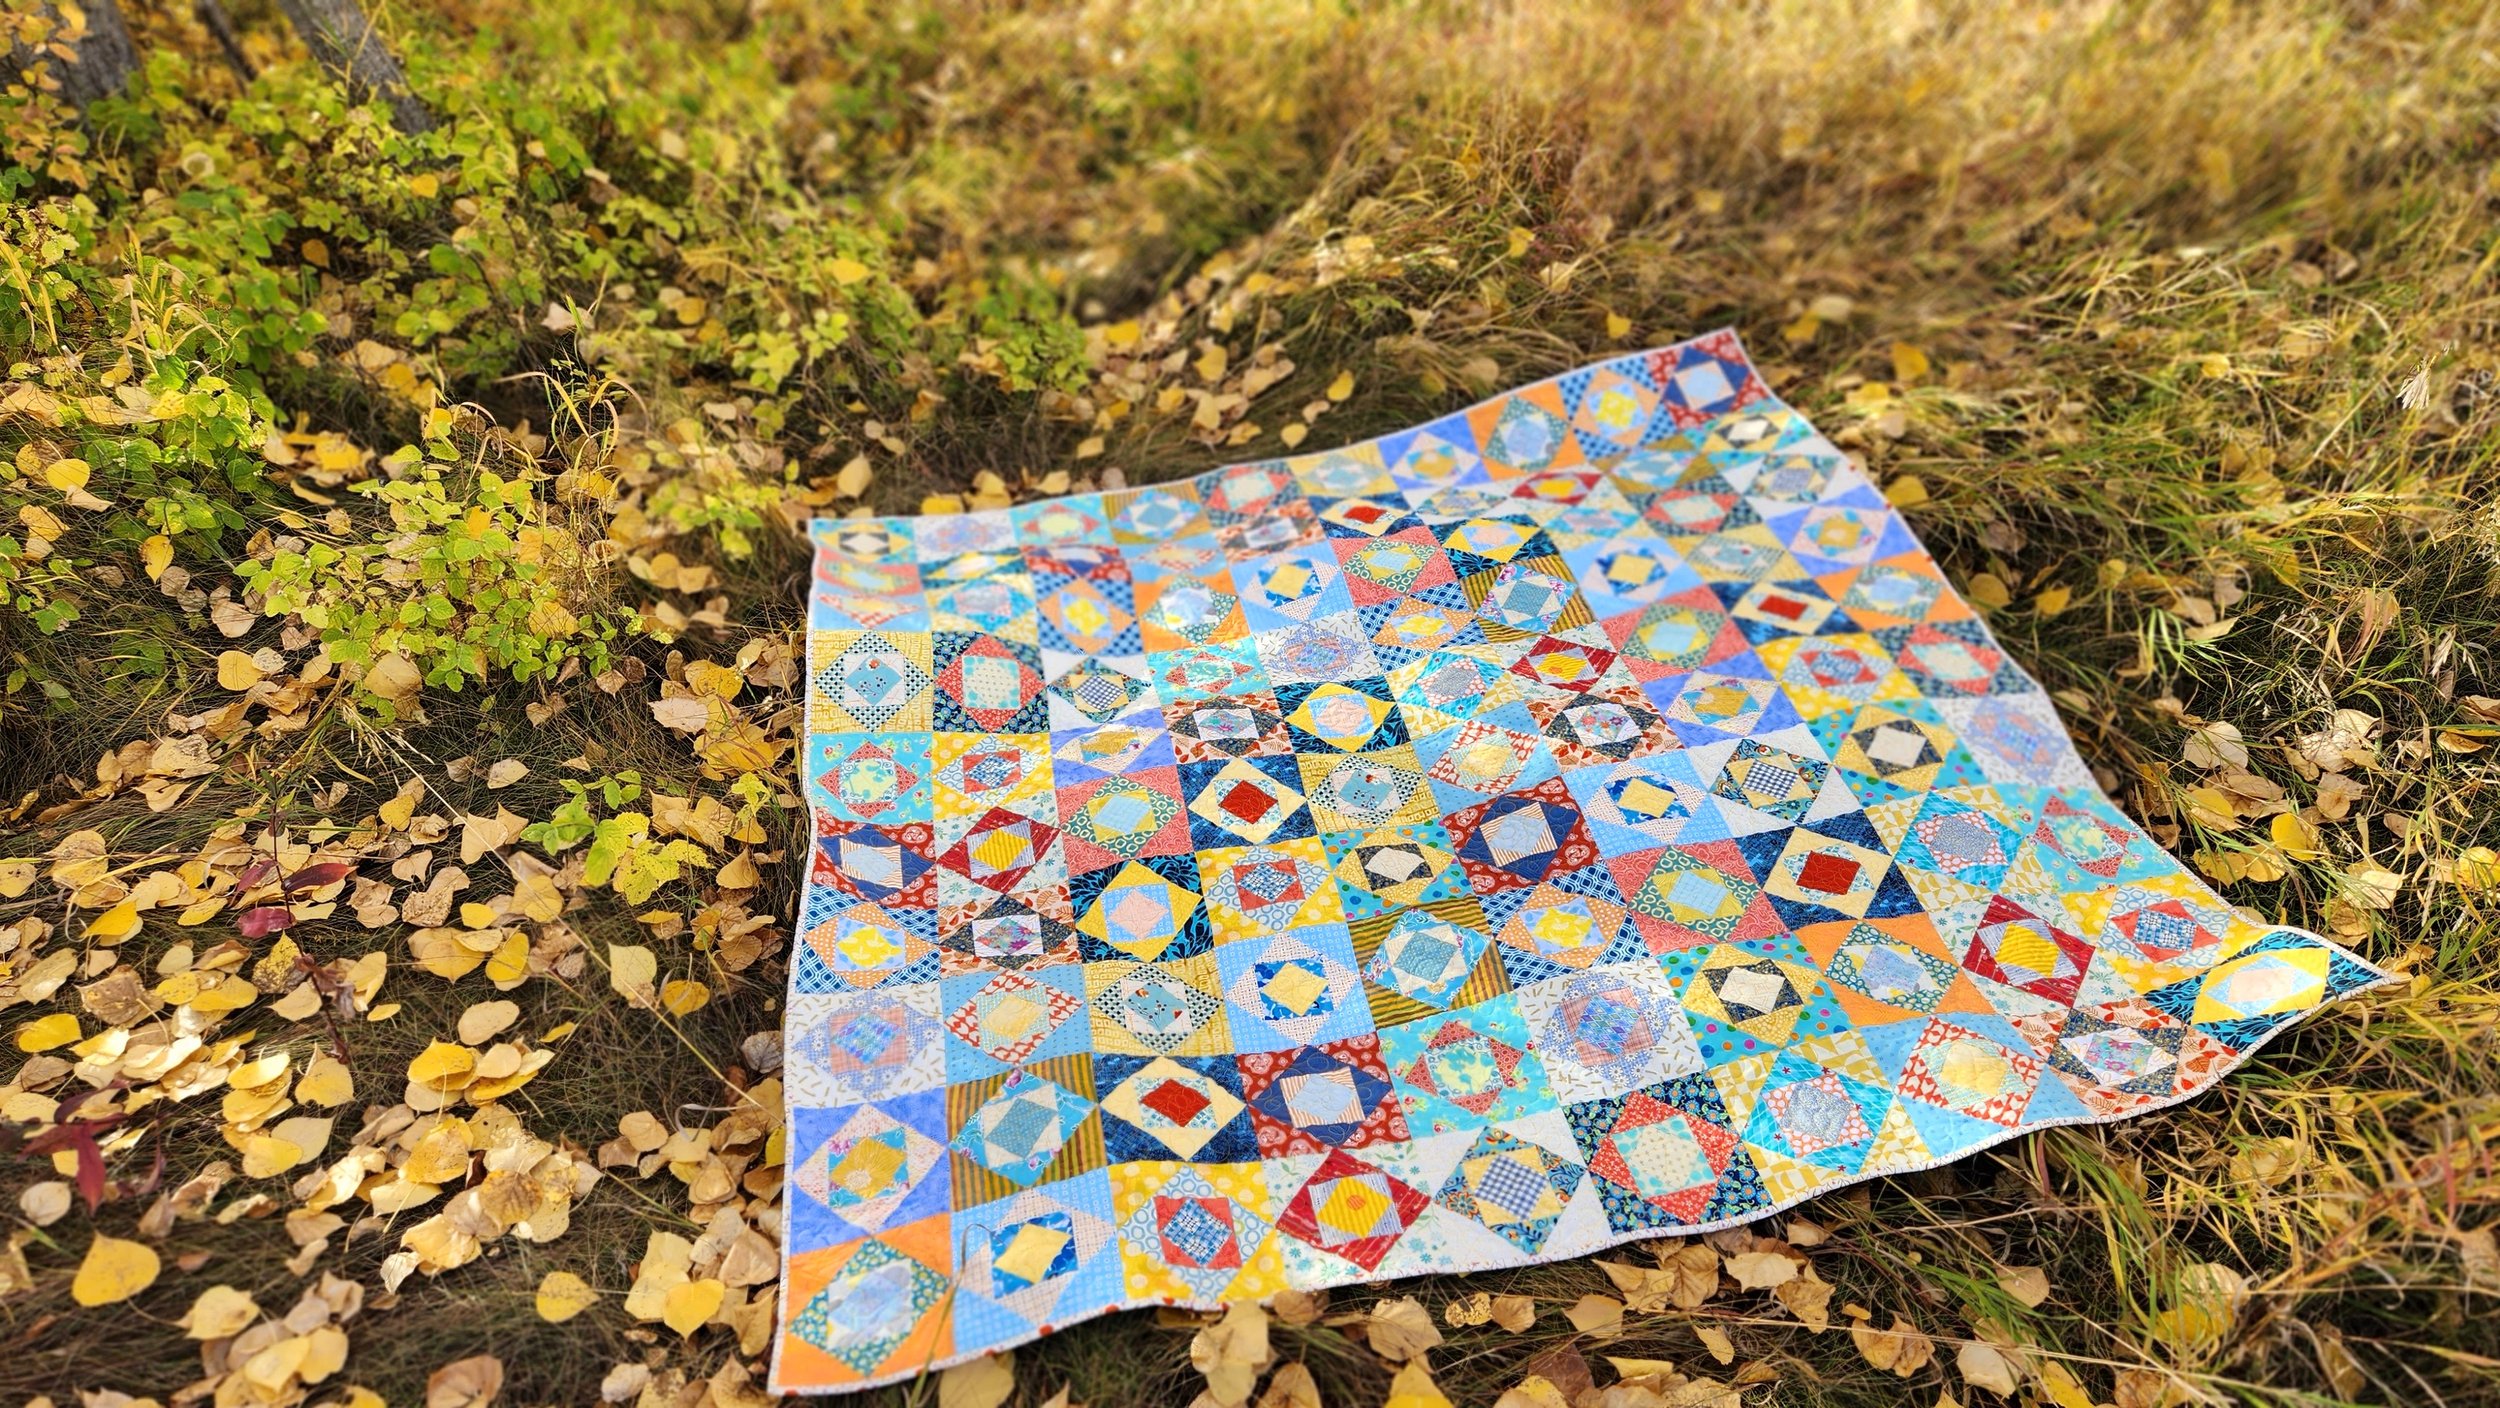
Kayleigh - My Version of a Fall Quilt

Kayleigh

70” x 70”

Along with her friends Ashley, Ashleigh, Brittany, and Angelica, Kayleigh loves her pumpkin spice, wide brim hats, and the sweaters that the cooler weather brings. Or even just the hint of cooler weather. Time to put away the spaghetti straps and flip flops, bring on the boots and oversized turtleneck sweaters. She’s sweet but not all that smart. She’s kind but not all that generous. But she will always open the wine. And she always finishes the book for book club. Who wouldn’t when wool socks and warm quilts keep you company while you read? Kayleigh is fall.

Okay, so my version of a fall quilt is a little less stereotypical than your basic girl hunting for pumpkins. It’s a function of where I am. Here in Calgary we don’t get a lot of the rich reds and oranges of your New England fall. We get gold, so much gold. We get blue skies in late September heat. My fall quilt reflects that.

I didn’t actually set out to make a fall quilt. The whole thing started with an experiment with a square in a square technique. You know, I had to see if it could be done improvisationally. Of course it can! I loved it so much I taught it as an online class - a Quilters’ Playcation Playdate last year. Then the colour combo of blue, yellow, and coral made me so happy I decided to just keep going! On a walk last fall I realized that these indeed were the colours of our fall.

I can hardly believe I actually finished the quilt already. My quilt tops tend to sit for years. Fall is here though. While pumpkin spice is not my thing - unless actually IN a pie - I do enjoy exploring nature as the season changes. So when I had a long arm appointment booked a few weeks ago I made sure to bring this quilt top and give her her due in the right season.

She is quilted with Wonderfil Tutti in a variegated yellow (TU01) with deco bob in the bobbin. I rented time at My Sewing Room on their Bernina long arm. In a little over 2 hours she was quilted! Nothing fancy, just an all over loop de loop design. There is no point going too fancy because you won’t see the stitching on such a busy quilt.

This is a great example of using prints and not being afraid of it! Most people call this look scrappy. It works because I paid attention to both colour and value as I made each set of squares. There are actually 5 of each fabric combination. I made five at a time simply so I could chain piece without getting confused. I would pick the four fabrics I wanted in the blocks, start with a centre square and build out. Each block wanted to finish around 7.5” so I decided to make 100 blocks in total. That meant I need 20 sets of blocks. To keep order with all these fabrics that meant I did 10 sets that went warm-cool-warm-cool, and 10 that went cool-warm-cool-warm. That way, when it came time to laying out the quilt top I could alternate the groupings for an effective layout. I think it worked well!

I also paid attention to value, although not as fastidiously. Some blocks have high value contrasts between each round, some are lower contrast. I like that mix of bold and soft. I did, however, pay more attention to value when laying out the blocks to make the quilt top. The really bold blocks and the really soft spots are spread throughout the quilt, so no one area commands all the attention. This is what I call managing the bossy blocks.

The back is pieced from things in my stash. Nothing fancy.

She is bound with a Heather Ross reprint. I tried a number of different colours and fabric and felt the white was a nice touch. As you probably know, I usually like a high contrast binding but it wasn’t right here. There is just a touch of pink in the print, though, that makes me smile.

Our days haven’t actually cooled off that much, even though the colours are changing. Which means there isn’t a huge need for a fall quilt just yet. She came in handy at a cross country race as a soft place to sit. And the evenings are getting longer and a bit colder. If I sit by the window I definitely need a quilt. Besides, pumpkin spice is already at the coffee shop so it definitely means fall.

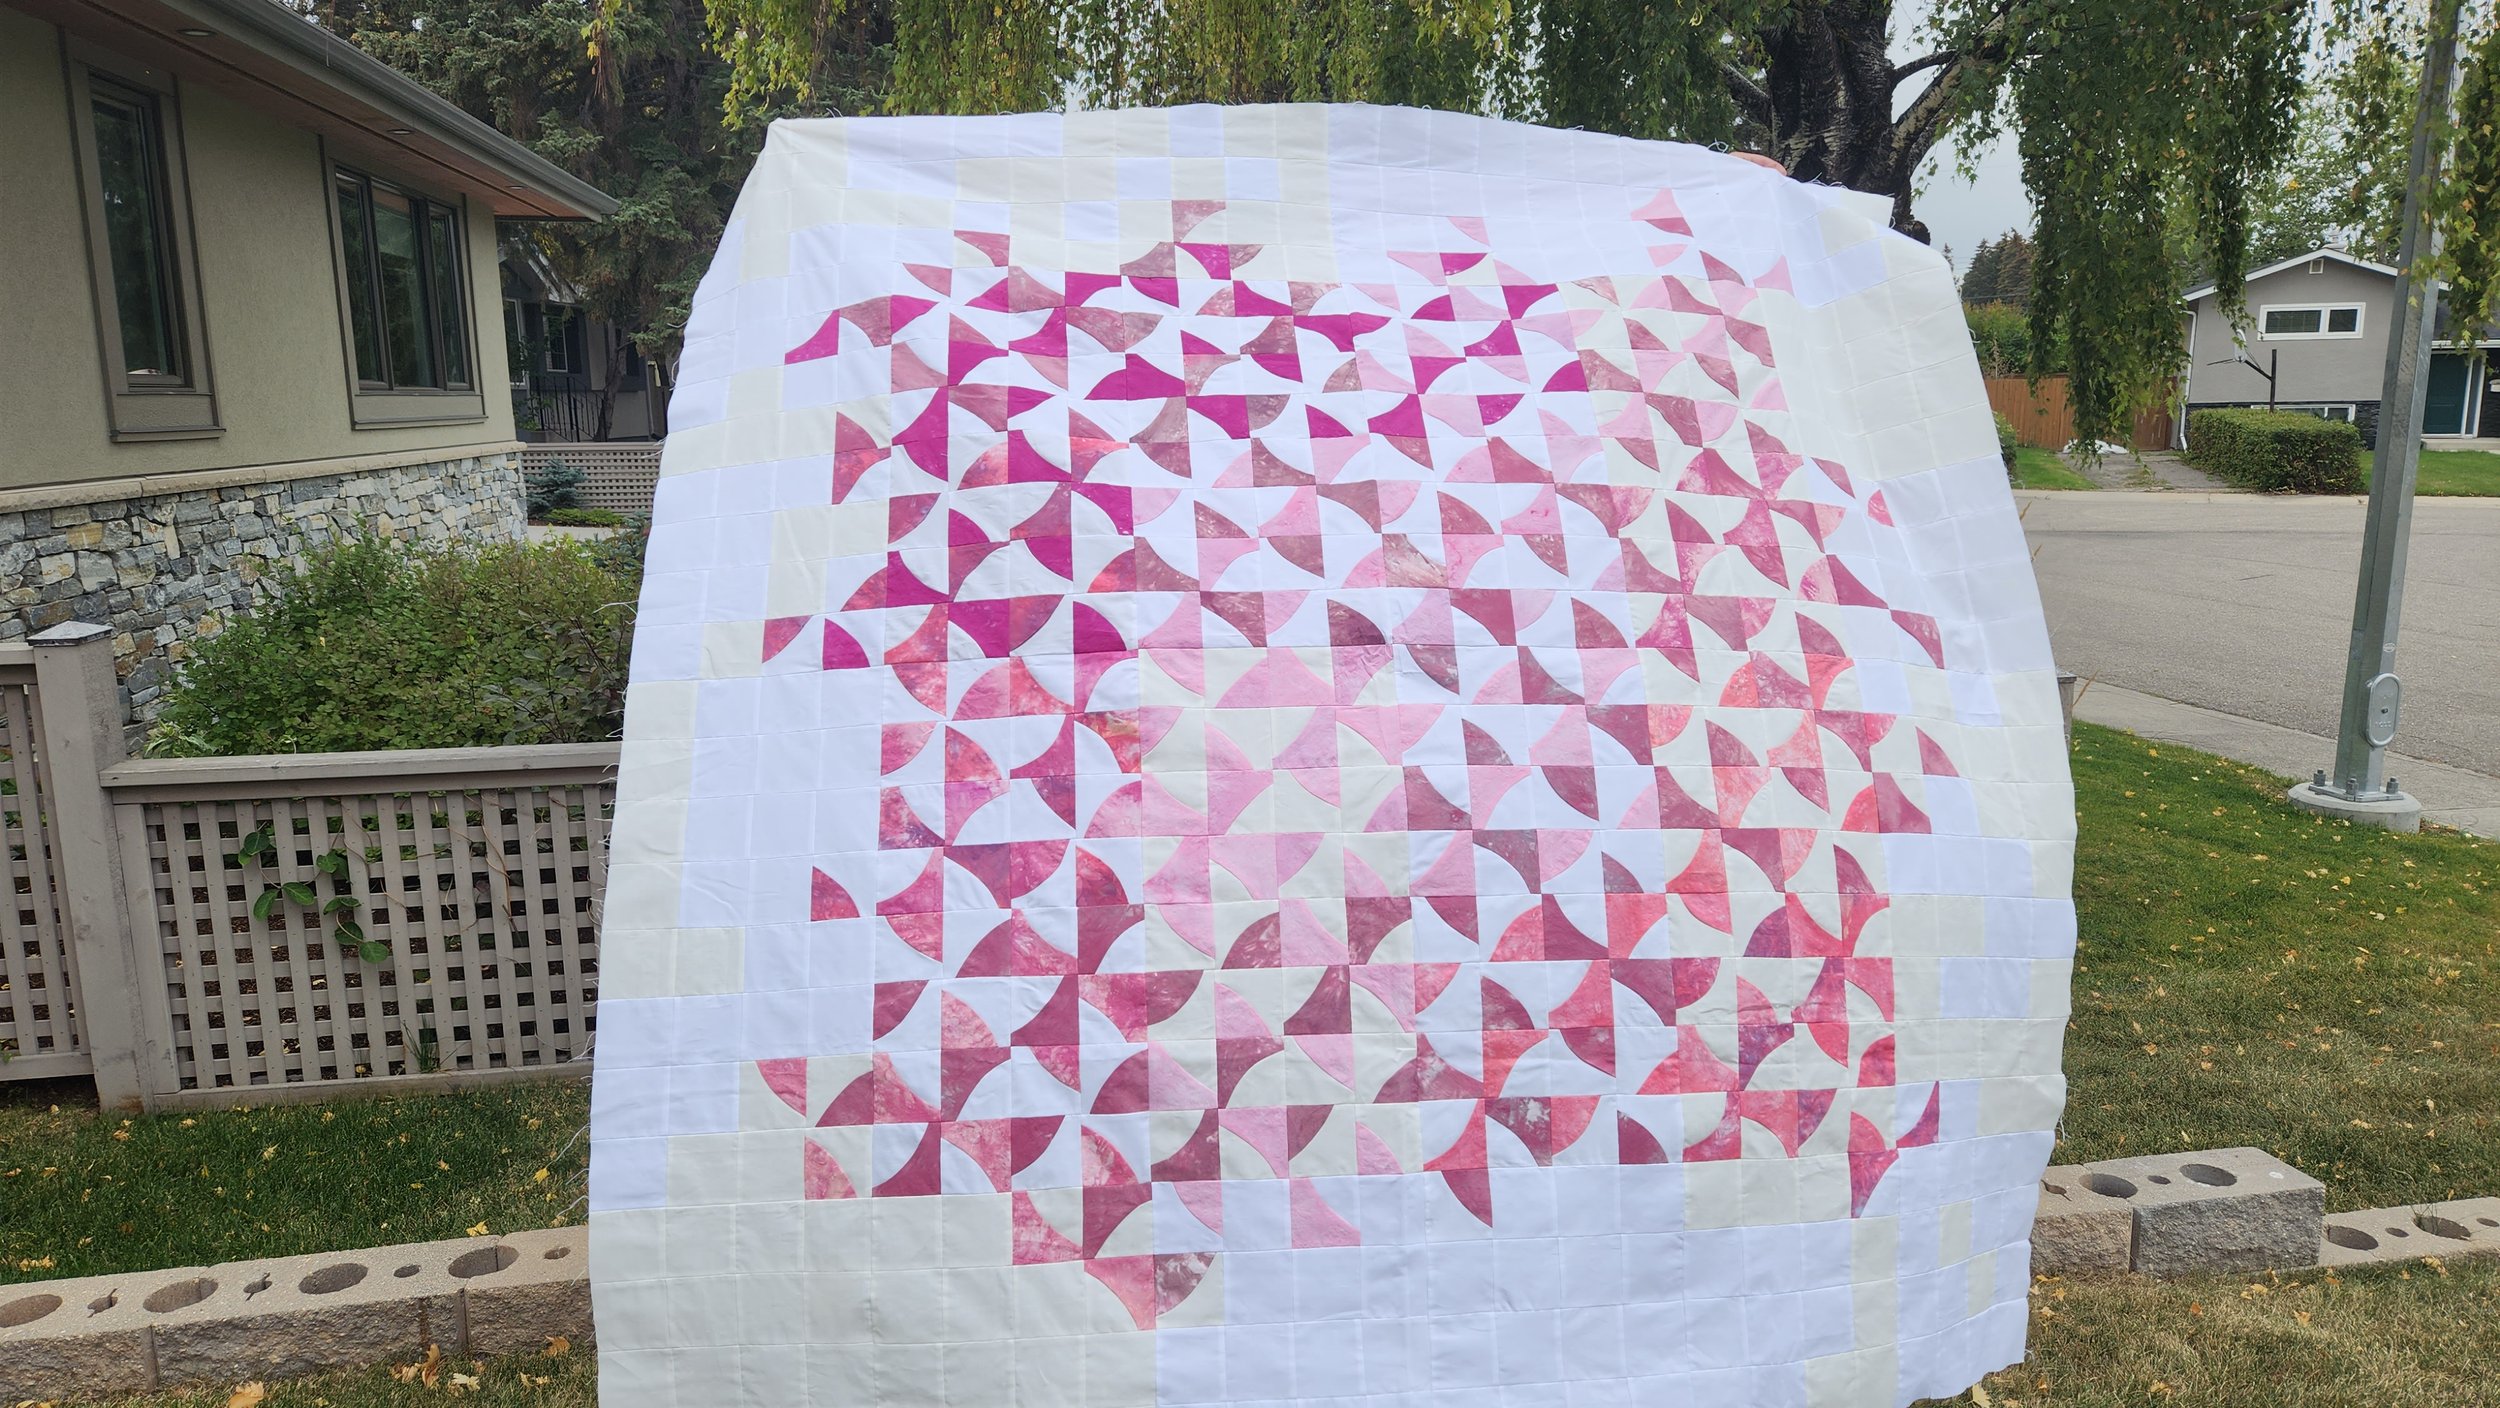
Happy Quilt Top

Pink and white Quilt Top blowing in the breeze

Not too long ago someone asked me how I design a quilt. Like, how do you go from idea to finished quilt? For all that I talk about play and experimentation, my answer was a bit of a cliche. The truth is, I rarely design a quilt. Instead, I try an idea out and see if it works, see if it grabs me. If I like it, then I make a bunch of things My great pleasure comes when I am trying to make all those things look good together. That is also the greatest challenge. When the last seam is stitched 90% of the time I could never have predicted (designed) the quilt I ended up with.

This particular quilt, for instance, actually started with a sample block for a virtual class. The pinks were piled up, rejects from my Perimenpause Chronicle Quilt. So when a request came from a student for a particular make I grabbed what was on the top of the table. The block worked, I set it aside. And honestly? I didn’t think about it again for months. The next time I pulled it out for a class it never got put away. Then, back in May it popped into my line of sight and I decided to make a second block. It was with the third block that I realized I’d gone from an experiment to a quilt top.

8 pink fabric blocks cut with an improv quarter circle

So I just made my way through the pile of hand dyed fabric. First I used all the pink pinks. That didn’t get me very far so I used the more purply ones too. I don’t really like to make small quilts and I was then out of enough of the pink and purple fabrics so I dyed some more. They ended up a lot lighter and I debated trying again but decided to just make it work.

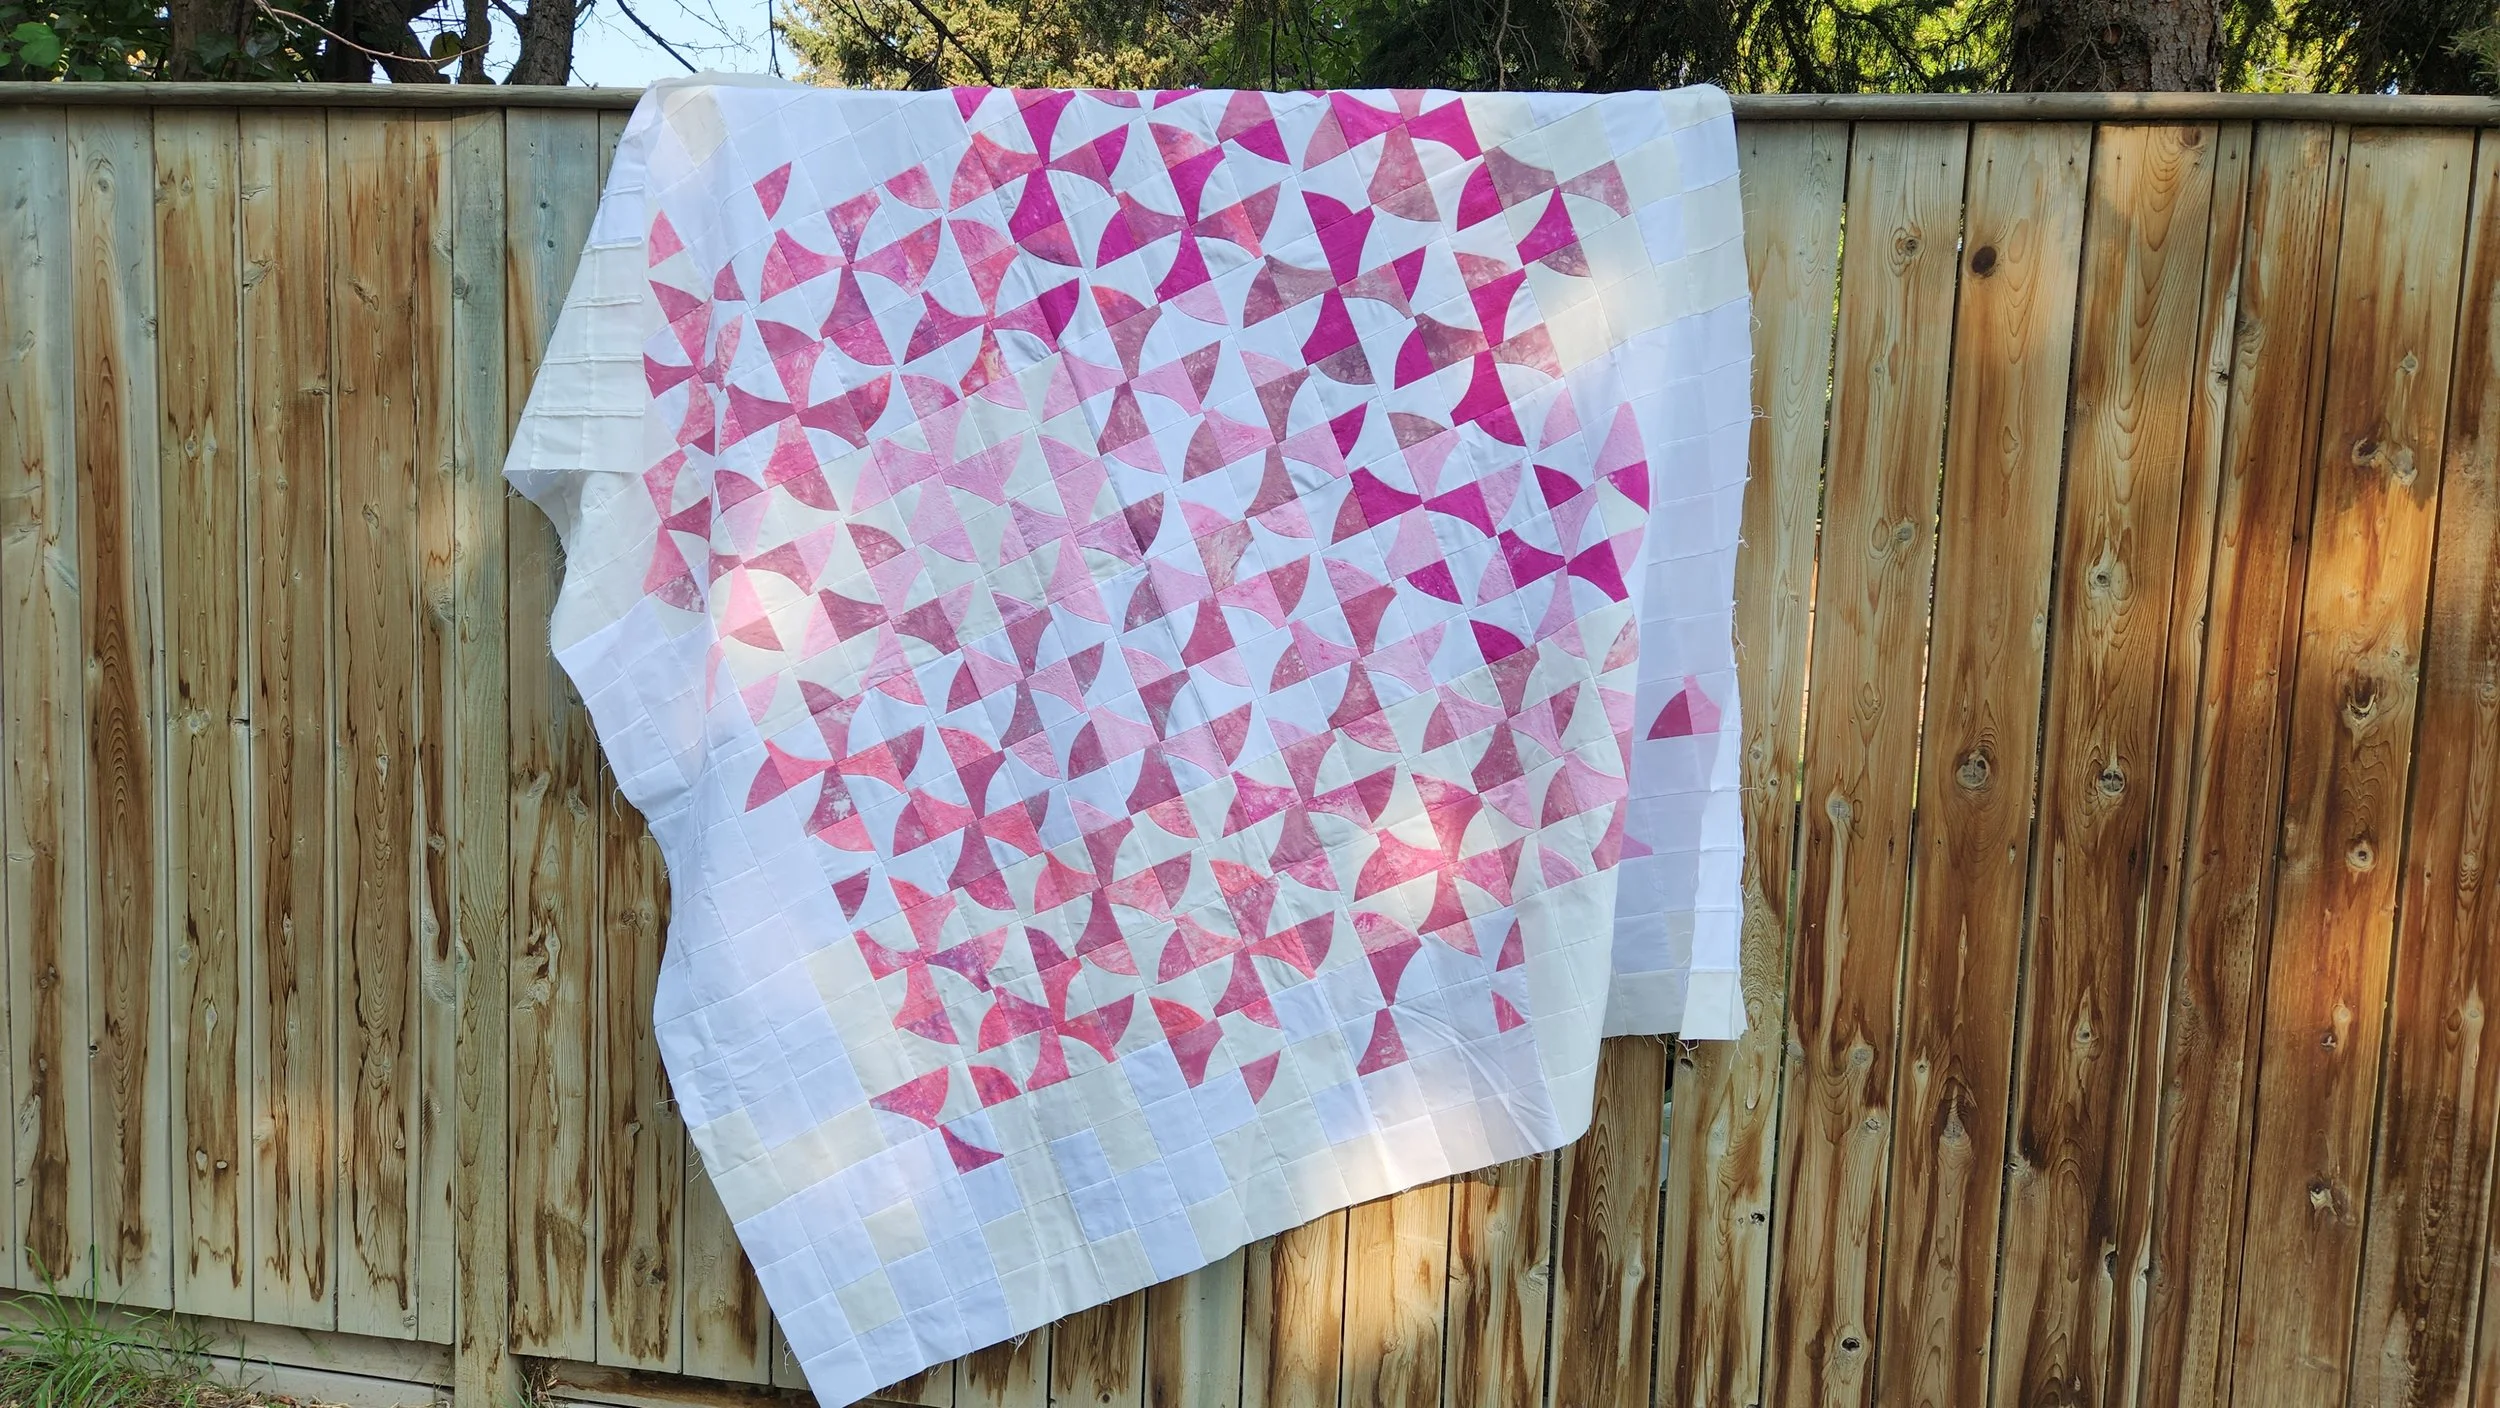
Another thing I had to make work was the background fabrics. Somewhere along the way I grabbed a different white than the one I started with. Because I was mostly working in the evening, under artificial light, I didn’t notice immediately. I had a choice to make - redo the blocks with the different white or keep going. Because I am kind of lazy I kept going. But what I did was embrace the differences and made the remaining blocks a mix of both whites. That way your eye wasn’t going to be drawn straight to the outlier.

Pink and White Pinhweel Quilt Top on fence

The amount of pink fabric I had was going to make a 48” square quilt when all was said and done. Not too shabby, really. By this point though, this quilt - puttering on this quilt - was really helping my mental health so I decided I wasn’t ready to stop making. I spent a fair amount of time contemplating things on the design wall then decided on something akin to a border. In places the pink curves extend out beyond the centre square. Most of the outside is white, however. Rather than make it a solid white and have. bunch of weird piecing to accommodate those extra pink bits I made the border out of the same size 16 patch blocks as the centre. So really, the quilt top is basic patchwork of 576 4” squares.

We won’t talk about the backing debacle, but I am back on track to get this basted shortly. I plan on a mix of machine and hand quilting so I would like it ready for when the snow flies and we are indoors a bit more.