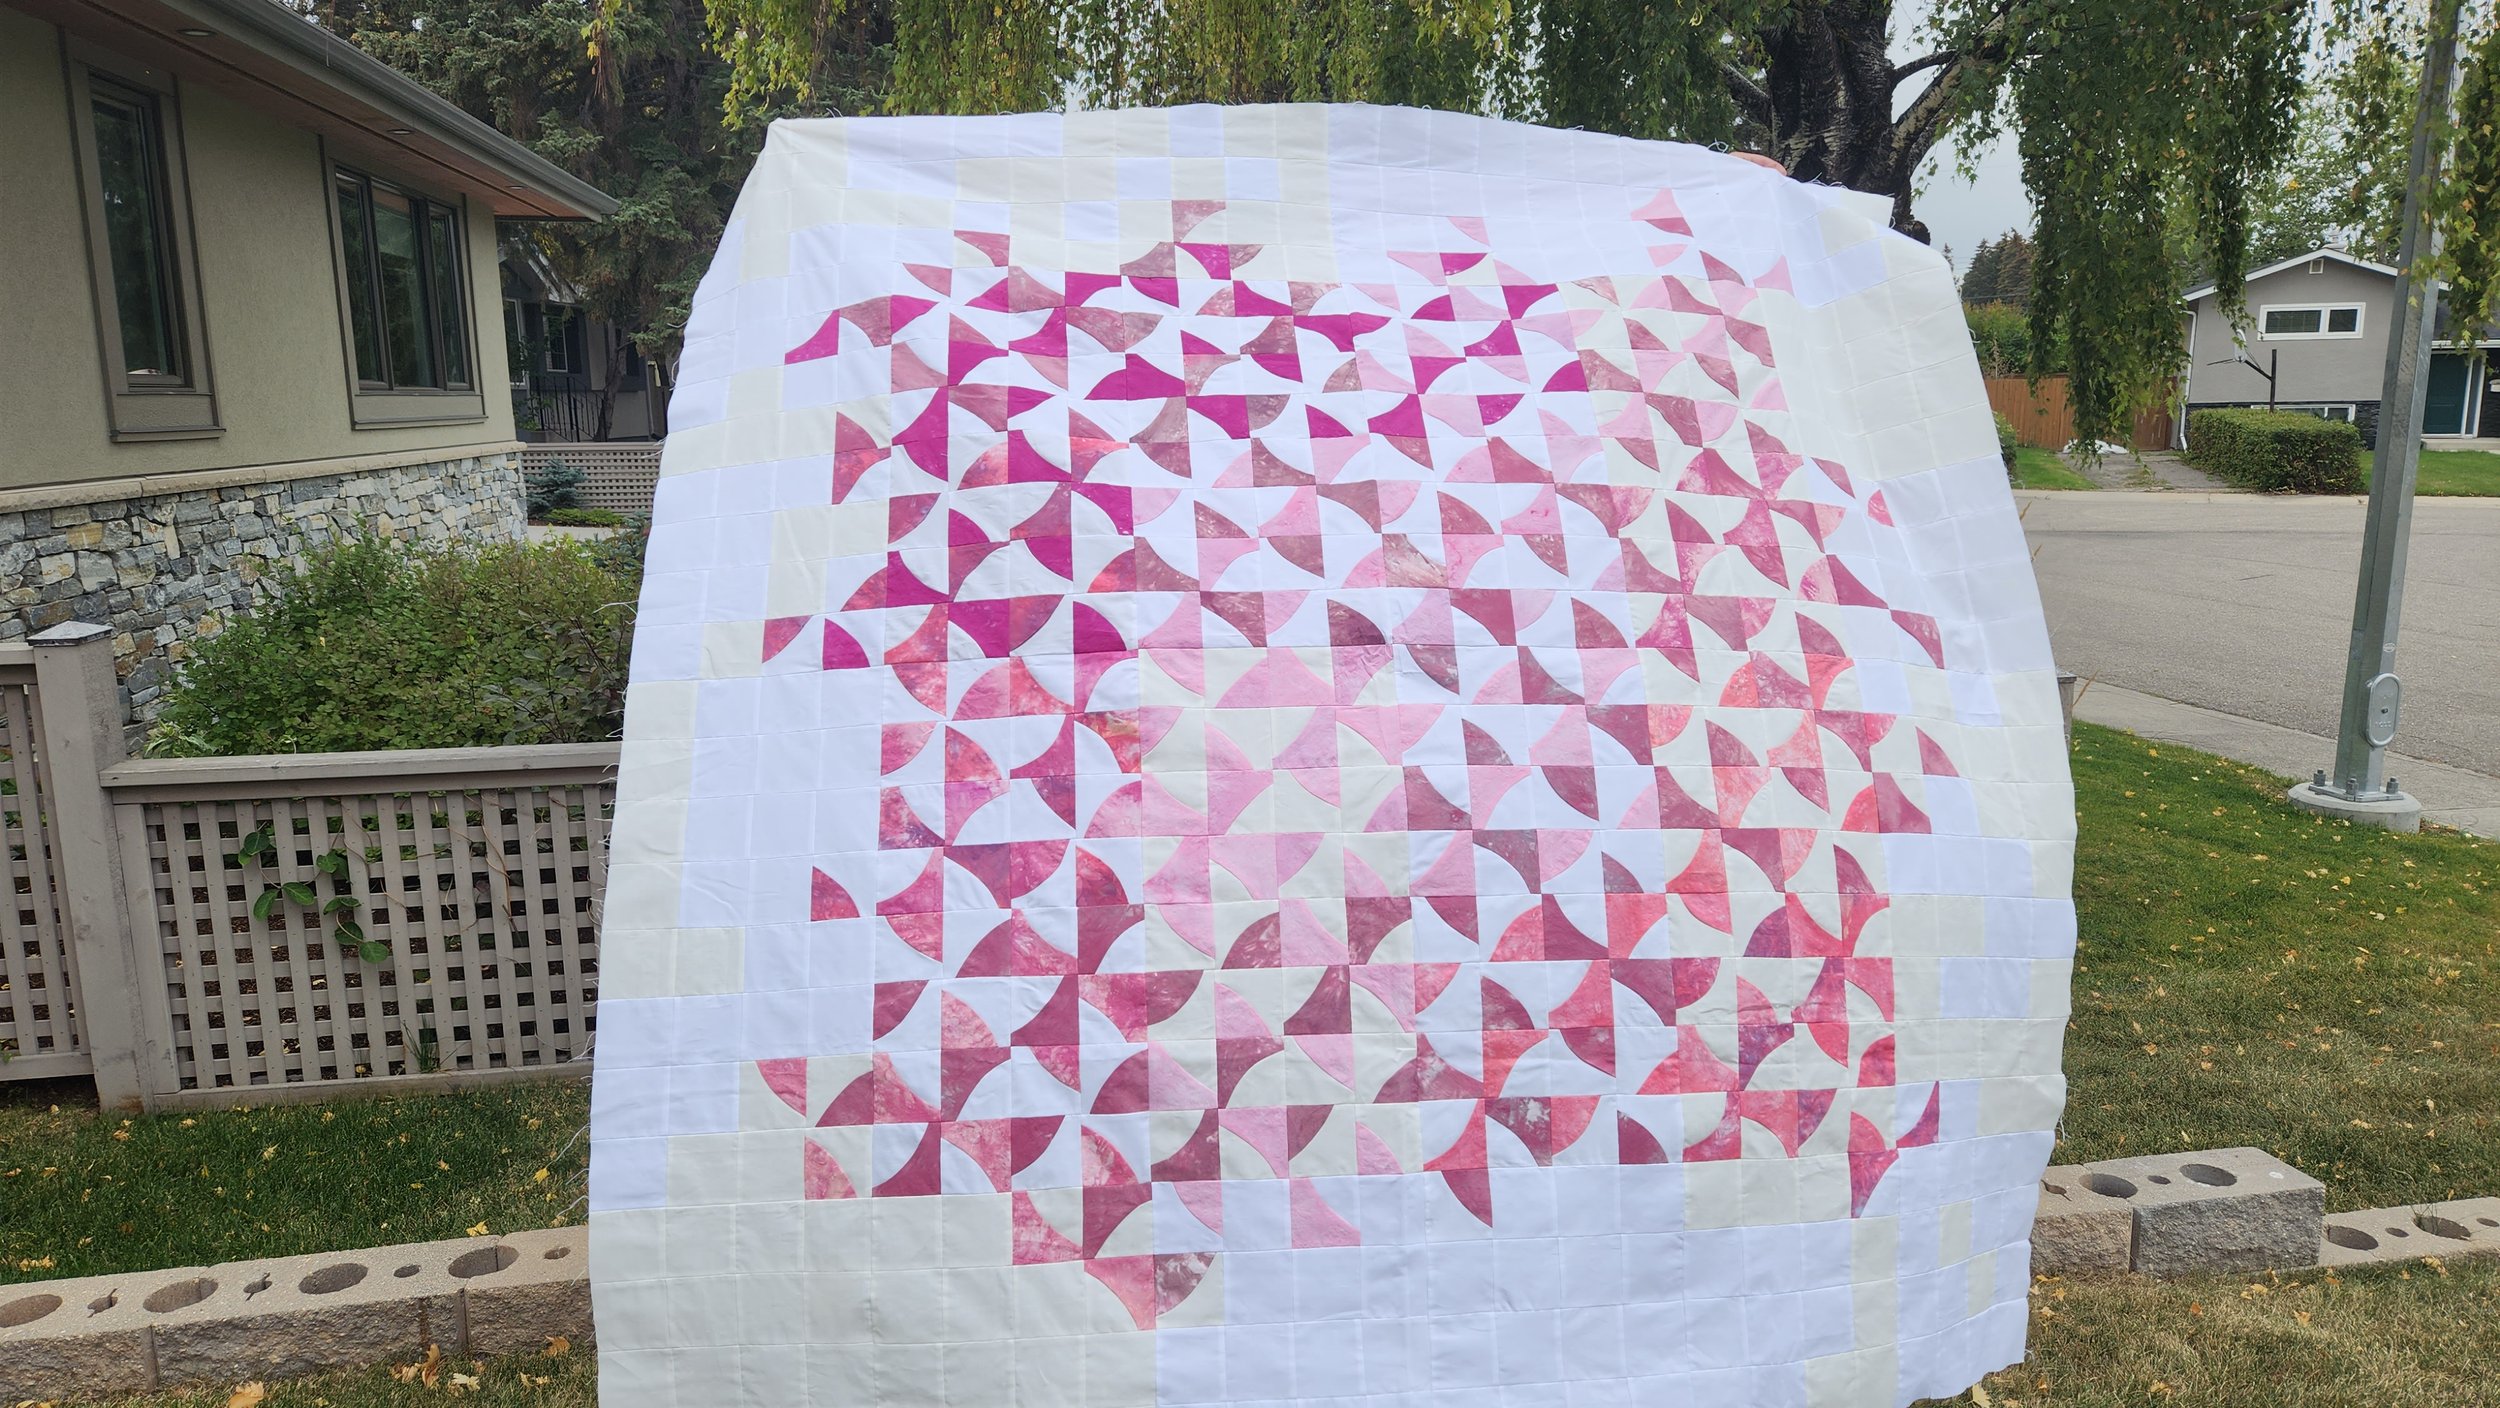
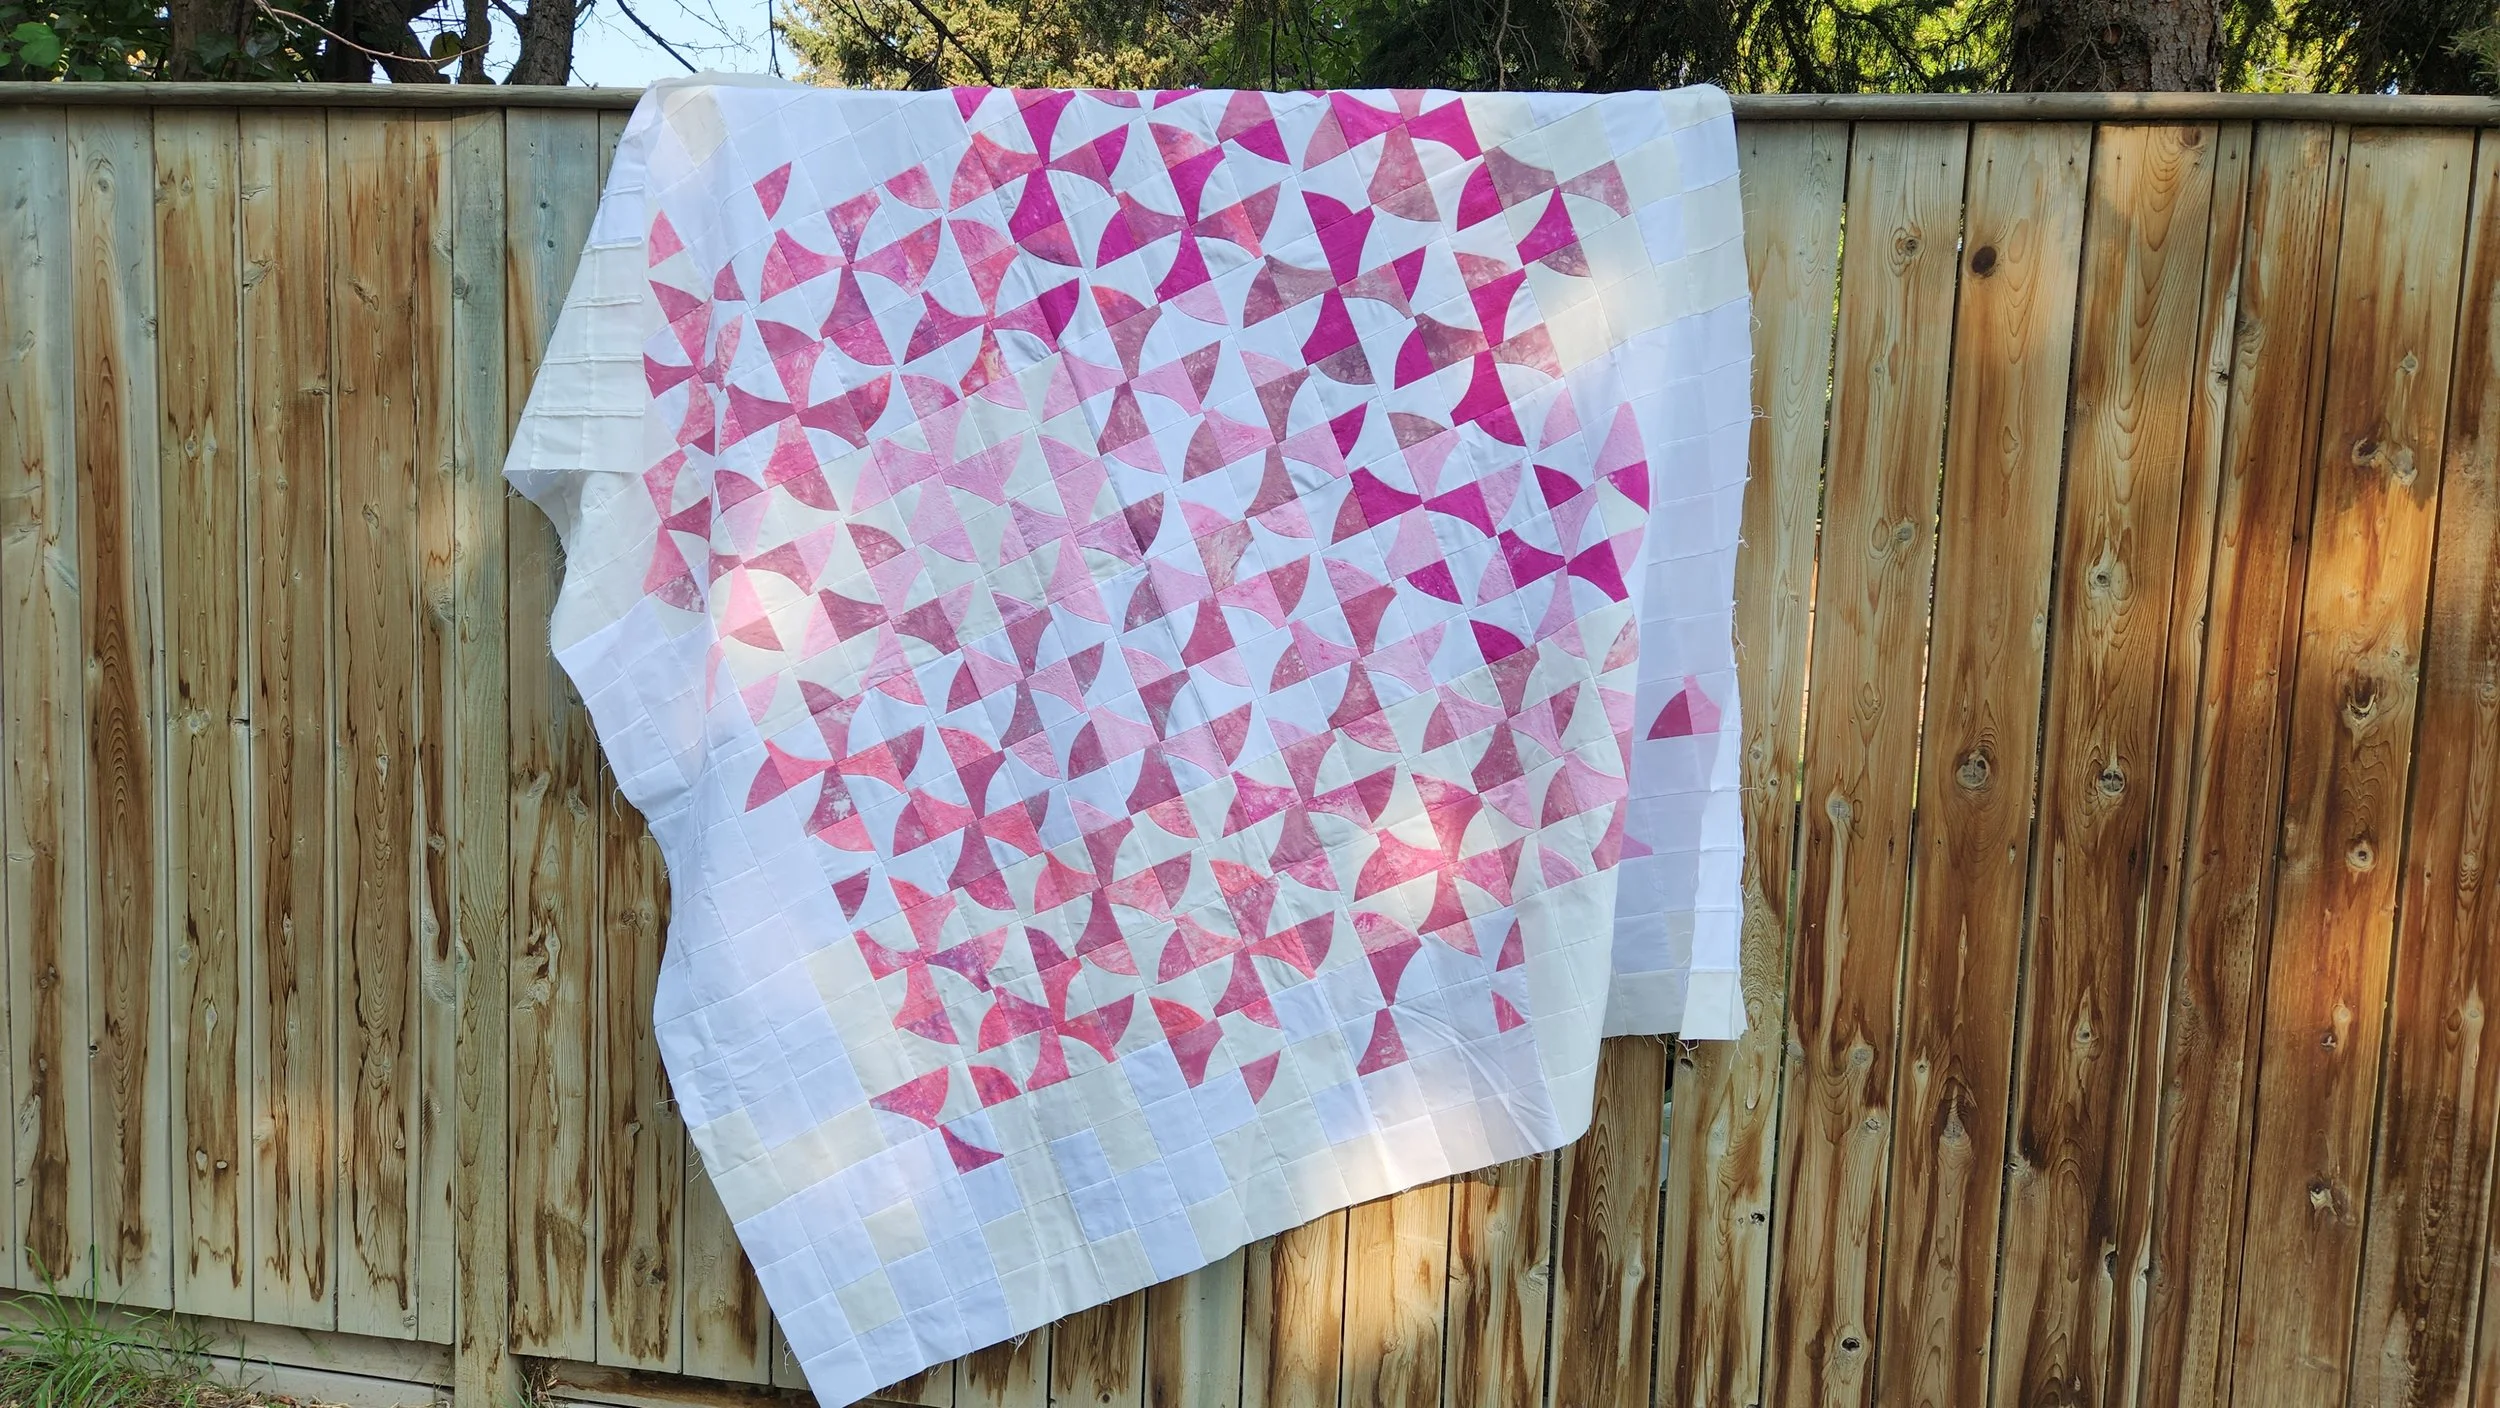
improvisational piecing

Noelle

Noelle

72” x 72”

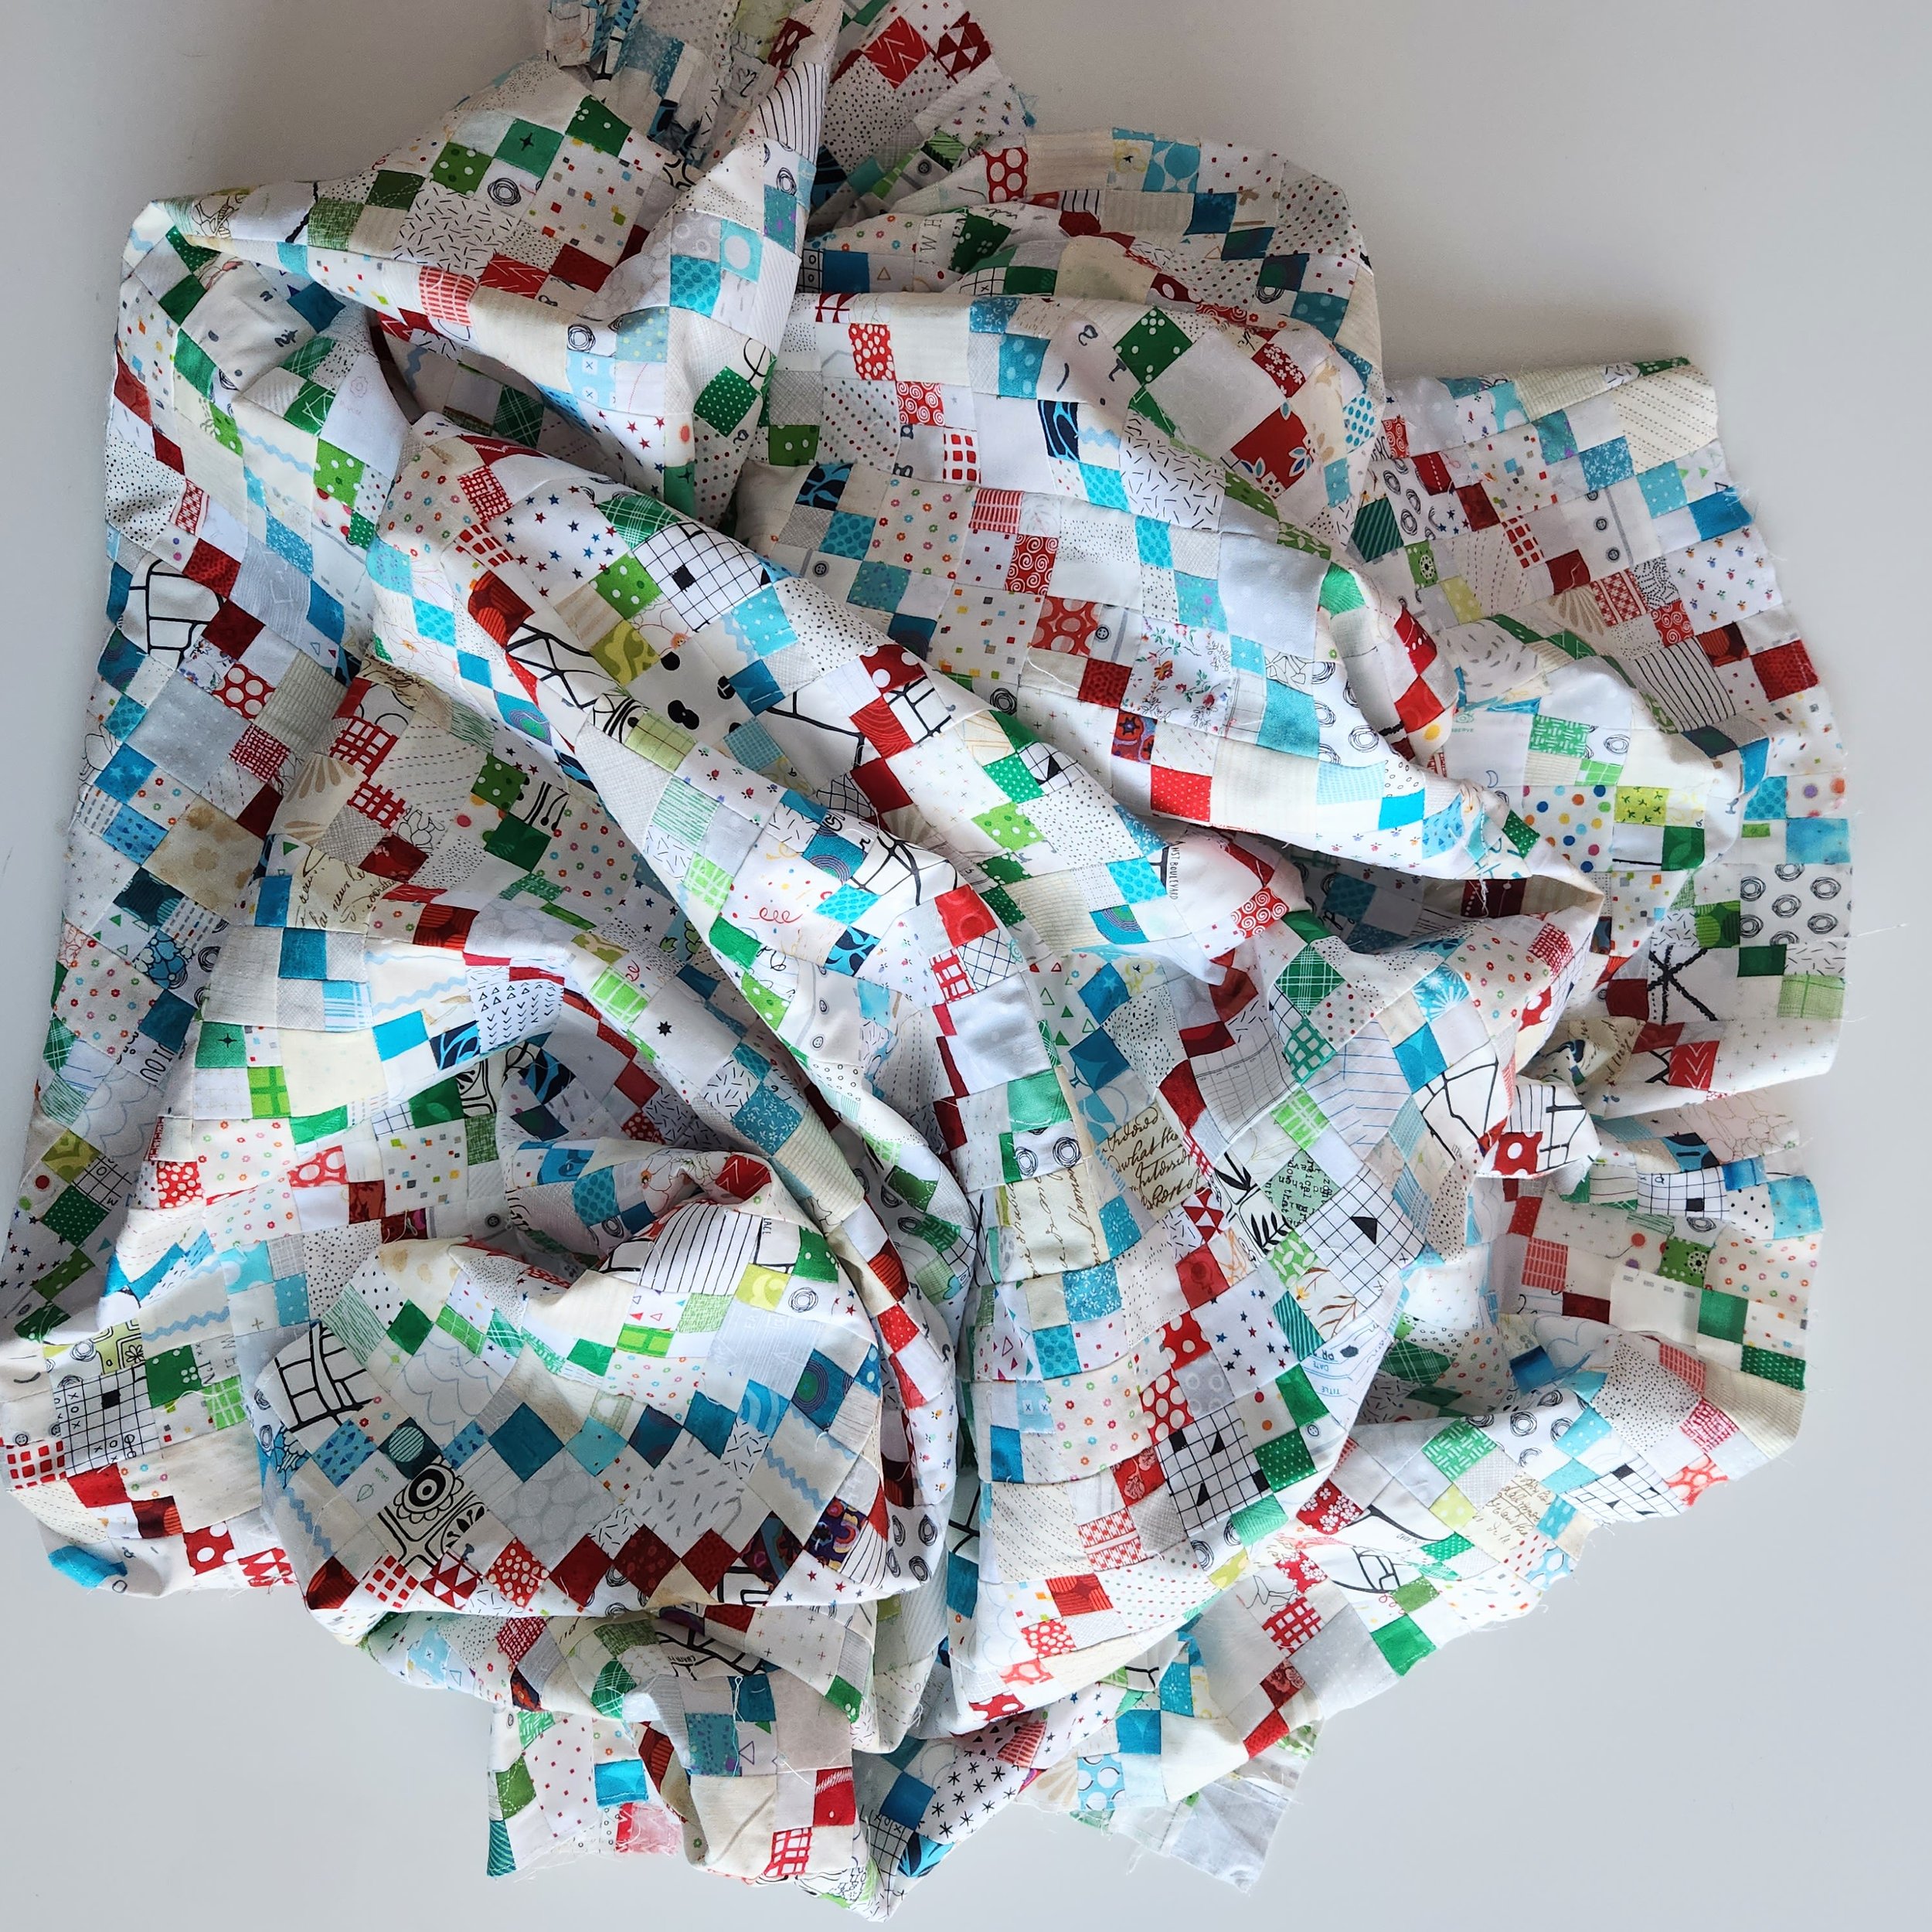
I’m either really late finishing a Christmas quilt or really early for next year. Let’s go with the latter, shall we?

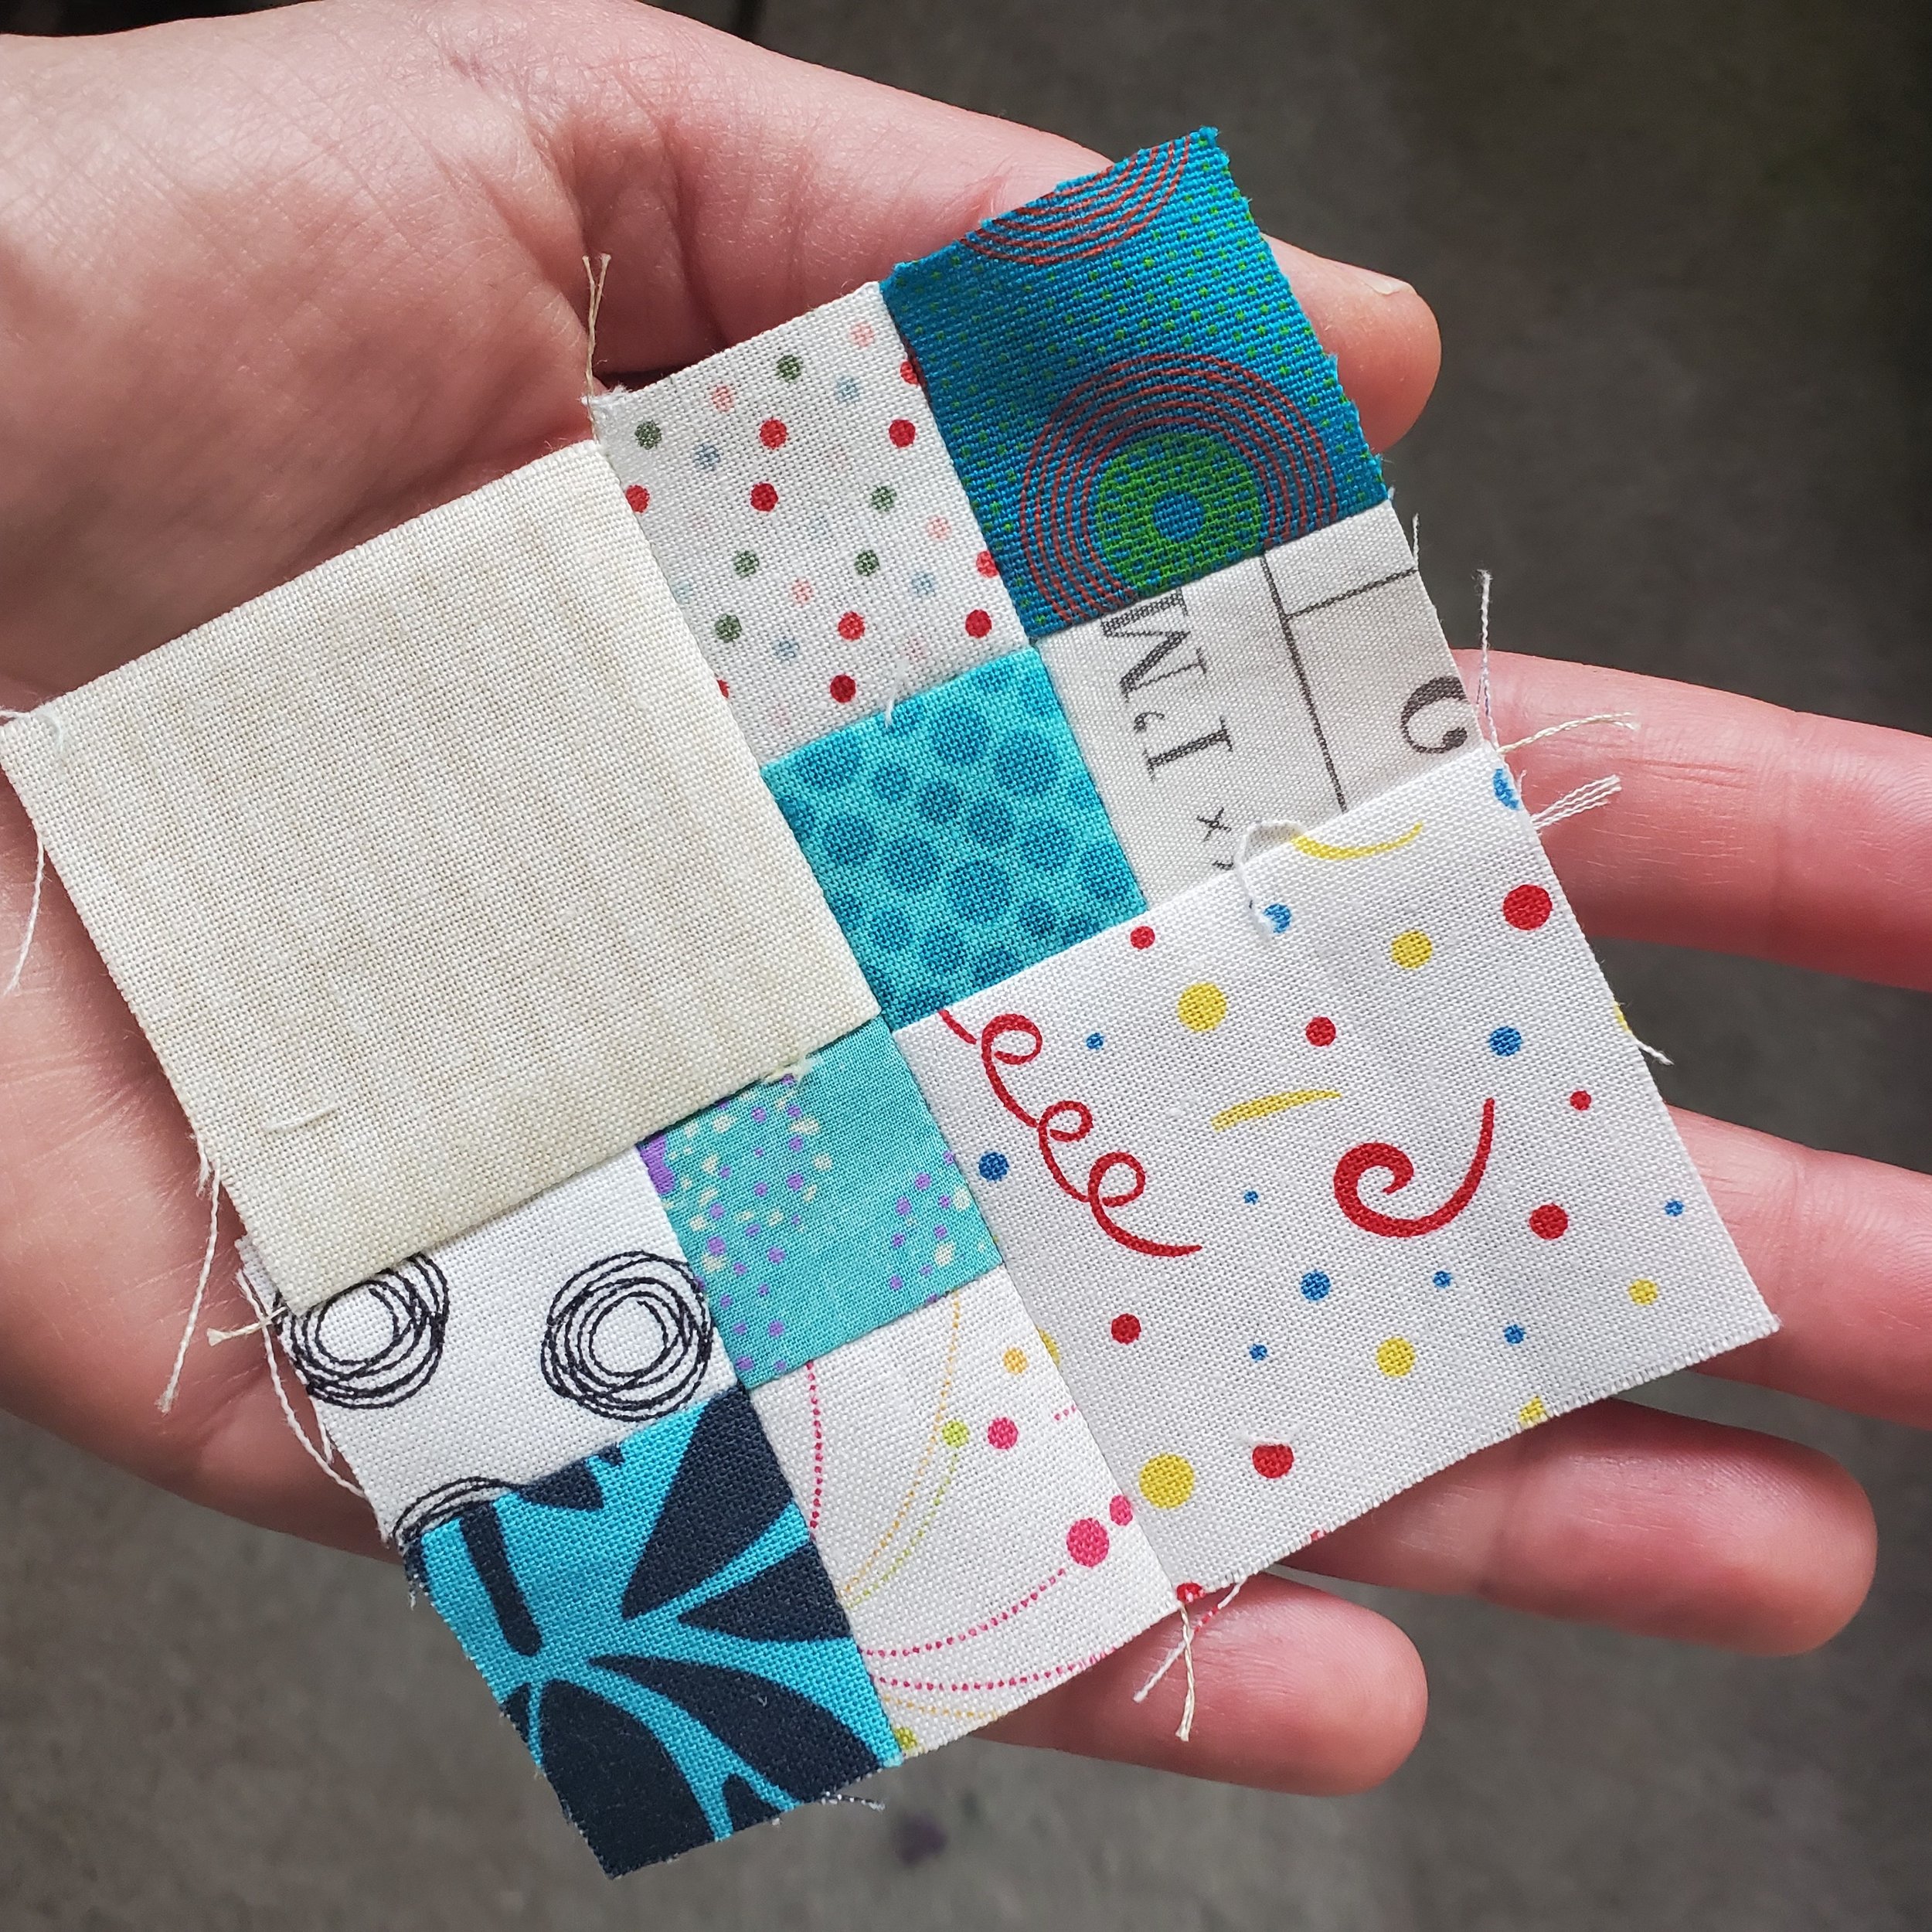
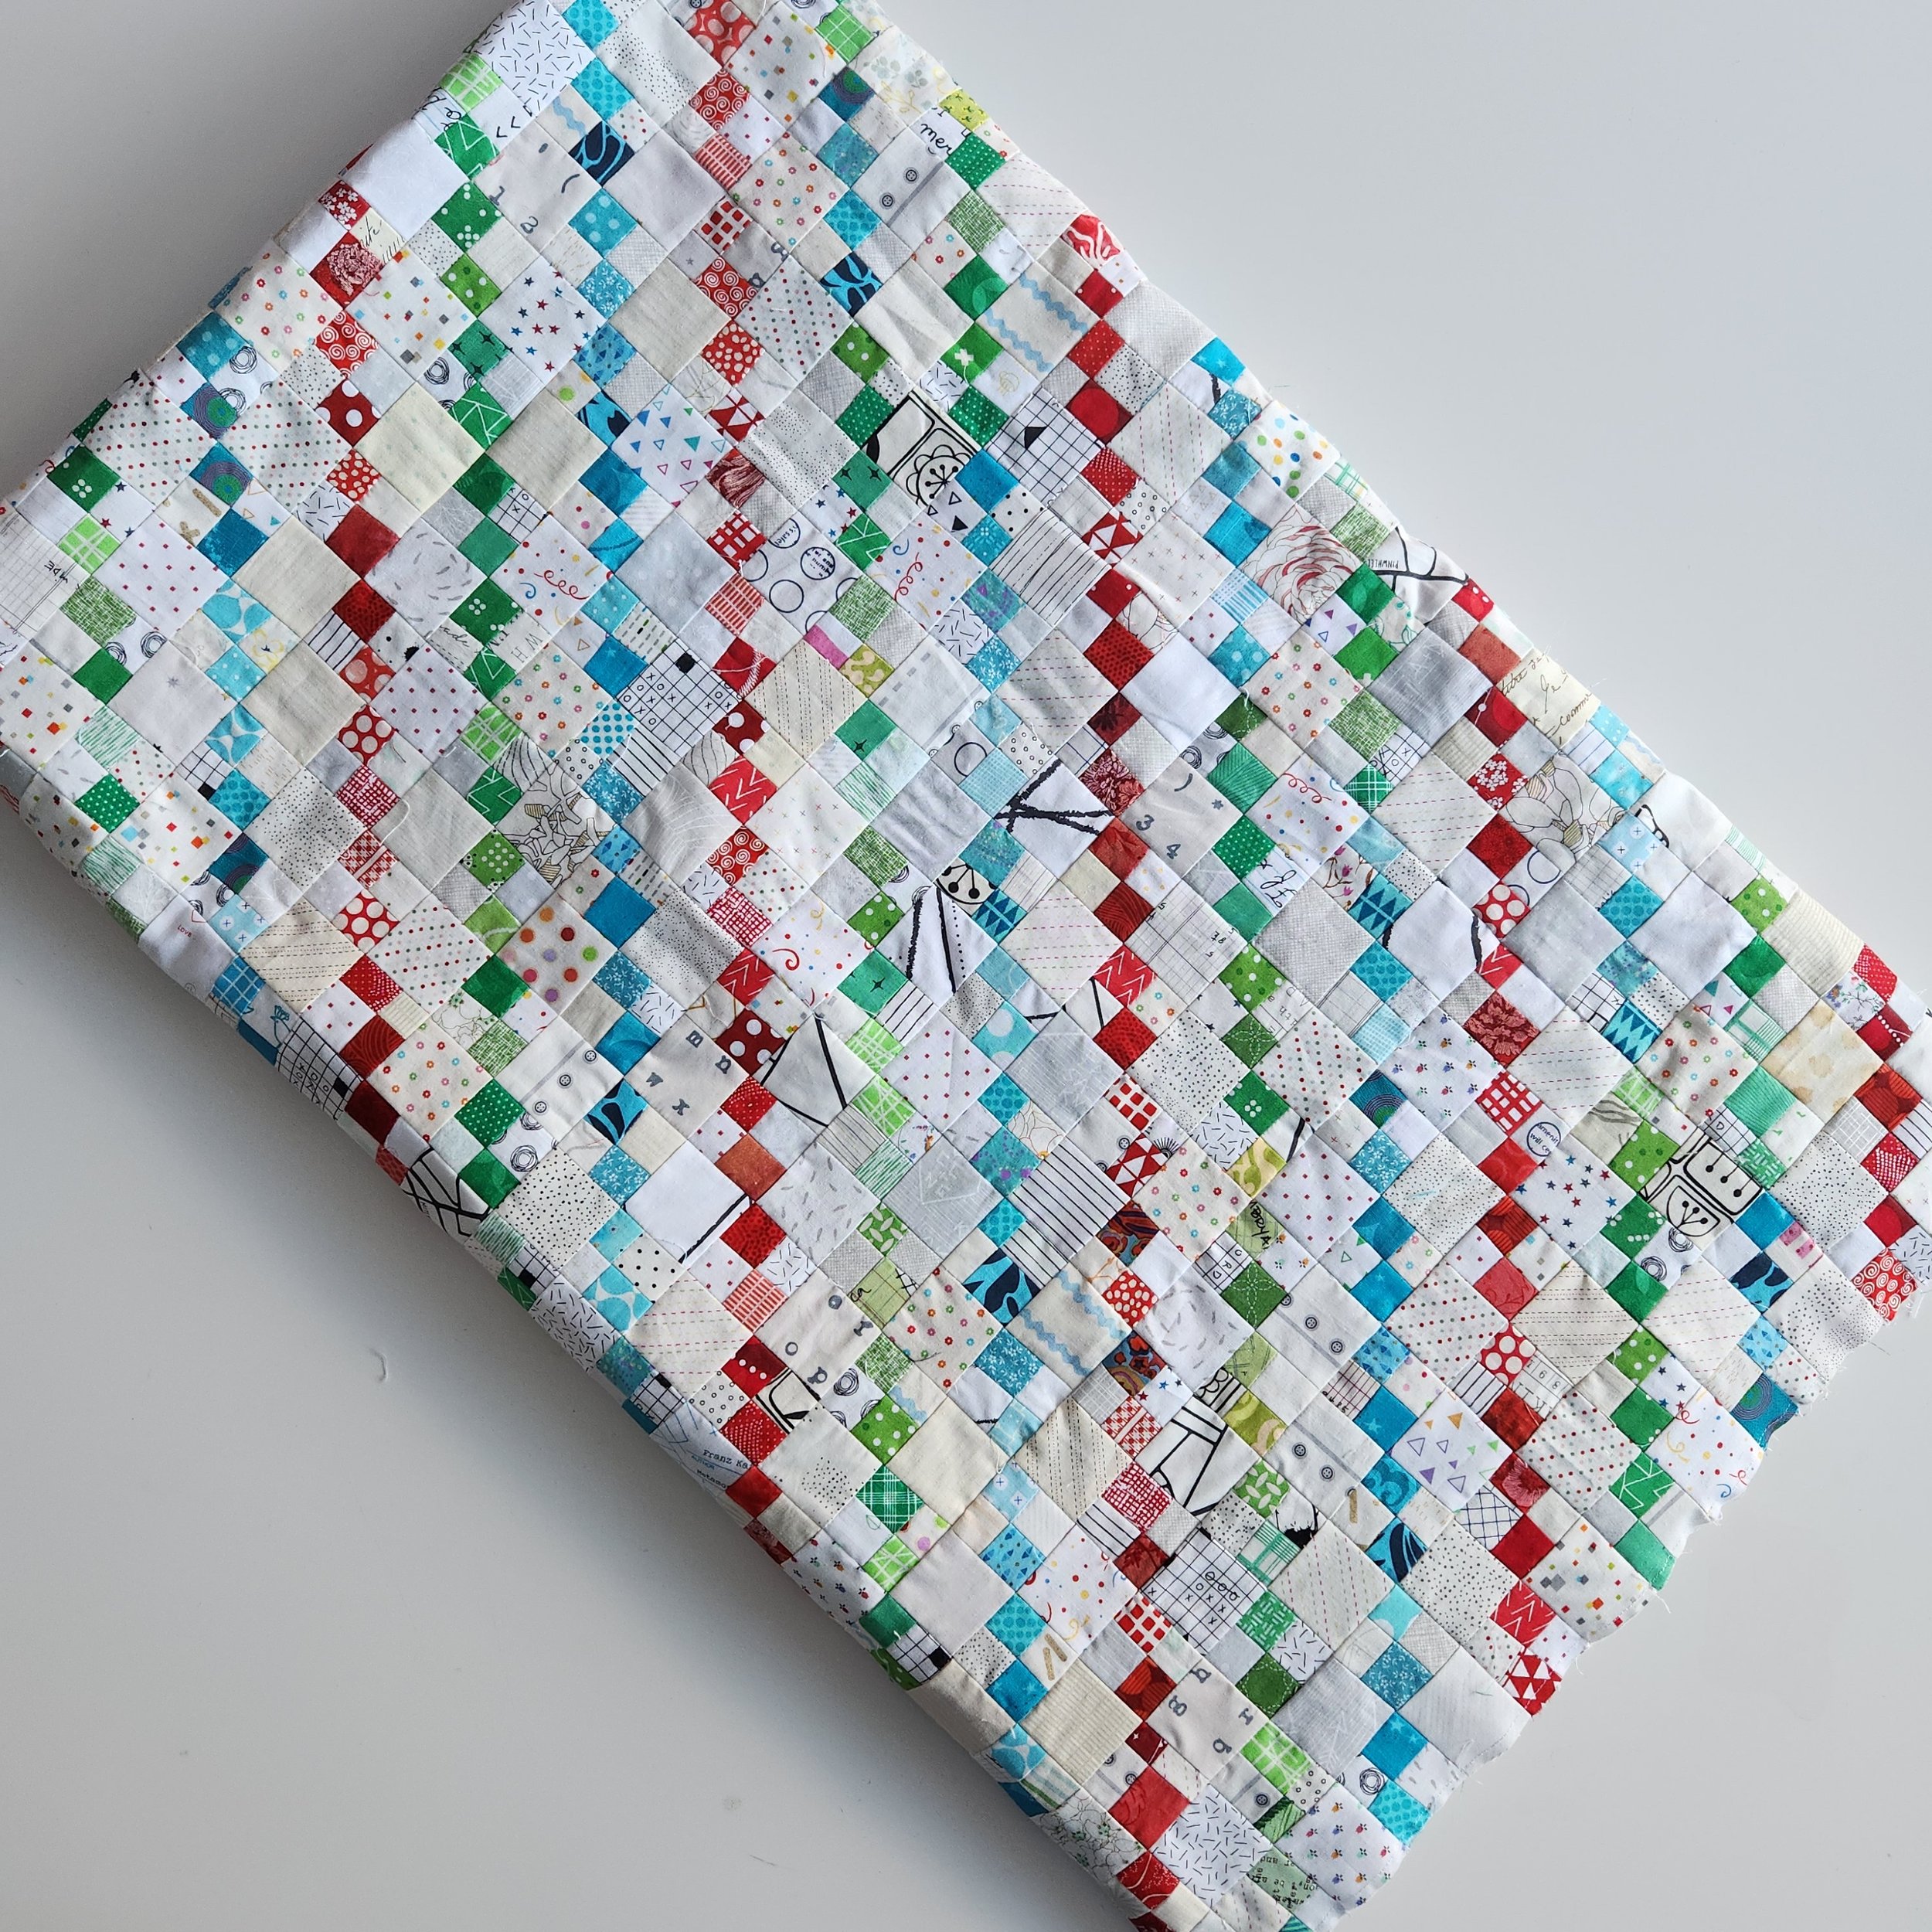
This quilt was started in the Quilters’ Playcation Cut Sew Repeat Party in December. It’s such a quick way to make a quilt top that I had it done a few days later. With a long arm appointment already booked I decided to go ahead and finish her quickly.

Close up of the wavy line quilting on a a white, aqua, green, pink, and gold Christmas quilt

It was a quick make, a fast quilt, and a quick finish. I still didn’t get it done before Christmas. It’s all good, I’m just ready for next year! I used a light turquoise thread for the quilting in freehand, wavy lines. It’s almost garland like.

The fabric all comes from the Alison Glass Holiday collection. Buying a single collection bundle is not my norm, but I’d picked this up early in the pandemic as an example for a stash class I was teaching. It is an unconventional holiday fabric and I love that. Using a single collection is a fantastic way to explore the Cut Sew Repeat Technique AND show off the fabric at the same time.

Close up of the coral fabric with random, tiny white dots on the quilt binding

When I finished quilting I took a quick look around My Sewing Room, where I was renting the long arm time, and found this coral fabric in the clearance section. What a find! I had been thinking hot pink but there are just enough hints of this coral in the multicolour prints of the collection that it worked perfectly. It was a lovely way to spend a few afternoons of winter finishing up the binding by hand.

The Cut Sew Repeat Party is returning on March 18. I’ll have a different stack of fabric, but the same great fun ready for you. Even if you attended the Party last time, we will have new treats and tips to explore as we play with our fabric. You can register here.

Small Piecing Pays Off

When your only goal is to clean up some little bits of fabric leftover from another project you don’t expect to launch in to sewing an epic quilt. In truth, most of my quilts start with zero intention of being a finished quilt. Rather, it is just something to sew at that time; some experiment to try; some play to improve my mood. So when I had those leftover red squares from this quilt I just sewed them together with some low volume scraps so that they wouldn’t go to waste or get lost. I had no plans, no design, no lofty goals.

But…

They did look quite good together. And what if you sewed two pairs to each other? Oh look at that cute 4 patch! Hmm, there might be something to this…

Reader, there was. I started adding turquoise, then green 4 patches. Those colours look great together and it was all so cheerful. Of course I have a tonne of low volume scraps so I could use them up too. So now I made a 4 patch of two 4 patches. Oh boy, this was getting good!

A 4 patch quilt block made from a few 4 patches in turquoise and white, held in a white hand

One thing led to another, one block led to another, and even though I sewed a whole pile of blocks I still had no clue where this was heading. Sure, it would be a quilt one day, but just how far was I going to go?

Quite often I just sew until I get bored. Then the quilt is as big as that many blocks, give or take a few. I use what I made to puzzle together something (hopefully) cool. In this case I reached a point where some actual planning was required. Since I don’t like to make small quilts I did some math and even sketched out the layout to see where I needed to finish. This was my guide for sewing.

Most of the blocks were made as leaders and enders while making other quilts. I kept a bowl of the coloured scraps and a bowl of the low volume scraps by my machine and sewed a pair together at the end of any other seam. These would pile up until I felt motivated to press them. Then I would make the 4 patches as the next round of leaders and enders. At some point these would get both pressed and squared up. That required more motivation because I was squaring them up to 2” by 2”. Tedious work. Then those would get sewn to a low volume square in the next round. Pressing again then the last seam to join two of those pairs together. Usually by the last step I was doing some dedicated sewing on these blocks instead of leaders and enders. It was all very reminiscent of this.

Pair of blue and orange glasses resting on a folded quilt top.

Eventually I became dedicated to finishing all the blocks. If I had started this quilt with the end goal in mind I can honestly say I wouldn’t have started. This was a very tedious make. Don’t get me wrong, I believe all the effort was worthwhile and any time sewing is time well spent. But when you make a quilt from small pieces it can be nearly impossible to see the end from the beginning. Like climbing a mountain when you have no idea just how high it is. Or deciding to swim across the lake without knowing how far it really is. It’s all possible, but it is going to take some time to see the final achievements. So even though I had a specific plan and number of blocks needed, it was hard, in the years I’ve had this quilt ongoing, to see the finish. Glad to be here now. Real glad.

Now that the quilt top is done I will probably get it quilted fairly soon. It isn’t impatience that motivates me, it is a desire to not have to press this quilt top again. That was a lot of seam management there!

Oh, and for those wondering, the quilt top finishes at 63” x 81”.


Kayleigh - My Version of a Fall Quilt

Kayleigh

70” x 70”

Along with her friends Ashley, Ashleigh, Brittany, and Angelica, Kayleigh loves her pumpkin spice, wide brim hats, and the sweaters that the cooler weather brings. Or even just the hint of cooler weather. Time to put away the spaghetti straps and flip flops, bring on the boots and oversized turtleneck sweaters. She’s sweet but not all that smart. She’s kind but not all that generous. But she will always open the wine. And she always finishes the book for book club. Who wouldn’t when wool socks and warm quilts keep you company while you read? Kayleigh is fall.

Okay, so my version of a fall quilt is a little less stereotypical than your basic girl hunting for pumpkins. It’s a function of where I am. Here in Calgary we don’t get a lot of the rich reds and oranges of your New England fall. We get gold, so much gold. We get blue skies in late September heat. My fall quilt reflects that.

I didn’t actually set out to make a fall quilt. The whole thing started with an experiment with a square in a square technique. You know, I had to see if it could be done improvisationally. Of course it can! I loved it so much I taught it as an online class - a Quilters’ Playcation Playdate last year. Then the colour combo of blue, yellow, and coral made me so happy I decided to just keep going! On a walk last fall I realized that these indeed were the colours of our fall.

I can hardly believe I actually finished the quilt already. My quilt tops tend to sit for years. Fall is here though. While pumpkin spice is not my thing - unless actually IN a pie - I do enjoy exploring nature as the season changes. So when I had a long arm appointment booked a few weeks ago I made sure to bring this quilt top and give her her due in the right season.

She is quilted with Wonderfil Tutti in a variegated yellow (TU01) with deco bob in the bobbin. I rented time at My Sewing Room on their Bernina long arm. In a little over 2 hours she was quilted! Nothing fancy, just an all over loop de loop design. There is no point going too fancy because you won’t see the stitching on such a busy quilt.

This is a great example of using prints and not being afraid of it! Most people call this look scrappy. It works because I paid attention to both colour and value as I made each set of squares. There are actually 5 of each fabric combination. I made five at a time simply so I could chain piece without getting confused. I would pick the four fabrics I wanted in the blocks, start with a centre square and build out. Each block wanted to finish around 7.5” so I decided to make 100 blocks in total. That meant I need 20 sets of blocks. To keep order with all these fabrics that meant I did 10 sets that went warm-cool-warm-cool, and 10 that went cool-warm-cool-warm. That way, when it came time to laying out the quilt top I could alternate the groupings for an effective layout. I think it worked well!

I also paid attention to value, although not as fastidiously. Some blocks have high value contrasts between each round, some are lower contrast. I like that mix of bold and soft. I did, however, pay more attention to value when laying out the blocks to make the quilt top. The really bold blocks and the really soft spots are spread throughout the quilt, so no one area commands all the attention. This is what I call managing the bossy blocks.

The back is pieced from things in my stash. Nothing fancy.

She is bound with a Heather Ross reprint. I tried a number of different colours and fabric and felt the white was a nice touch. As you probably know, I usually like a high contrast binding but it wasn’t right here. There is just a touch of pink in the print, though, that makes me smile.

Our days haven’t actually cooled off that much, even though the colours are changing. Which means there isn’t a huge need for a fall quilt just yet. She came in handy at a cross country race as a soft place to sit. And the evenings are getting longer and a bit colder. If I sit by the window I definitely need a quilt. Besides, pumpkin spice is already at the coffee shop so it definitely means fall.

Happy Quilt Top

Pink and white Quilt Top blowing in the breeze

Not too long ago someone asked me how I design a quilt. Like, how do you go from idea to finished quilt? For all that I talk about play and experimentation, my answer was a bit of a cliche. The truth is, I rarely design a quilt. Instead, I try an idea out and see if it works, see if it grabs me. If I like it, then I make a bunch of things My great pleasure comes when I am trying to make all those things look good together. That is also the greatest challenge. When the last seam is stitched 90% of the time I could never have predicted (designed) the quilt I ended up with.

This particular quilt, for instance, actually started with a sample block for a virtual class. The pinks were piled up, rejects from my Perimenpause Chronicle Quilt. So when a request came from a student for a particular make I grabbed what was on the top of the table. The block worked, I set it aside. And honestly? I didn’t think about it again for months. The next time I pulled it out for a class it never got put away. Then, back in May it popped into my line of sight and I decided to make a second block. It was with the third block that I realized I’d gone from an experiment to a quilt top.

8 pink fabric blocks cut with an improv quarter circle

So I just made my way through the pile of hand dyed fabric. First I used all the pink pinks. That didn’t get me very far so I used the more purply ones too. I don’t really like to make small quilts and I was then out of enough of the pink and purple fabrics so I dyed some more. They ended up a lot lighter and I debated trying again but decided to just make it work.

Another thing I had to make work was the background fabrics. Somewhere along the way I grabbed a different white than the one I started with. Because I was mostly working in the evening, under artificial light, I didn’t notice immediately. I had a choice to make - redo the blocks with the different white or keep going. Because I am kind of lazy I kept going. But what I did was embrace the differences and made the remaining blocks a mix of both whites. That way your eye wasn’t going to be drawn straight to the outlier.

Pink and White Pinhweel Quilt Top on fence

The amount of pink fabric I had was going to make a 48” square quilt when all was said and done. Not too shabby, really. By this point though, this quilt - puttering on this quilt - was really helping my mental health so I decided I wasn’t ready to stop making. I spent a fair amount of time contemplating things on the design wall then decided on something akin to a border. In places the pink curves extend out beyond the centre square. Most of the outside is white, however. Rather than make it a solid white and have. bunch of weird piecing to accommodate those extra pink bits I made the border out of the same size 16 patch blocks as the centre. So really, the quilt top is basic patchwork of 576 4” squares.

We won’t talk about the backing debacle, but I am back on track to get this basted shortly. I plan on a mix of machine and hand quilting so I would like it ready for when the snow flies and we are indoors a bit more.