screen printing

Euroa Quilt - An Adventure in English Paper Piecing

Euroa Quilt English Paper Piecing Original

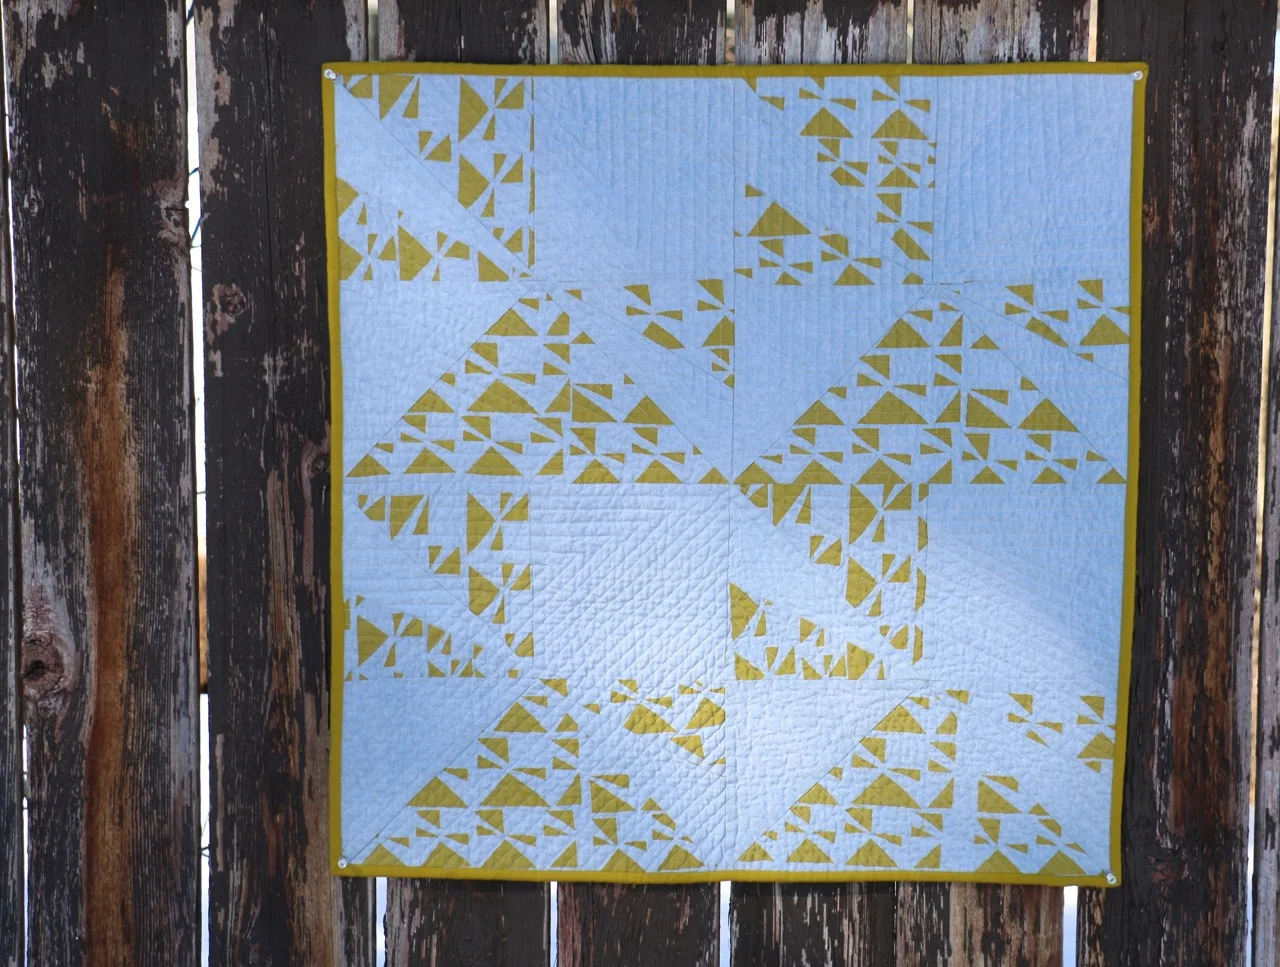
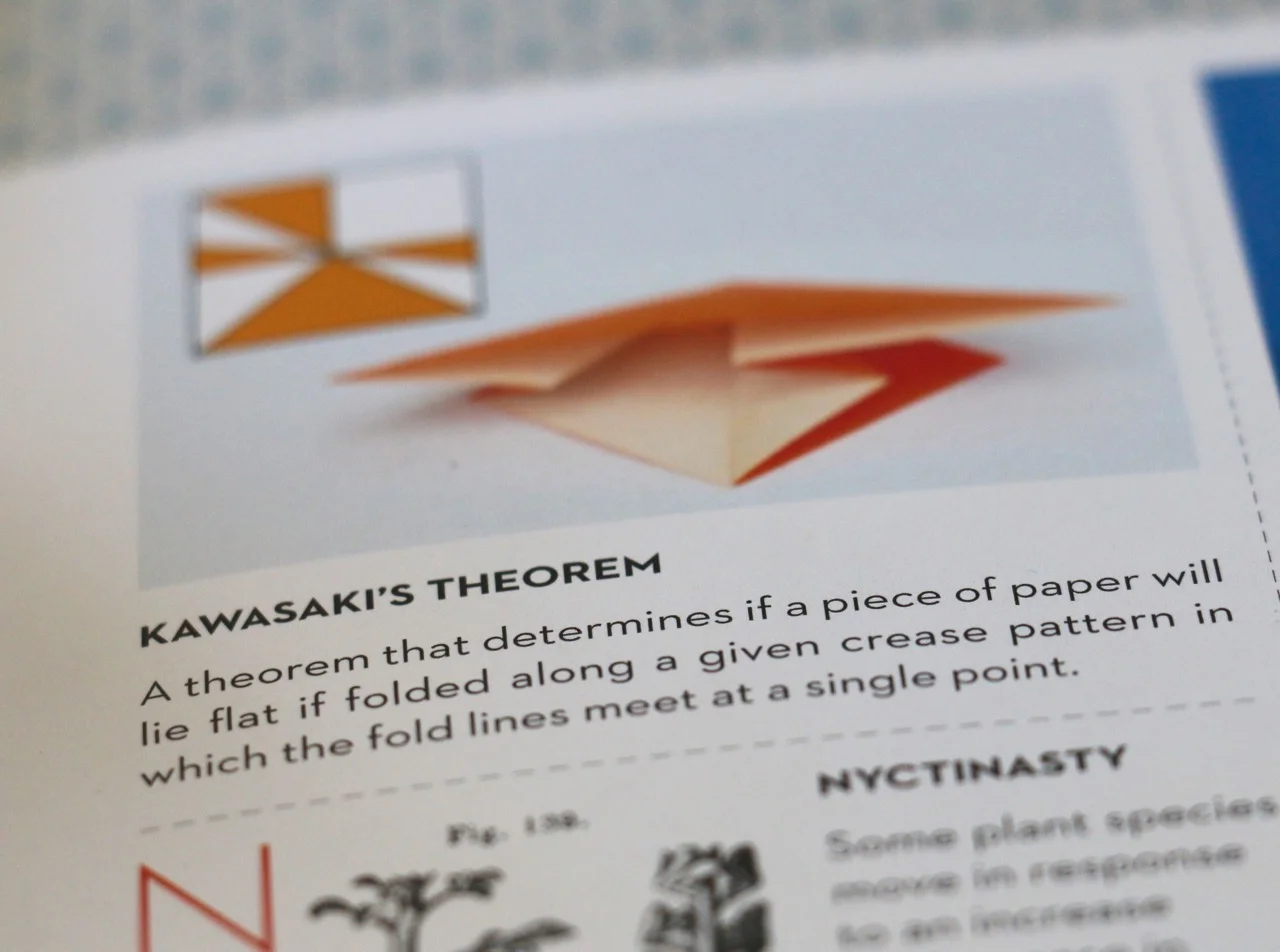
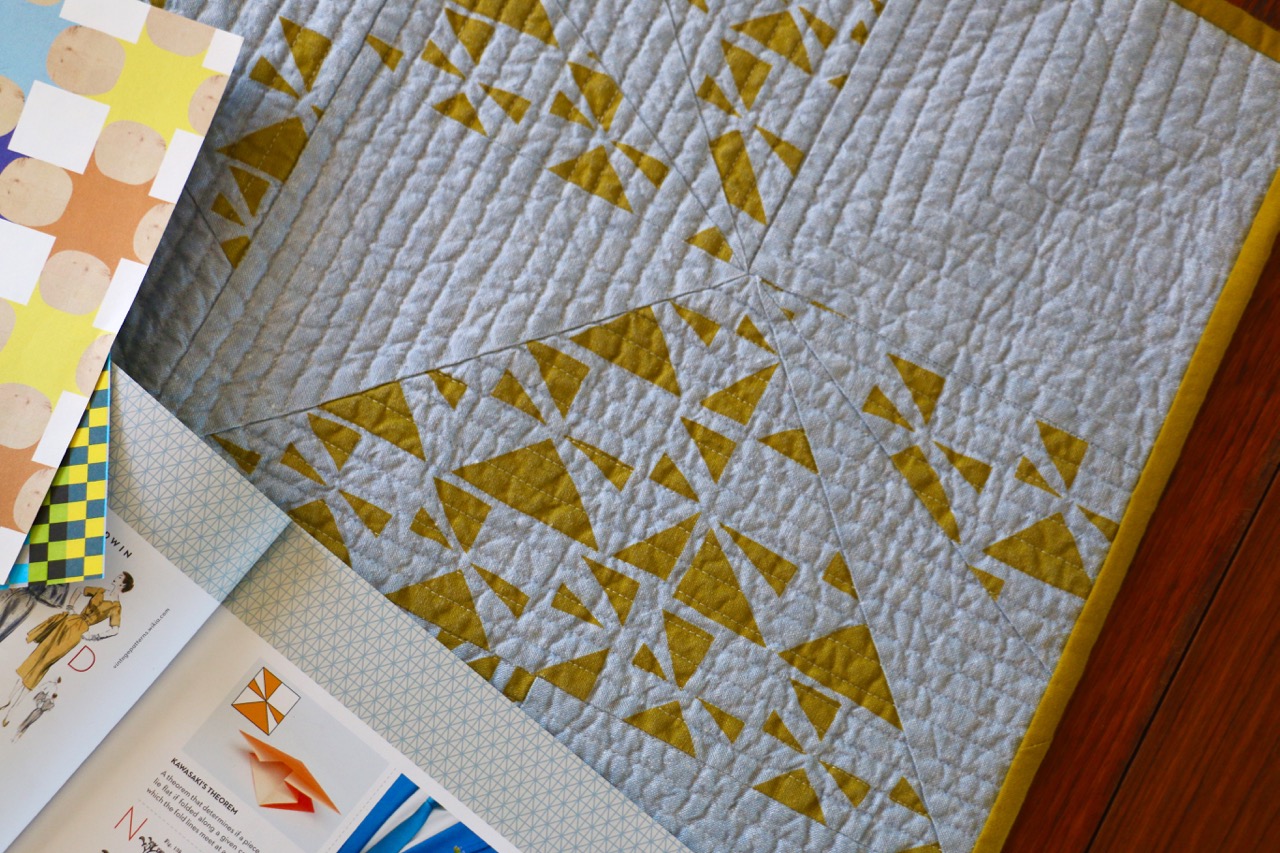
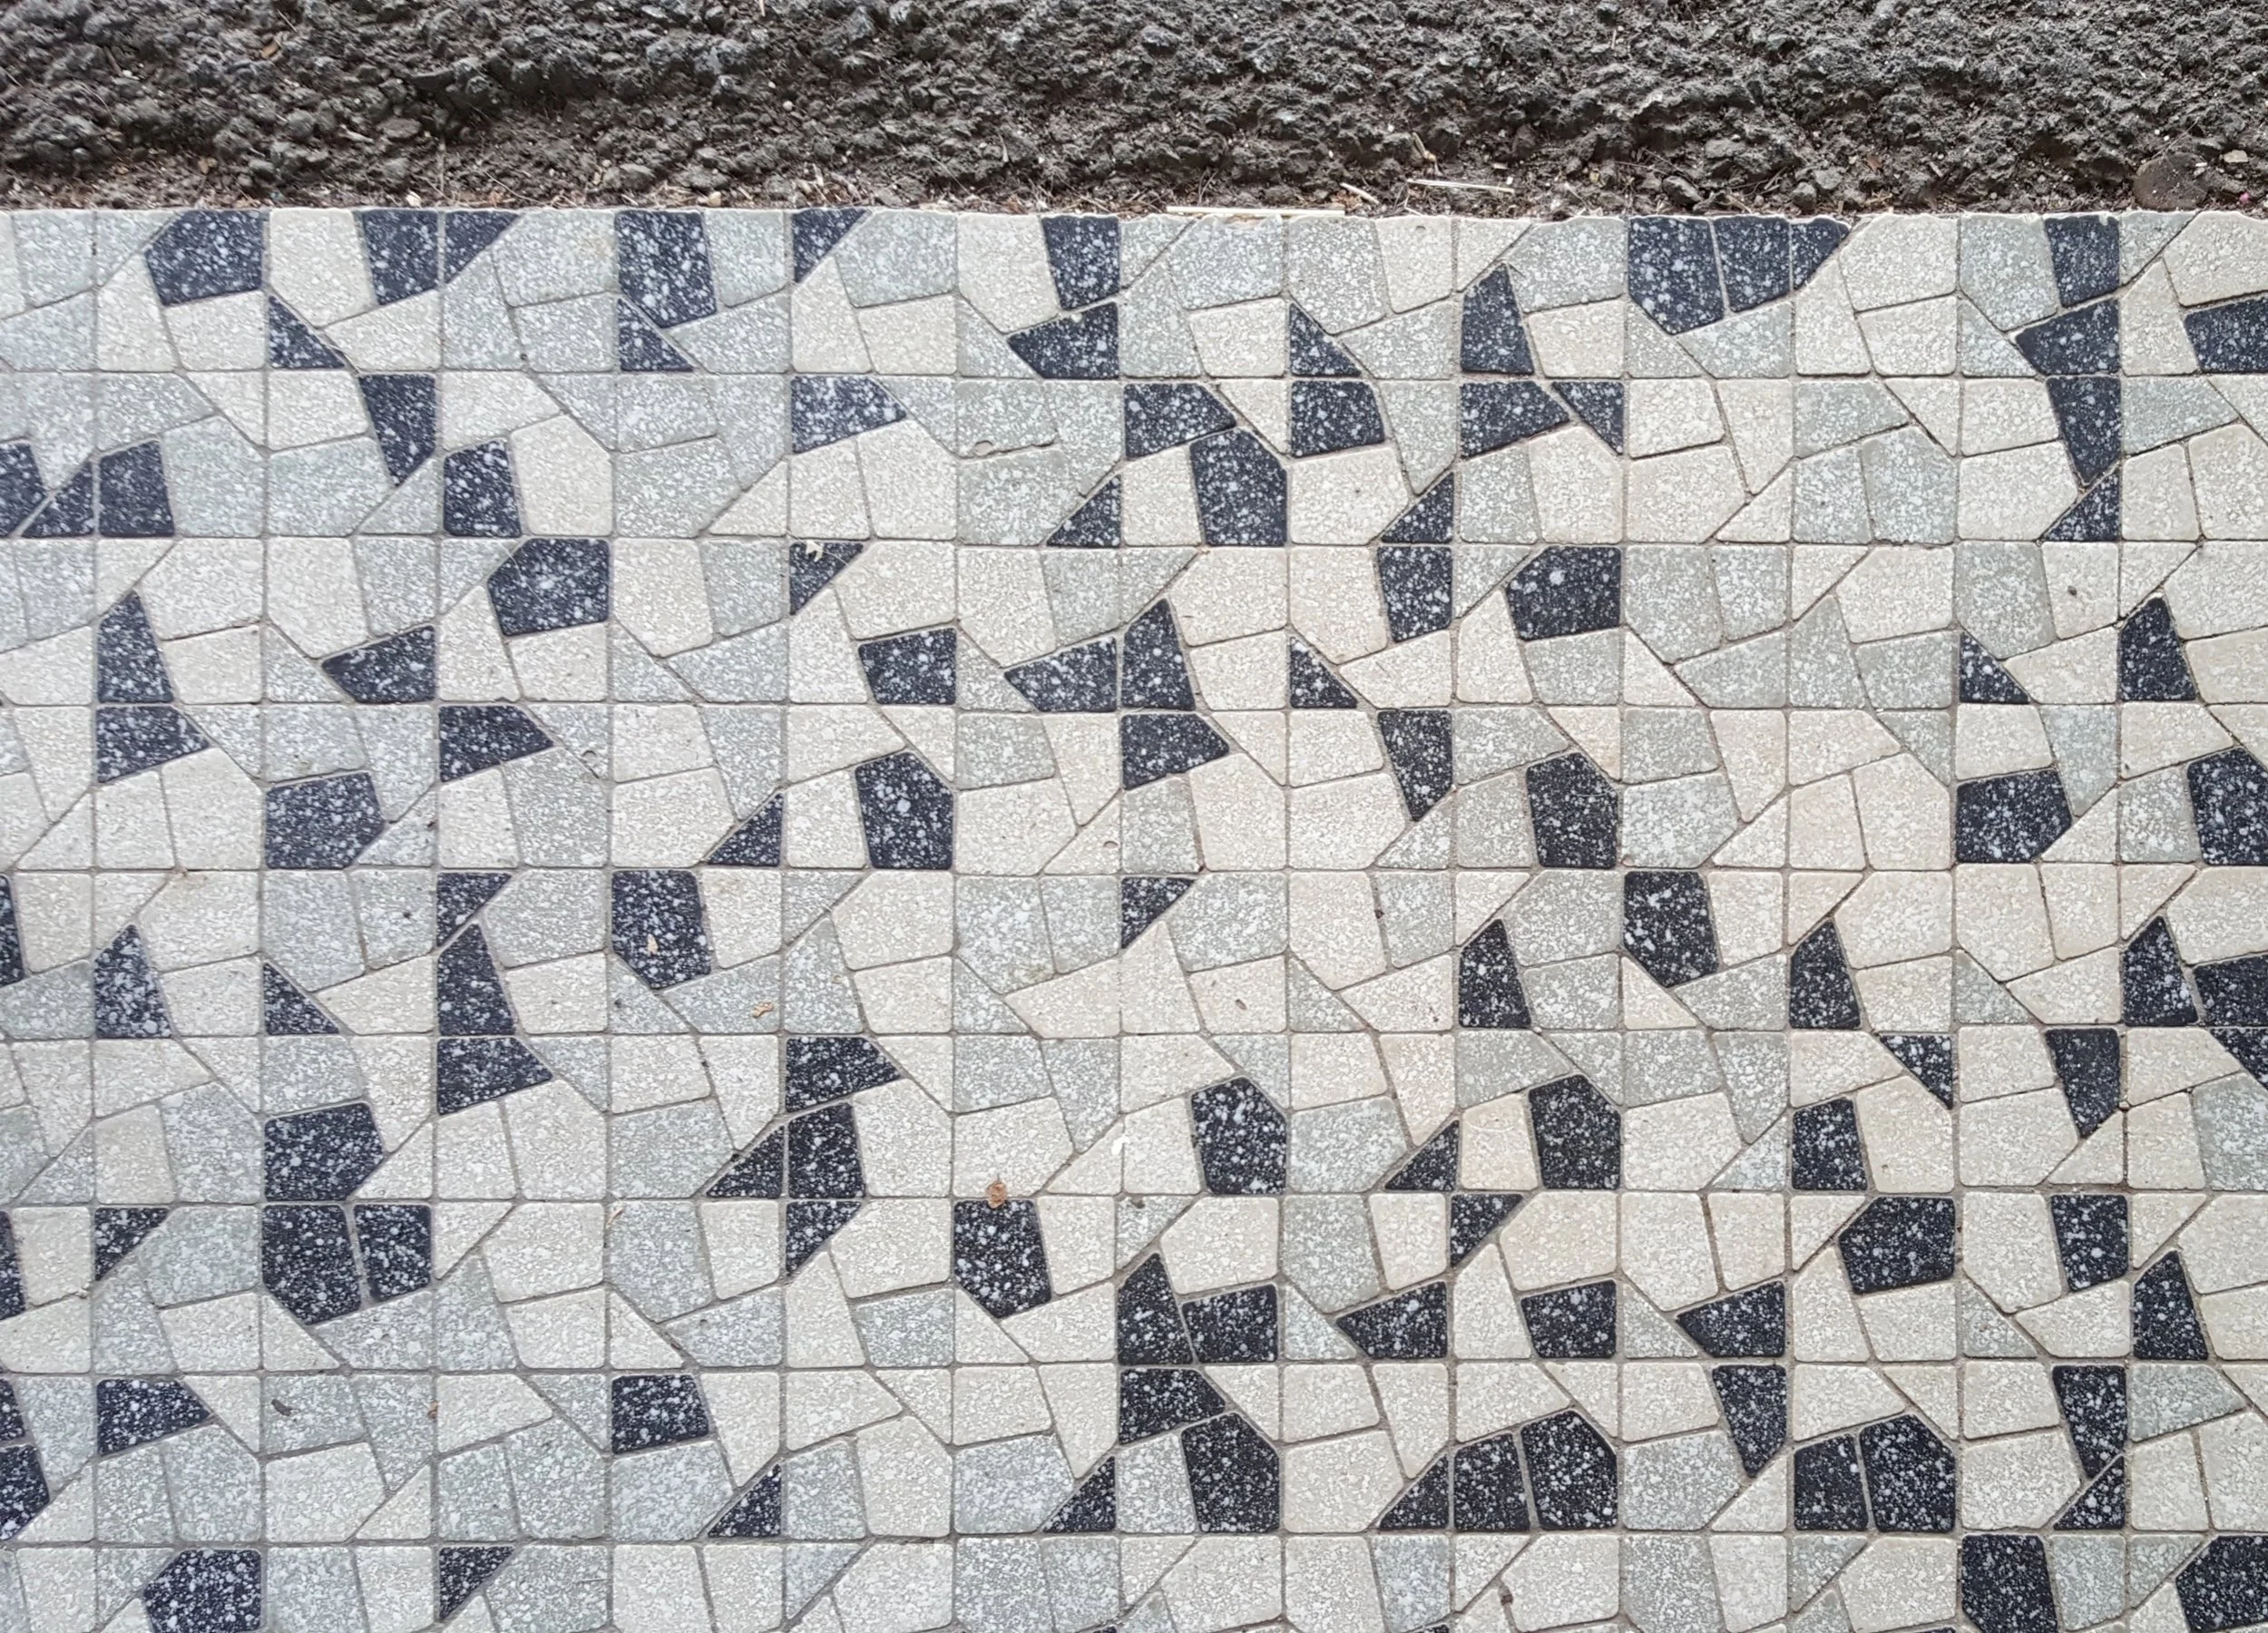
Behold the exciting beginnings of my first English Paper Pieced Quilt! Inspired by a tile floor I saw last year in Australia. It is a running joke among quilters that we take pictures of tiles because they are so inspiring. But I've never actually made a quilt that literal in its interpretation. I am now though.

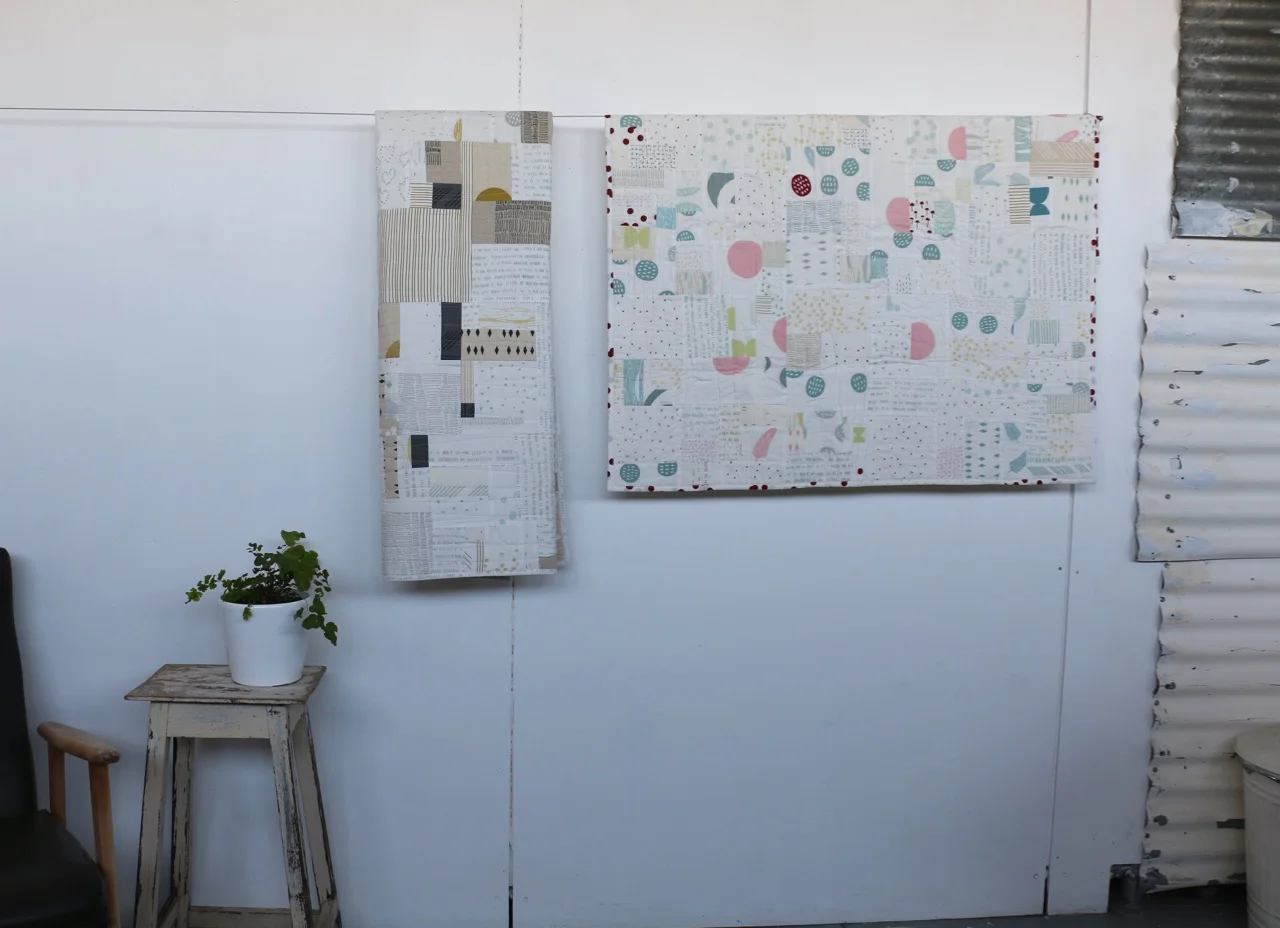
Because I finished the Park Quilt I felt totally justified in starting this one. Despite my over 40 quilts under construction I've found that I can't have more than 2-3 in the hand work stage. It simply takes up too much time and head space to be fighting among handwork projects. But with my big applique project done I could move on to this one.

Euroa Tile Inspiration for Quilt
Maze and Vale dropcloth

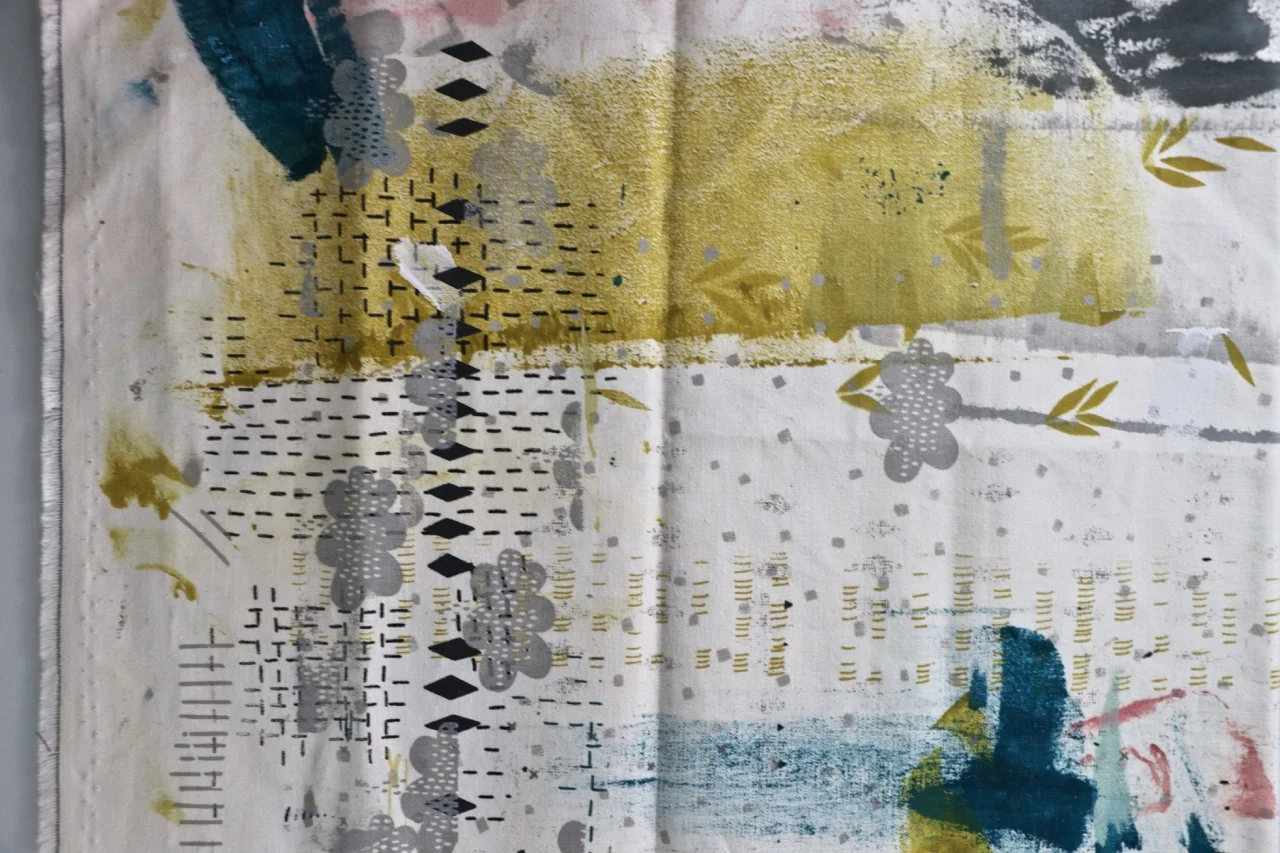
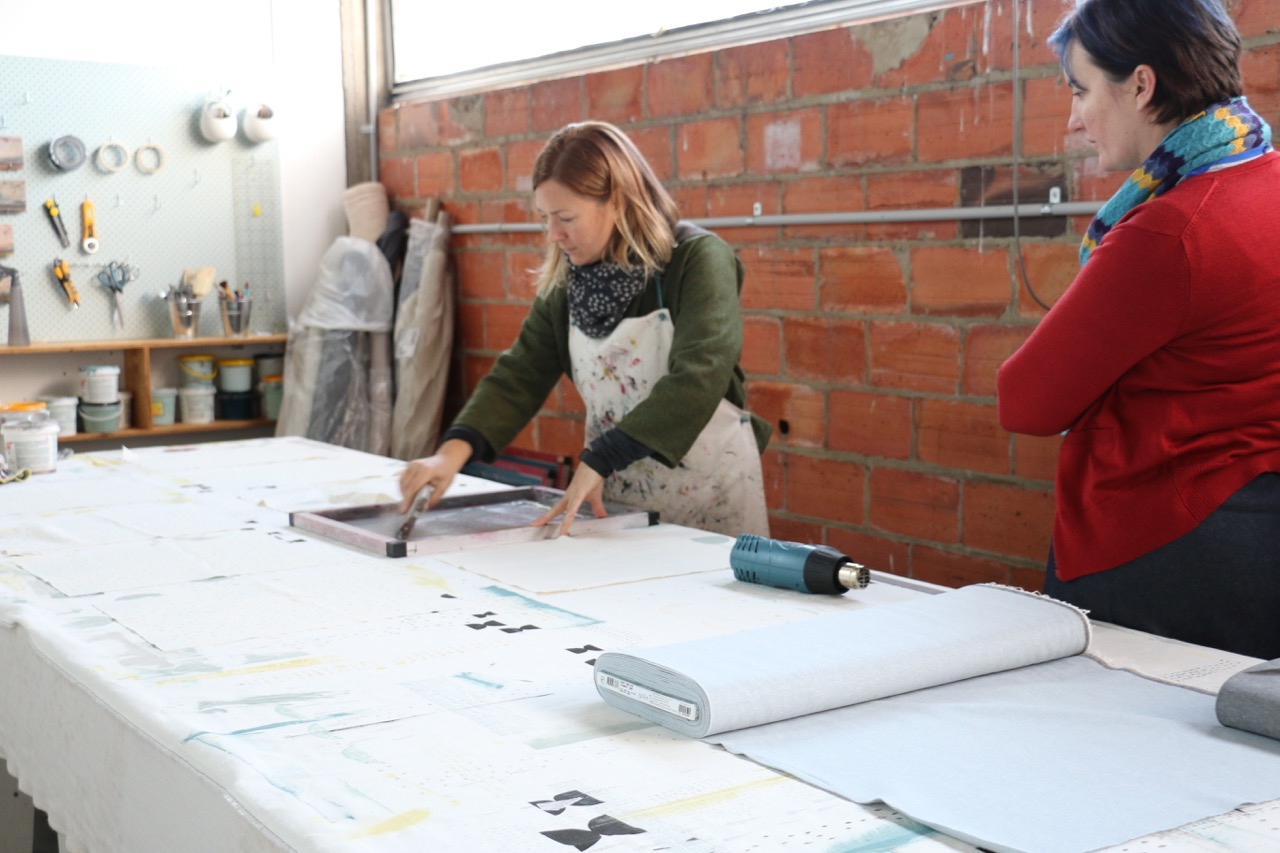
While the inspiration for the pattern itself came from the tile floor, the colour scheme was lifted from another Australian influence. We visited Leslie Keating from Maze and Vale while in Melbourne. Our screen printing lesson was incredible, and her fabrics are dreamy. What I truly loved (aside from the light in her studio and her lovely presence) was the drop cloth on her work table. Periodically she has to switch it out. The old one then gets sold as bits of fabric or dropcloth art. This was the piece I got from her in the sale. Originally I thought I would stitch it up as a whole cloth piece, but once I started down this quilt's path it became integral to the entire thing. It dictated the colours and I am cutting it up, bit by bit, to be included in the quilt.

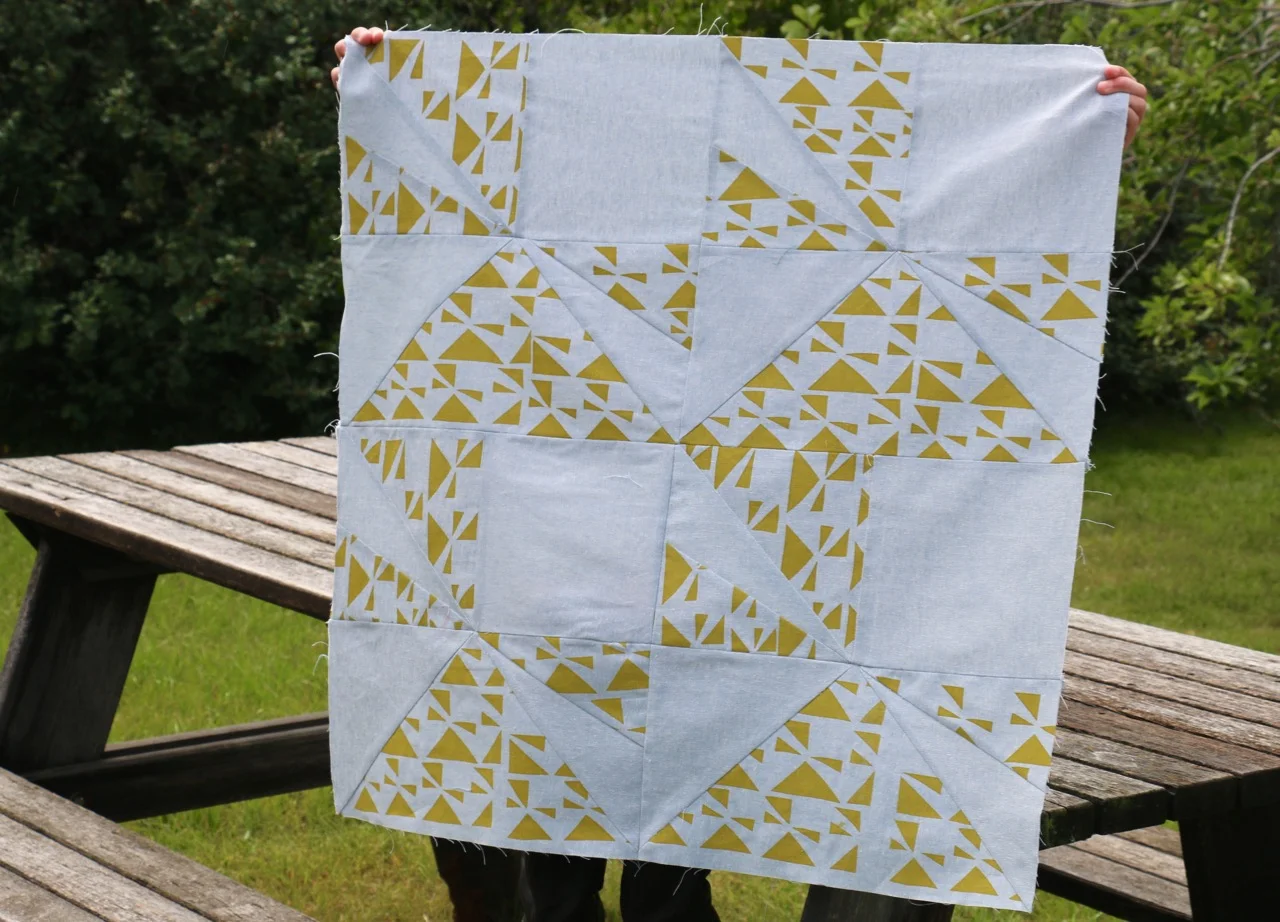
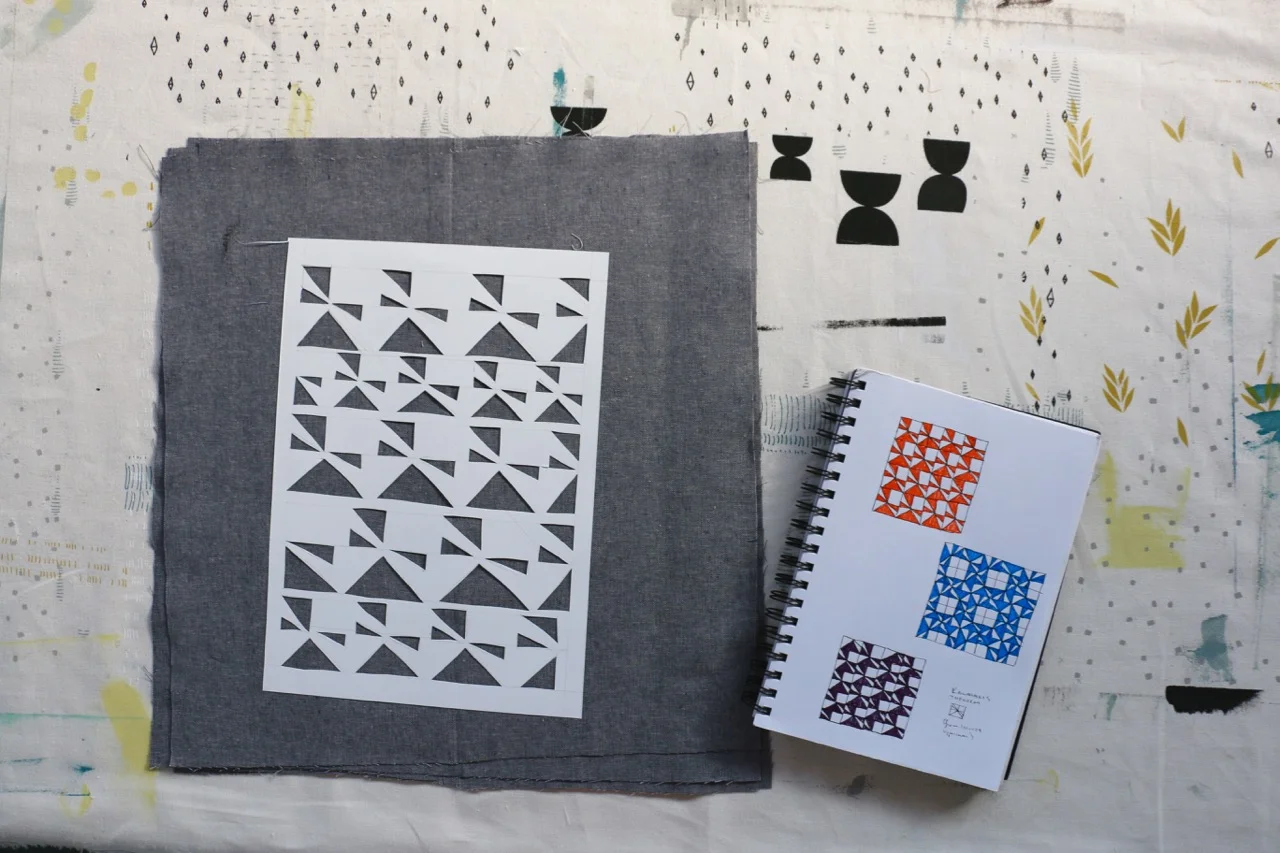
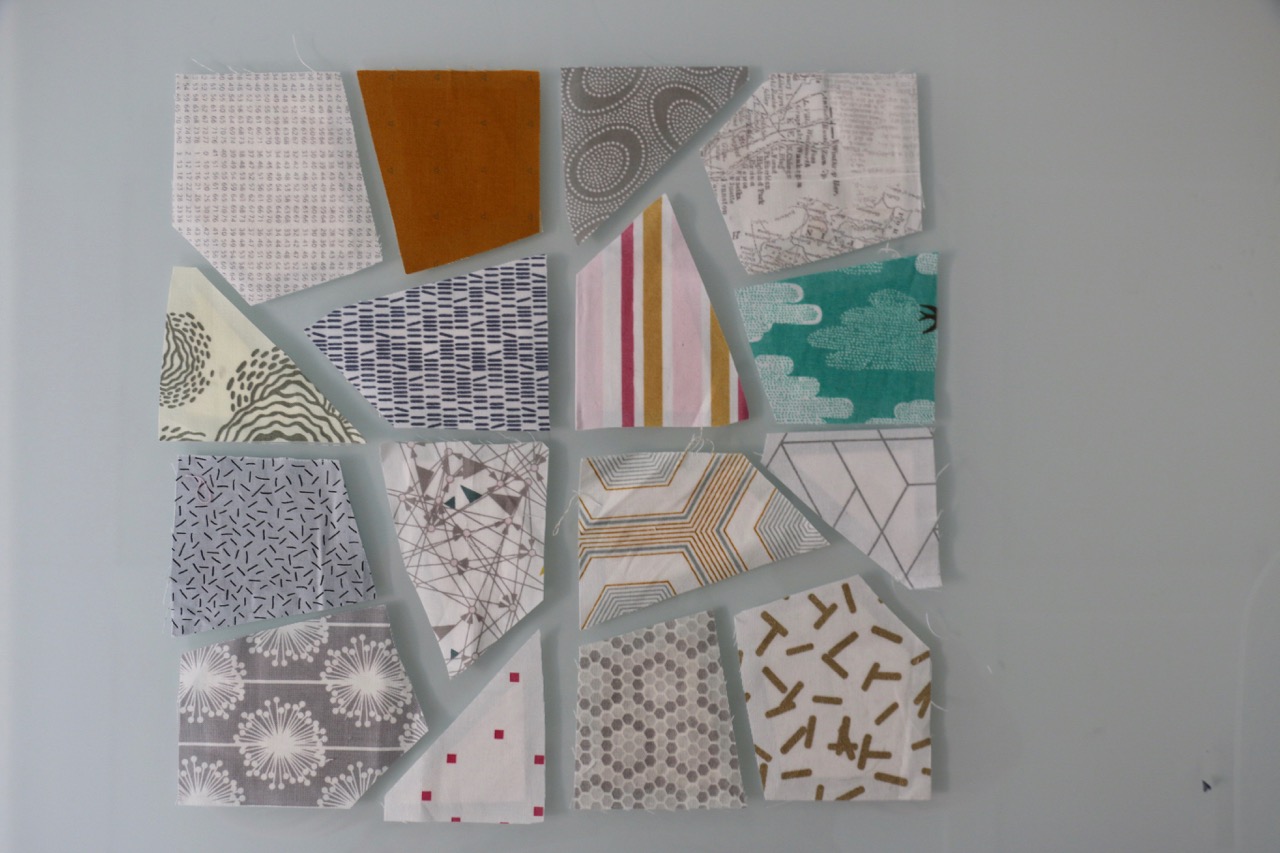
To start the quilt I drew out the single block pattern in Illustrator. Knowing that I don't work small (when it comes to the size of quilts) I wanted to be able to ensure consistency of the pattern and to make multiples in one go. I am doing English Paper Piecing with my templates, so I print out 4 little blocks at a time on a sheet of cardstock. I could have easily done this with foundation paper piecing on my machine. The pattern works either way. 

Scraps for the Euroa Quilt

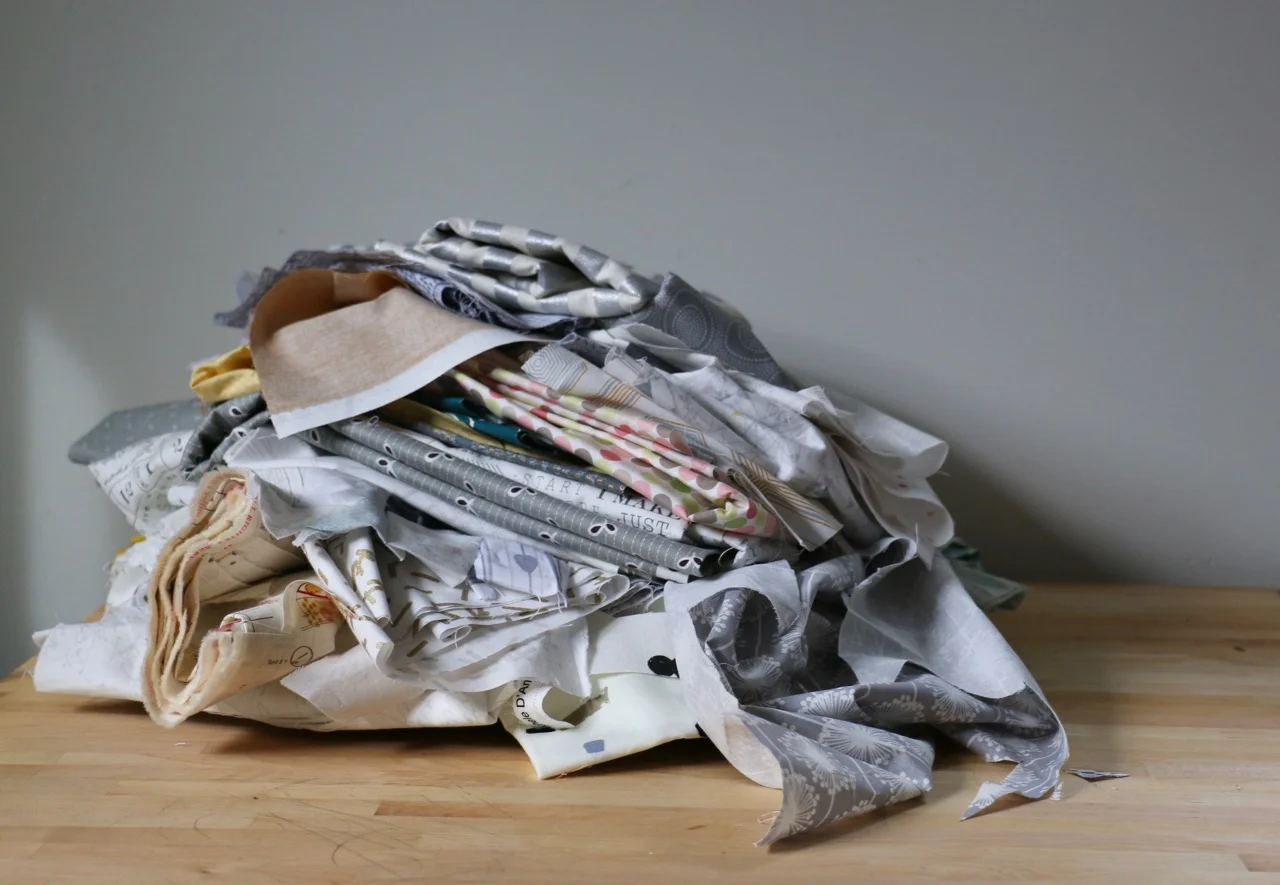
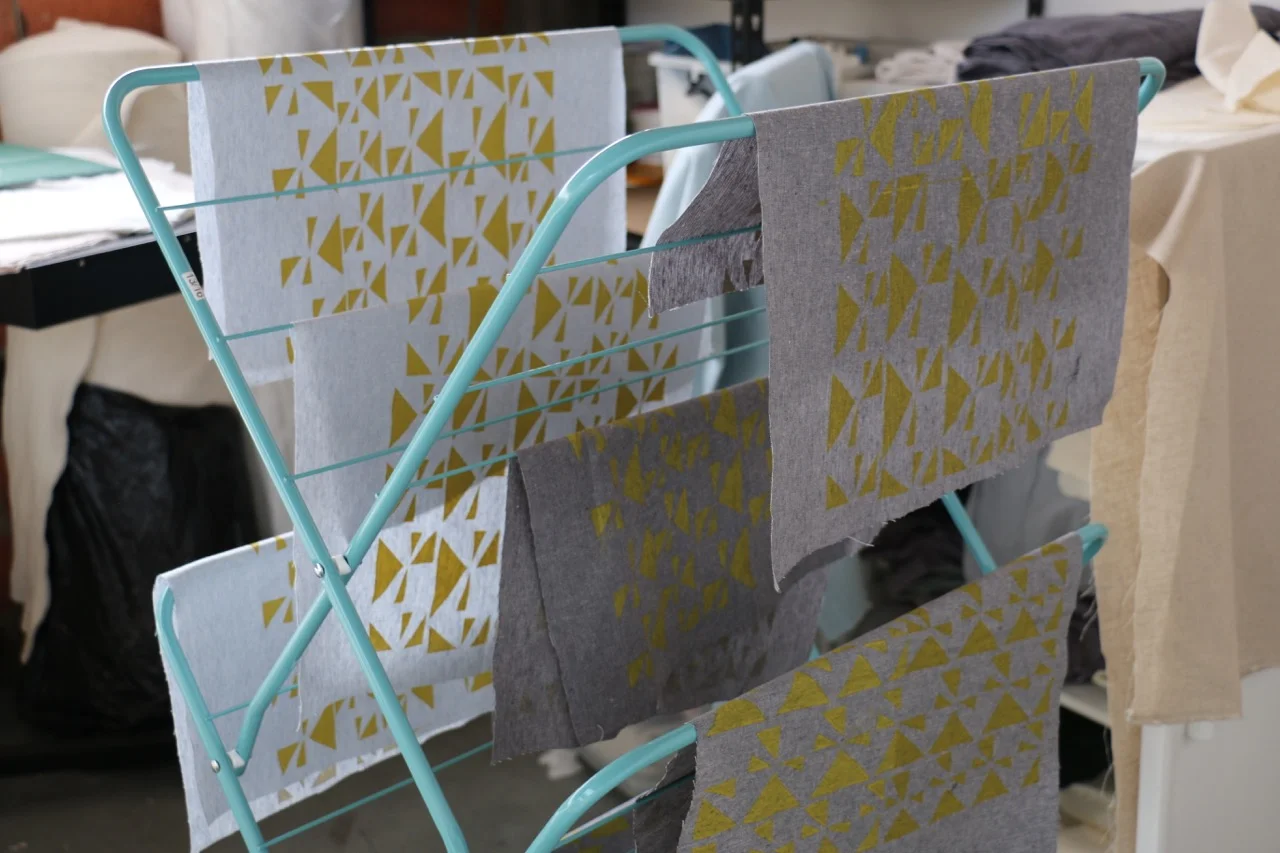
The next step was actually picking the fabric. Into the stash I dove! I picked out light and medium greys, a few teals and mints, the two mustard fabrics I had, some light pinks, and various creamy low volume prints. I decided to skip the black and whites, preferring to focus on grey. After I made the first couple of blocks I decided it needed more depth in fabric choices so I did a little bit of shopping. Some more mustards and more white/grey prints. The block results in some interesting secondary patterns. Playing with value or colour can drastically change the way this looks. I decided, however, to keep with the original influence and go completely scrappy.

I have a feeling this messy stack will be sitting on my cutting table for the next year or so.

My plan/goal is to make this quilt 80'' x 80''. I just don't like small quilts. Each mini block is 4'' x 4''. That means I will need 400 of them! I make them 4 at a time. Then make 4 of those and sew them together, calling those a mega block. So I will need 400 mini blocks, or 100 blocks, or 25 mega blocks. Whew. It's scary when you write it out that way. One block at a time. Like any journey that starts with the first step.

English paper Piecing Prep for Euroa Quilt

From start to finish for one block is probably about 2 hours of work. That includes the printing, cutting of the template, picking fabric and prepping blocks, thread basting, then sewing it all together. So far I have never just sat and done that start to finish. This is my one the go/summer sitting/TV watching project so it gets done is spurts and with interruptions. That's the point of a hand sewing project like this after all. 

I am pretty much brand new to English Paper Piecing and jumped in with my own pattern. It suits me just fine. I've poked my fingers and am developing callouses. I am still searching for my favourite needle (small enough but strong enough not to bend). And so far I haven't removed any papers. I'm kind of nervous about that step for some reason. It's fine for now, I have plenty of paper and there is no rush. 

This isn't the first quilt made from this inspiration. Lori made this incredible version after I posted the tile floor while on my trip last year. I posted the photo then went out of wifi range for a few hours. When I logged back in she'd already posted a block she'd made! Her finished mini quilt is awesome! Since I started the project I've had numerous requests for the pattern so I am prepping that to go live in the next couple of weeks. Watch for it. In the meantime, slow down and sew. 

UPDATE: The Euroa Templates are now available.

Kawasaki's Theorem Quilt with Maze and Vale

Kawasaki's Theorem quilt with Maze and Vale

Kawasaki's Theorem 1

28'' x 28''

It's a bold and cocky move to name anything Number 1. It completely implies a series. That's a lot of pressure to put on yourself... if you care that much.

I met never get to Kawasaki's Theorem #2. That's okay. In my head this was just the first round of play though. So maybe, just maybe, there will be more.

This particular quilt started before there was fabric. It was an image in Uppercase Magazine, an issue on paper. The image is actually about a paper folding and angles. There is a formula and everything. It was the image that illustrates the theorem that got me though. It immediately screamed quilt block. I sketched up some repeats for fun, then dated and parked the idea.

Kawasaki's Theorem Uppercase Magazine

When in Australia I had the great chance to take a private silk screening class with Leslie from Maze and Vale. Rather than use her screens she encouraged us to create our own stencil. I pulled out my ever present sketchbook to see if anything struck me as a possibility. My Kawasaki's Theorem sketches were there and my brain was broken for any other ideas so I went with it.  We printed fabric and went on our merry way. 

Then I had the idea to go very meta with my fabric. Sometimes I can be rather cheesy. I designed a block based on the theorem and used the fabric in the block. Then I made a few more. And then, as I contemplated my quilting plan, I extended the design there and quilted it to reflect the theorem as well. I am a total nerd.

Kawasaki's Theorem Uppercase Magazine Maze and Vale

Who knows if Number 2 and 3 in the series will ever get made, but there are sketches. If not, the play is still totally worth it. It is in the play that new ideas grow, techniques get better, and the joy is found.


Improvisational Quilting, Australian Inspired

Improvisational Quilting and Improv Play

My #arkisoninaustralia quilt top is done. To be honest, I felt like I could keep going forever. That's what happens when I get going on improv!

This whole quilt started as technique demos while teaching at The Creative Retreat a few months ago. Some random fat quarters grabbed started the colour scheme and the shapes. It is entirely done from improvisational piecing. From those first demos I ran with shape as my guide:

  • quarter circles
  • triangles, both spiky and as flying geese
  • inserted strips
  • curves and wavy lines
  • diamonds
  • a few arrows, for good measure when I needed to fill space

The colour scheme was led by the mustard and pale blue, the ones I started with, as well as black and white prints. I used solids, linens, even a canvas. Some of the prints are those of Emma Jean Jansen, an Australian designer who attended the retreat in Point Lonsdale. Some others are gorgeous treats from Leslie Keating at Maze and Vale, plus the ones we printed together

Improvisational Quilt Piecing - Triangles

As much as I was excited to get this quilt top finished I had a tremendous amount of fun putting it together. I made the components without any regard to specific size. I thought about scale - in terms of making the piecing large or small - but not a specific size. Depending on the technique you need a measured size to start, but that number was chosen out of the air or determined by the size of the fabric I had.

Components found a home on the design wall as I finished them. Eventually, I needed to find a bit of order. In stolen moments of time I would move, remove, and rearrange pieces on the design wall. With more and more mornings more and more components made their way up. Getting on the design wall allowed me to see where I had holes in technique as well as design. It also let me pick fabric to lend to the composition, as opposed to the composition being dictated by colour.

Putting together a quilt top with so many disparate sizes can be a necessary evil of improvisational quiltmaking. Personally, I don't see it as an evil, I absolutely love that part. One can always go the Magic Numbers route and square things off to relatable sizes. It makes assembly much easier, and for beginners that makes total sense. It might make sense for the design as well. I chose the path less travelled. It was a lot of fitting, adding, cutting off, making more, and y-seam construction. I stared at the layout a lot to figure out the easiest way to assemble. That challenge, for me, is a great boost. It gets me excited, the joy of accomplishing something difficult.

For tips and a demos and an understanding on improv quilting, check out my class on Creative Live: Improv Quilting Basics.

Improv Quilting at Its Best

The next challenge will come with quilting. I have absolutely no idea what to do there. Open to suggestions... It is a busy quilt so an all over design, chosen well, wouldn't hurt. I'm not sure it would enhance things though. That being said, tackling each component individually has a lot of potential. Including the potential to take a really long time. I can't believe I am saying this, but i am considering hand quilting. I love what Jess, a student at the Kangaroo Valley retreat is doing with the the piece she made in our time together. Jess also designed and had printed one of the amazing black and white text prints used in the quilt. It could be a good winter project, defining my seasons.

This project defined my summer, for the most part. It started at the beginning and I put the last pieces together on Labour Day. My early mornings on this got me through the onslaught of parenting all day. Morning Make, Australia style saved my sanity this summer.

Photography with kids and an improv quilt

Screen Printing Lesson and Coincidences at Maze and Vale

Kawasaki's Theorem on Fabric

On my Australia trip I got the opportunity to learn silk screening printing from the wonderful Leslie Keating at Maze and Vale. We were in Melbourne for 48 free hours in between the two retreats. Jules McMahon arranged for us to go meet Leslie one morning. I'd interviewed Leslie for a Modern Patchwork/Quilting Arts article before, but this would be a treat. We were in for far more than we expected!

At Maze and Vale

Leslie invited us into her shared warehouse studio space. A number of different artists working on their painting, printing, sewing, and making in a sunny, crisp warehouse. Divided by plywood walls and mixed with creativity. The Maze and Vale space is long and narrow, perfect for a printing table. Perfect for Leslie's gorgeous drop cloths (which Jules and I really, really want), a cabinet with her base cloth, and shelves of inks. Not to mention the true value of her unique screens stacked under the window.

We, admittedly, thought we were going to have a cup of tea, a short tour, and a little chat. But no! Leslie gave us that and so much more. She gave us lessons, stencil papers, a blank screen, and access to her beautifully custom mixed inks. Before our tea was cold we were cutting stencils with an exacto knife.

Prepping a stencil

To be put on the spot for this was momentarily disconcerting. Thank goodness for my nearly full sketchbook that I always carry with me! I flipped through the pages and came across these sketches. In an older issue of Uppercase Magazine there was mention of a paper folding technique called Kawasaki's Theorem. While me drawing it out has nothing to do with paper folding I loved the lines of the illustration. It screamed quilt block to me. And, on this day, I used it as my inspiration for a stencil.

Now, the last time I used an exacto knife I nearly sliced my thumb off and my brother had to practice his eventual doctoring on me. So, I was a little nervous. But with some good chit chat I calmly got through and got to the exciting part of the process - printing.

Silk screening demo at Maze at Maze and Vale
Procrasticraft printing

There is something wonderfully meditative and quite exciting about screen printing. You think you know what it is going to look like, how it will finish, but there is still some uncertainty at the beginning. I could see this being addictive for me. At least in the summer at home because I'm not sure I could appropriate the dining room table for this in the winter months!

My prints dried, we heat set them, and last week I put together a small quilt top with my fabric. We used Essex Linen as out base cloth. With a bit more of the blue colour and a paper piecing pattern drafted to take advantage of the prints themselves I made 4 blocks. The blocks themselves are the Kawasaki's Theorem on repeat. All very meta. I think I will continue that with the quilting.

Fresh prints drying

Leslie was a wonderful host and teacher. If I lived in Melbourne I would hope we could hang out a lot more. If she lived back in her native Canada it is likely we would too. Then again, we may have in the past! It turns out that not only is she Canadian, she is from the same Prairie suburb as I am. We know mutual people and even now, her sister and my sister in law are friends! We discovered all this while chatting and printing. It was a crazy coincidence and I can't believe I had to go halfway around the world to discover the connections. My little quilt and my prints mean that much more now.

This day of printing was an excellent creative retreat for Jules and I. Working hard for others and doing all we could to nurture their creativity was decidedly fantastic. But getting a chance to play and nurture our own was such a welcome and needed break. Thank you to Leslie for providing the space, inspiration, and guidance to do so.