"stash"

Xenia - A Maple Leaf Quilt for a New Friend

Xenia

72” x 48”

For 3 weeks we had a German, teenage athlete staying with us. She originally contacted my daughter last winter, she was working to fulfill one of her dreams to come to Canada. In October she made the dream come true. Such a bright, committed, and curious girl. We loved having her with us. It was fun to show her some of our favourite things (but not many because these athletes have so much training!) And through her we learned about Germany, pumpernickel bread, and life in a village with no restaurants.

Each day she would come with my son and I to the new studio. The kids would do their school work while I plugged away on projects and accounting stuff. On breaks we would chat and play with the dog. While her and I would have many deep conversations over the weeks she was with us (more than my own teens are willing to have with me) she, sadly, showed no interest in quilting.

That didn’t stop me from wanting to gift her, and her parents who joined her in Canada after 3 weeks, a quilt to take home with them. I mean, of course I would give them a quilt! And once I decided that, it was clear which one I would give them.

Conveniently, I had the quilt top already made. It was a second version of the Maple Leaf quilt - a pattern I used sell, and then teach. I no longer do either with this pattern as I have complicated feelings about our national flag now. It seemed perfect to finish the quilt and give it to our new German friends though. A great momento of an epic trip for them.

The quilt top, itself, differs from the original pattern in that each block is made with a single red fabric. This is in contrast to the original made with scraps sewn into slabs to make the side blocks and leaves. It’s an excellent way to play with value and contrast via visual texture.

So, I whipped up a quilt back with what I had on hand - a great Aneela Hoey print from many, many moons ago and some other treats in the stash. Then I snagged a long arm appointment at my local shop. Phew. That left me two days to bind, label, and wash the quilt before they departed our snowy wonderland for home. It was a fast process, but worth it. And totally possible when you have a deep stash and can make time.

I totally forgot to take a picture of it, but I also signed the back, off label. Our German athlete attends a boarding school. I worry that someone might try to take her quilt. They would take off the label and argue that there was no way to prove the quilt was hers! I’ve heard stories of these happening in nursing homes and I don’t want it to happen to her. When I gift a quilt that may live in a public place I always sign the quilt itself, somewhere not so obvious, so it can always be proven if the worst happens.

The quilt, and our new German friends, are back home now. We will miss them.

Virginia - Maple Leaves for a Unexpected Fall Quilt

Virginia

60” x 60”

She is a crafty girl, taking her knitting with her everywhere. At this time of year she is buried in yarn and apple cider and cat cuddles. She wants to jump in a pile of leaves, take her girlfriend to a sunflower maze, and totally watch Gilmore Girls even though it is terribly problematic. She’s wearing layers at the first sign of a chill and refuses to take them off when the sun warms her on a walk. She may come across as basic, but she is anything but.

More than a year ago I made a single block. Just one maple leaf to show some folks in a Playdate that you can find use for the ugly fabric hiding around corners in your stash. Ugly, after all, is just like beauty - it’s all in the eye of the beholder.

teal, blue, gold, brown, and a bit of pink in a maple leaf quilt

Of course, of course, I put that first block dead centre in my finished quilt top. That so not me leaf fabric was paired, unexpectedly, with a ikat butterfly print from Tula Pink. From those two fabrics the rest of the quilt came to be. I shopped from my stash and had a blast putting together different combinations. The end result was a fall inspired quilt like no other.

The quilting is there merely to add texture. Each block was quilted with wavy lines crossing the block on the diagonal. Because the leaves themselves change direction across the quilt, I carried the direction of the waves with each leaf. For thread I chose a teal blue Superior at the long arm rental spot. (My preference is for 100% cotton, but this works well with their machines and there is absolutely nothing wrong with it.) I wanted the quilt to be extra squishy so an allover design versus outlining each leaf was preferred.

I broke my fabric shopping fast (I have sooooo much fabric) to pick up a binding choice from the clearance section at My Sewing Room. As I was taking the quilt off the long arm I realized that a rosy binding was going to be the perfect choice. Now, I know my stash, there is not a single rose coloured fabric in any value in there. I am a hot pink girl! Keeping with the theme of the quilt as a whole - starting with ugly fabric - I chose a print very much out of character for me. Turns out it was perfect. It binds the quilt so well and is a great complement to the colour scheme.

In the end, this quilt is another unconventional fall quilt. They don’t all have to be reds and oranges folks! And as I was stitching the binding I also realized that it goes perfectly in our living room with its chartreuse sofa on one side and the blue/brown one on the other. I guess it was just all meant to be!

Sunshine for Days - A Bold Star Quilt

Bold, full of sunshine and memories.

This quilt top began its life as a leftover stack of fabric squares. On our big trip to Egypt and Turkey last year I travelled with a stack of 6.5” squares. I made a block each day to reflect our travels - a trip diary of sorts. That turned into this quilt. The scraps from making all those blocks then turned into this quilt. Of course, I cut far more fabric than I needed and carried it around with for the entire month. When I got home and finished those other quilts I was left with a stack of pre-cut squares.

You know me, nothing it going to waste! I pulled them out and played until I landed on making HSTs with the non-yellows plus yellows. That gave me nearly enough to make 4 stars. I did have to augment with a bit of stash for all colours, but not much. My goal was to use the leftovers and that’s it.

Turquoise, grey, and pink stars on a bright yellow patchwork background

I made the HSTs and sorted out a layout early in the winter. Then the blocks got put aside (all numbered and ready for assembly). A few weeks ago I needed some no-brainer sewing. After consulting my big list of quilts under construction I decided to turn these into a quilt top. I did, then I realized it was too small for me. It came in, with only the leftover squares, at 44” square. A good little baby quilt. The problem, however, is that I have no need of another little baby quilt. So I debated my options.

  1. Accept it’s size.

  2. Make a border of some sort.

  3. Make more blocks.

Truth be told, I am incapable of making small quilts with no reason. It is very, very difficult for me to stay small. When pressed or shockingly motivated I can stop at a small size, but it is not my norm. Option 1 was out.

Borders… oh borders. Any fabric I used on a conventional border was only going to take away from the stars. I did debate a yellow patchwork border, two rounds of squares all around. The yellow and feature fabrics, however, are pretty close in value. I felt that the stars would too get lost this way. Besides, when do you ever see me use a border? Option 2 is out.

That leaves me making more blocks. This is almost always the best option. You can see that it worked well too. With HSTs finishing at 6” this was easy and relatively quick sewing. I did have a lot of the fabrics from last year still so it was easy shopping. My yellow supply, however, was very slim so I did spend some cash to fill in the gaps (and fill up my yellow bin again). Luckily I was able to get some of the same fabrics so it really doesn’t look like I have two separate sections.

She is done for now. I am debating adding that patchwork border too. Maybe just one round of yellow squares all the way around? Yes, I am suggesting that despite what I said just two paragraphs above. We’ll see. For now, I have some sunshiny memories sewn into this quilt and that makes me happy.

Elodie - A Bold Quilt of Half Square Triangles and Circles

Elodie

84” x 84”

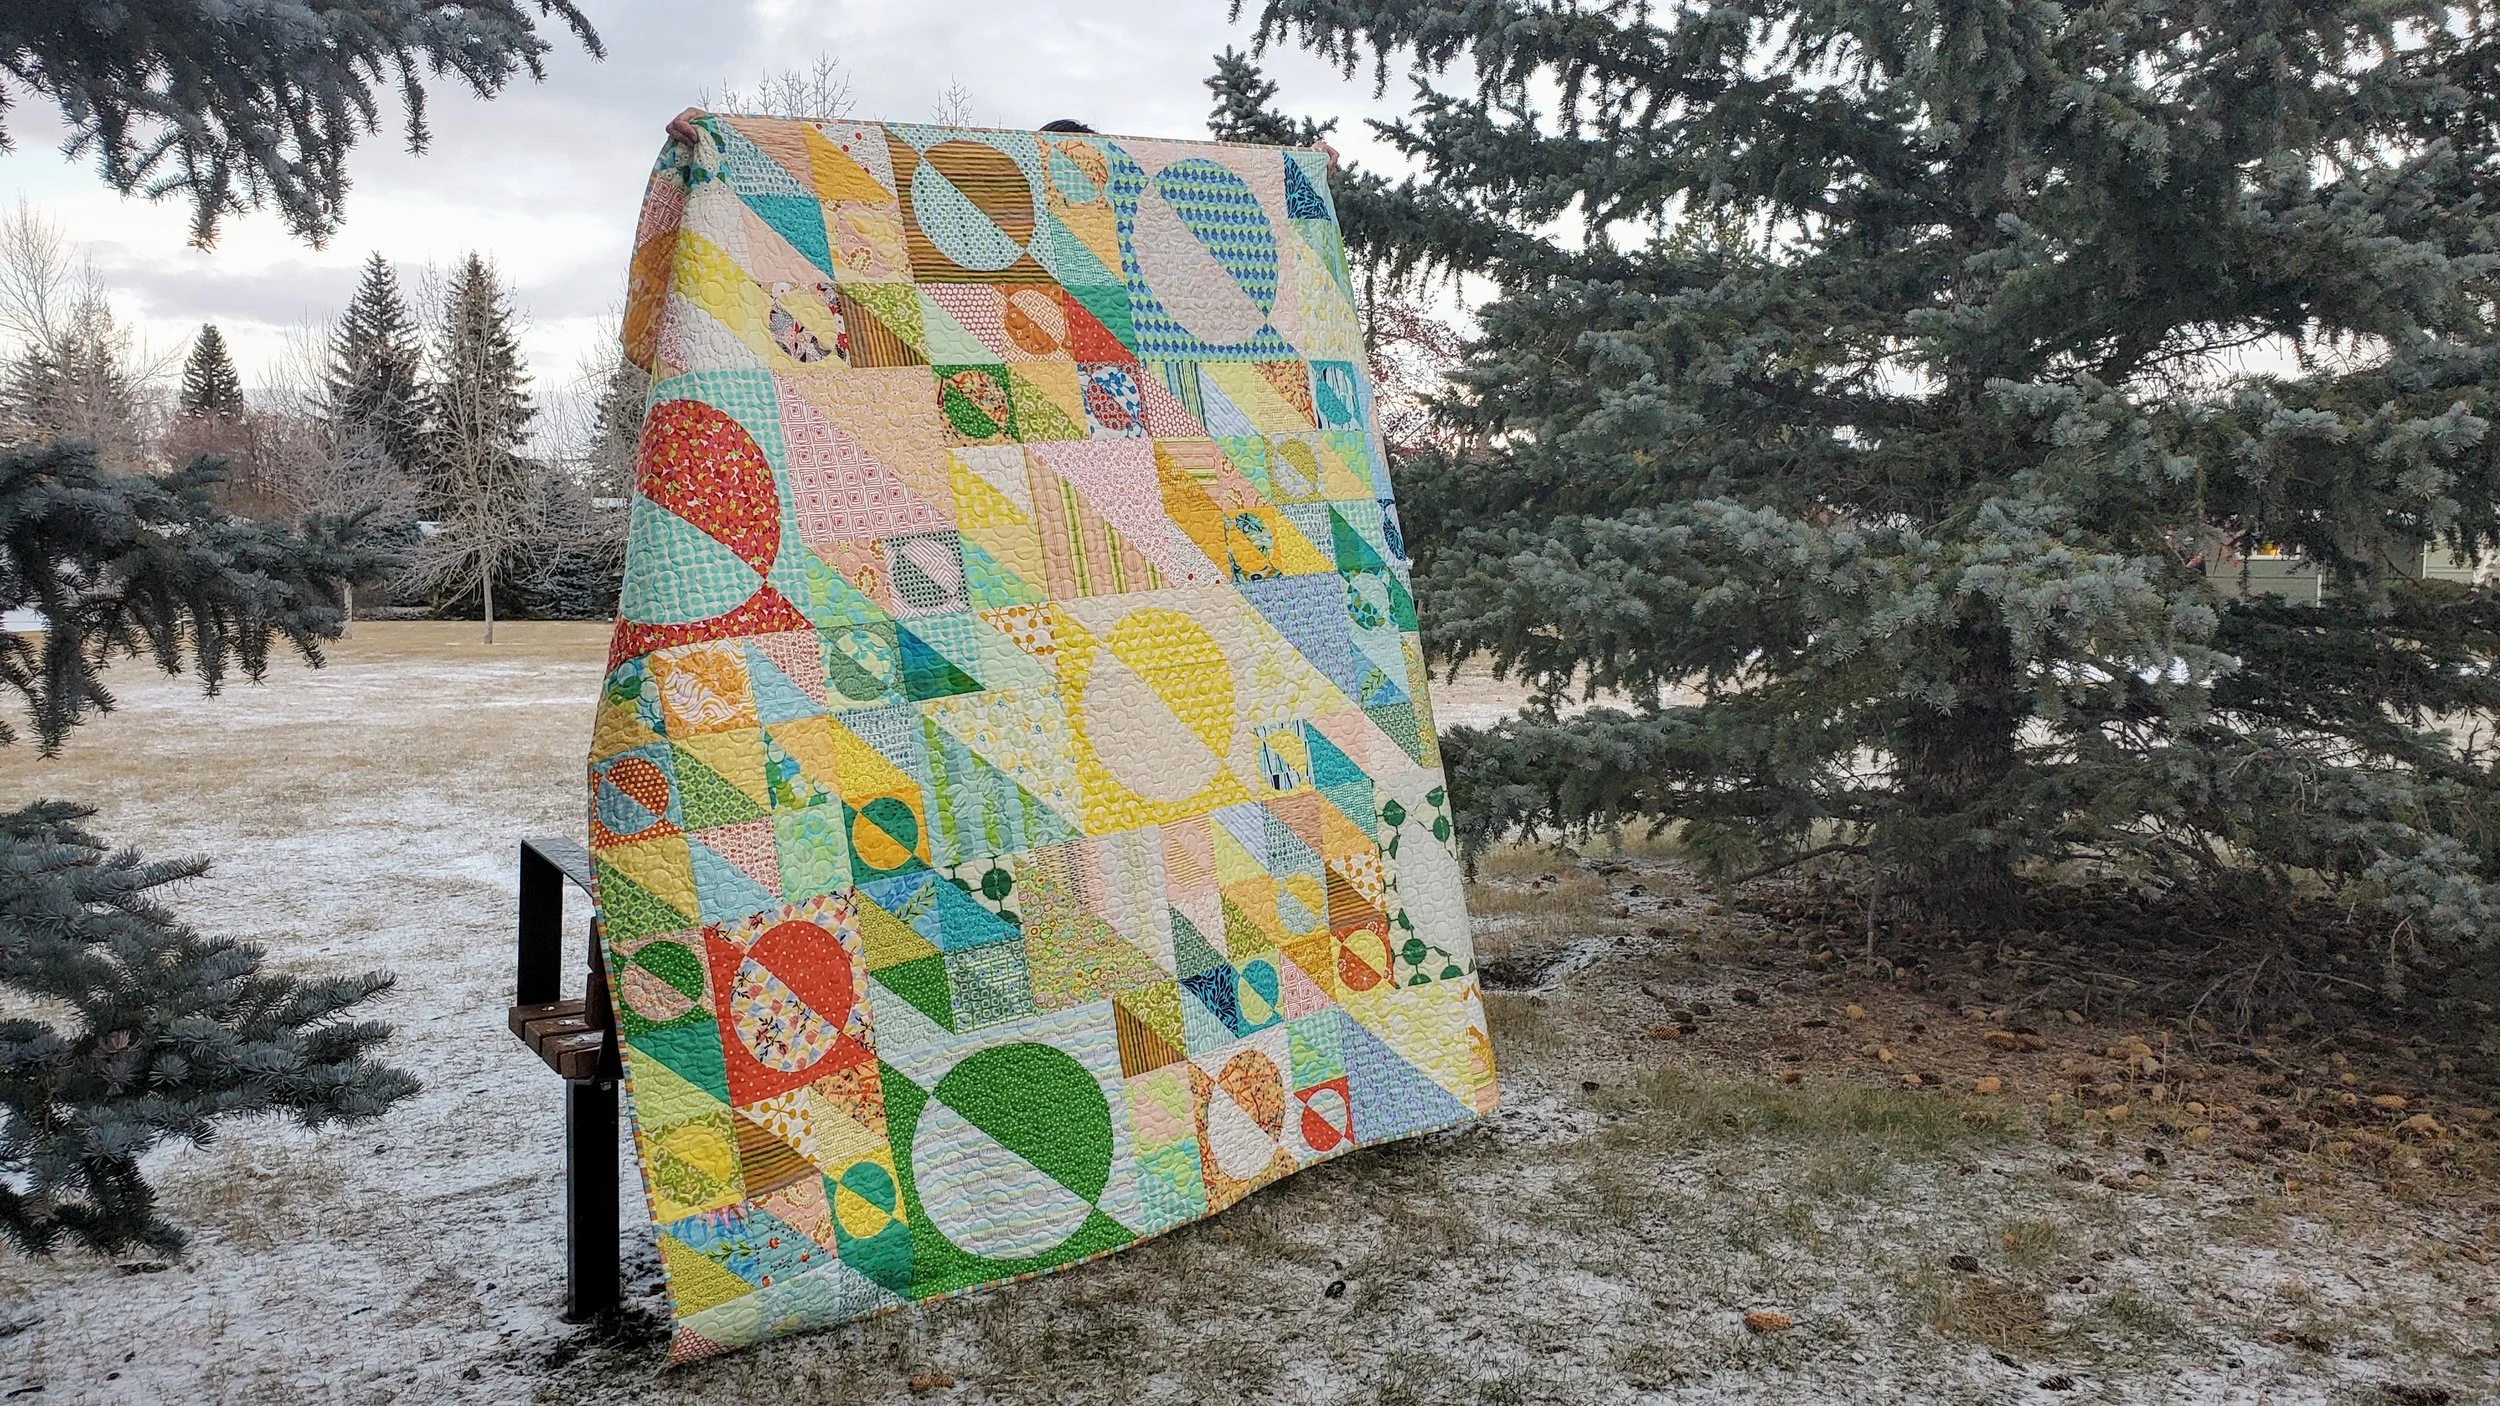
Elodie is a lady of optimism. Sure, she’s a realist, knowing that work is always required in life and love, but she chooses to seek the sunshine in every moment. It isn’t easy and, frankly, it doesn’t always work. Elodie wasn’t always this way. Not so long ago she stayed under the covers, under the quilts, as much as possible. The world felt like a lot too much. It all changed the day the sunbeam hit her. It had been gloomy outside and in. Like most gloomy people Elodie lay napping fitfully. Then the sun broke through the clouds and hit her square in the face. Without thinking about it she breathed, nestled, and relaxed like a cat curling up in the sunbeam. Her nap became restful and when she woke the clouds had broken. Elodie could see the sun again. She vowed then and there to seek it out. Tropical vacations or moving to the South of France not being an option, she looked for ways to bring the sunshine to where she was as much of the time. Being optimistic doesn’t automatically make the sadness go away, but stepping into the light is the right step for Elodie.

This particular quilt nearly did not make it. It started from a random block, a sample made for a class. That block ended up in the donate pile that never got donated. A random rediscovery and the right timing turned that one block into a quilt top.

To make the blocks I shopped first in my scraps, using any piece in the colour story that was big enough. After that I went shopping in my stash. That makes this quilt both scraps and scrappy. (Ask me the difference in my trunk show Scraps Vs. Scrappy.)

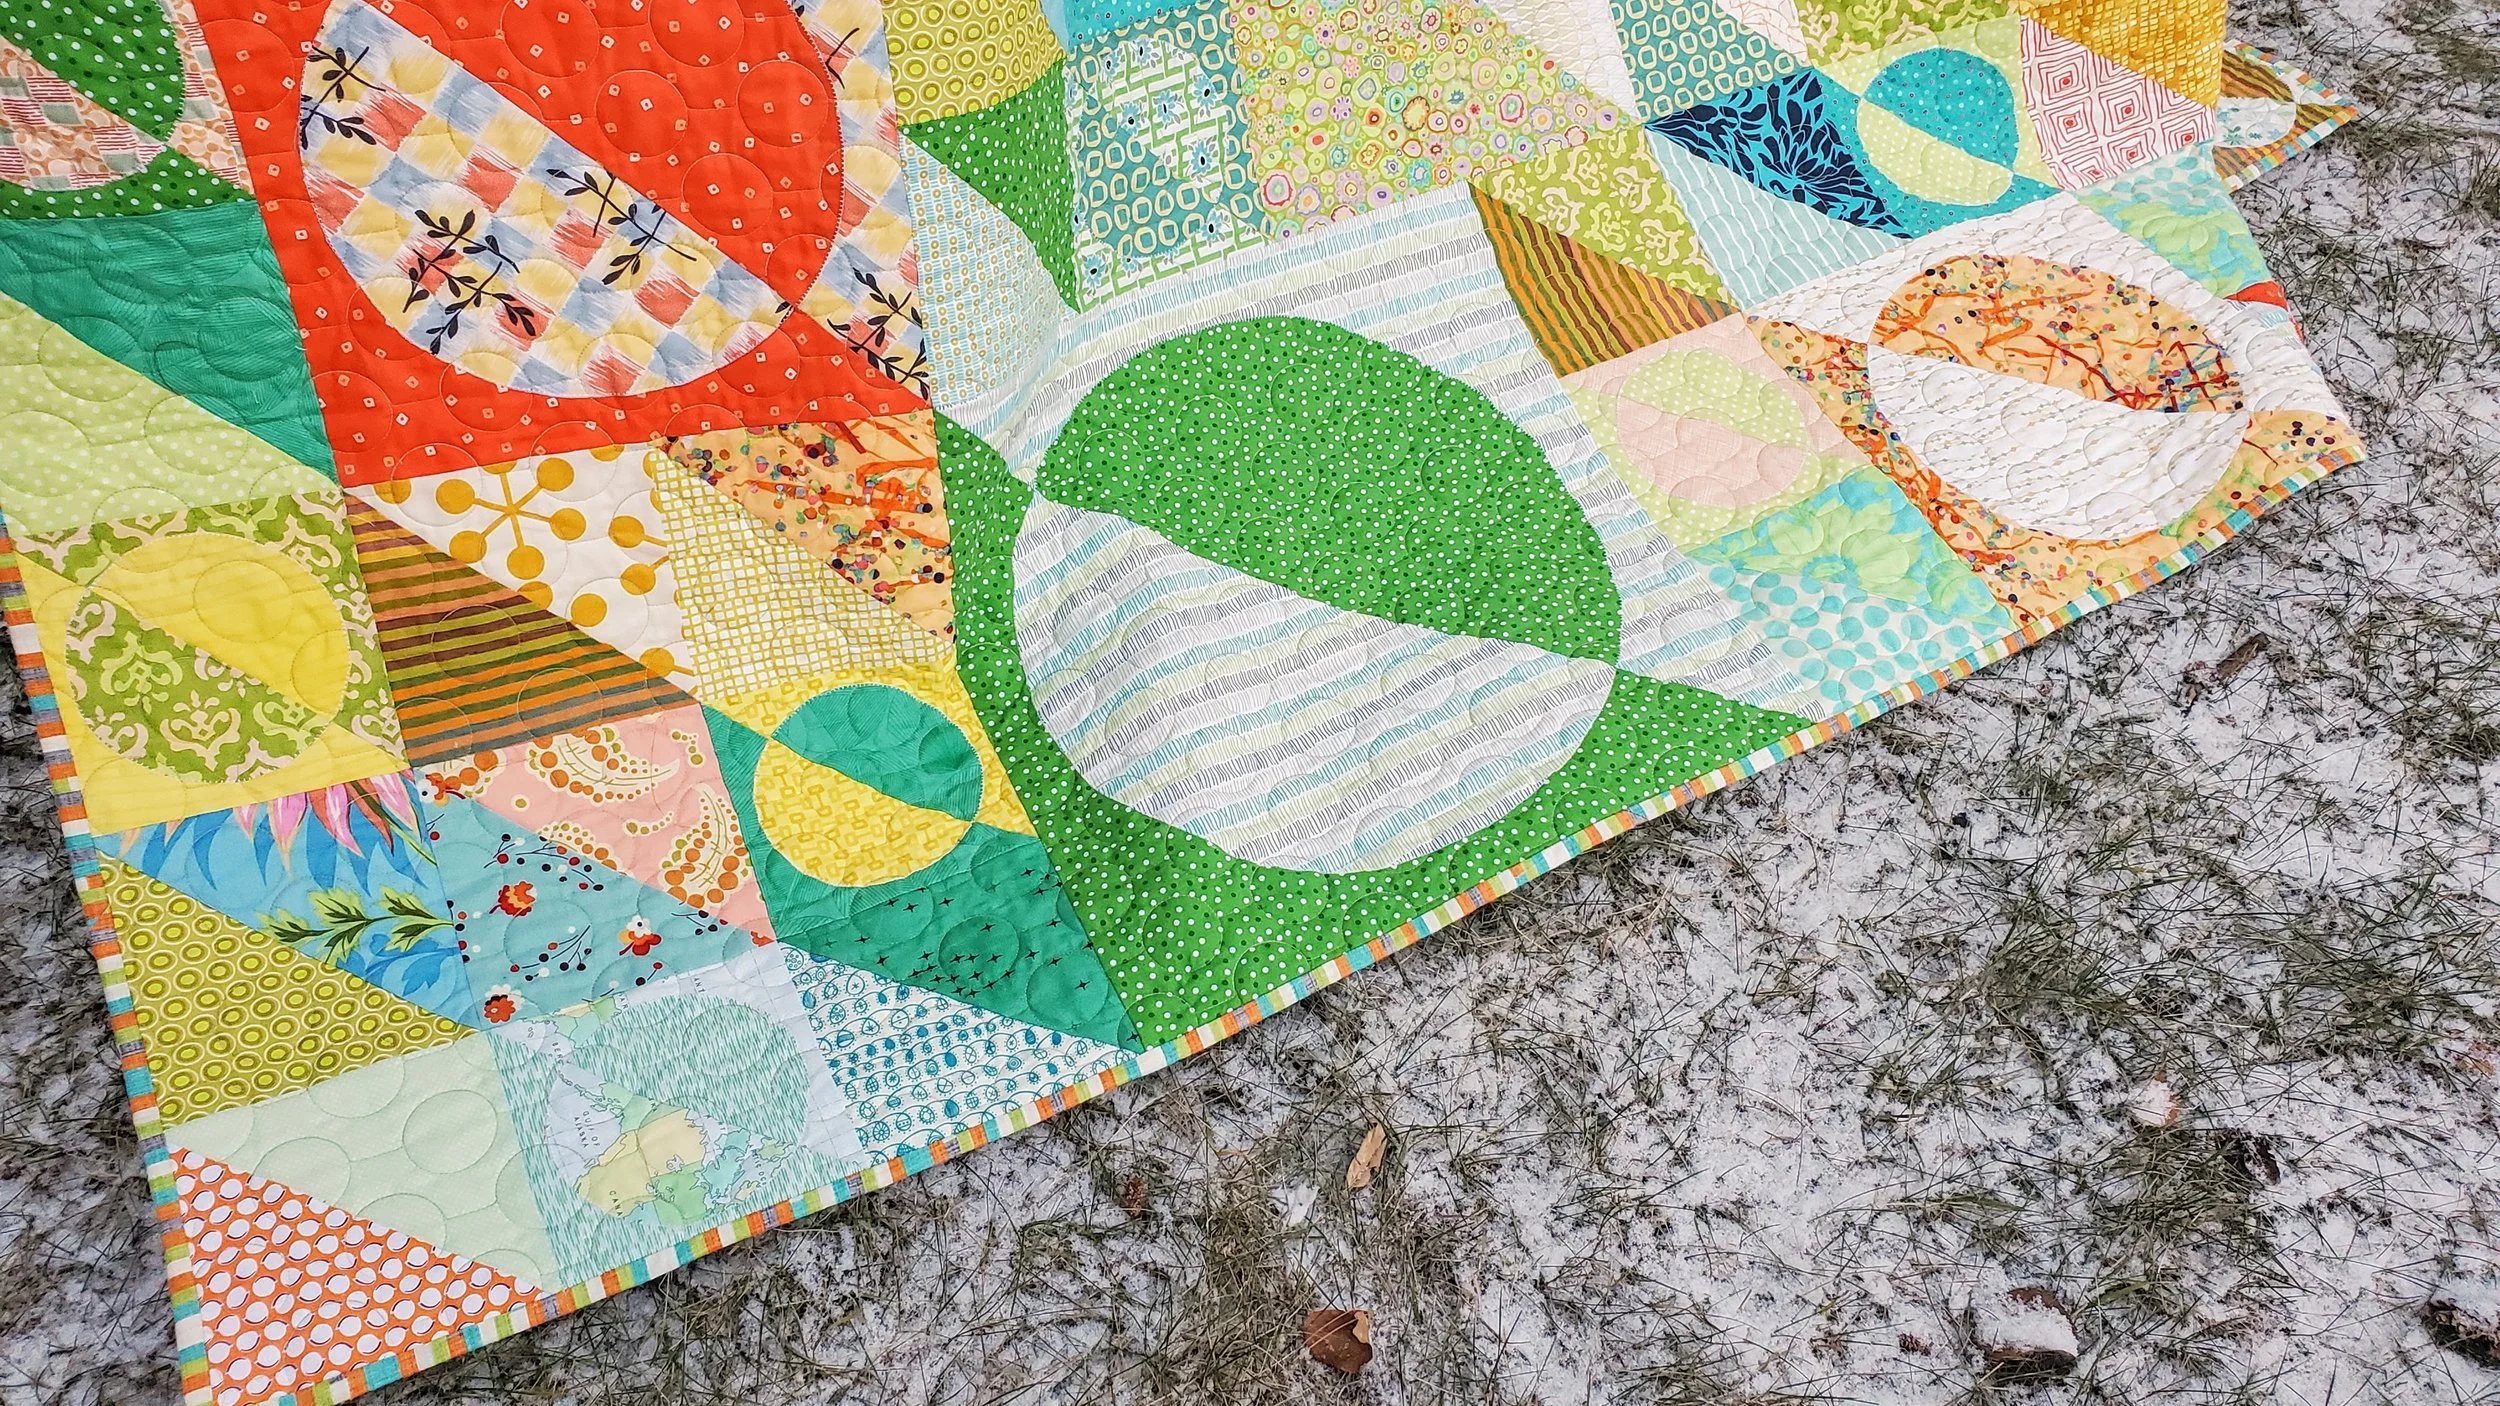
It took me quite a bit to take the blocks - some plain half square triangles and some of those turned into circles - and find a layout that felt cohesive. I made the blocks in a colour story or orange, yellow, green and blue in 3 different sizes": 6” 12: and 18”. Some have high contrast, some have low contrast. When it came time to get them all on the design wall the challenge was evident. I tried laying it out my value, by colour, by size, and many options in between. In the end I played with colour more than value (against my usual advice) and keeping a strong diagonal component in the design. I’m pretty happy with how it ended up. And the original block found a home in it.

The quilted was completed by Phillipa Gelinas. I chose this great circle panto to compliment the design of the quilt top. Elodie deserved a fast finish. Rather, she deserved to be welcomed and used quickly. Deserved/needed.

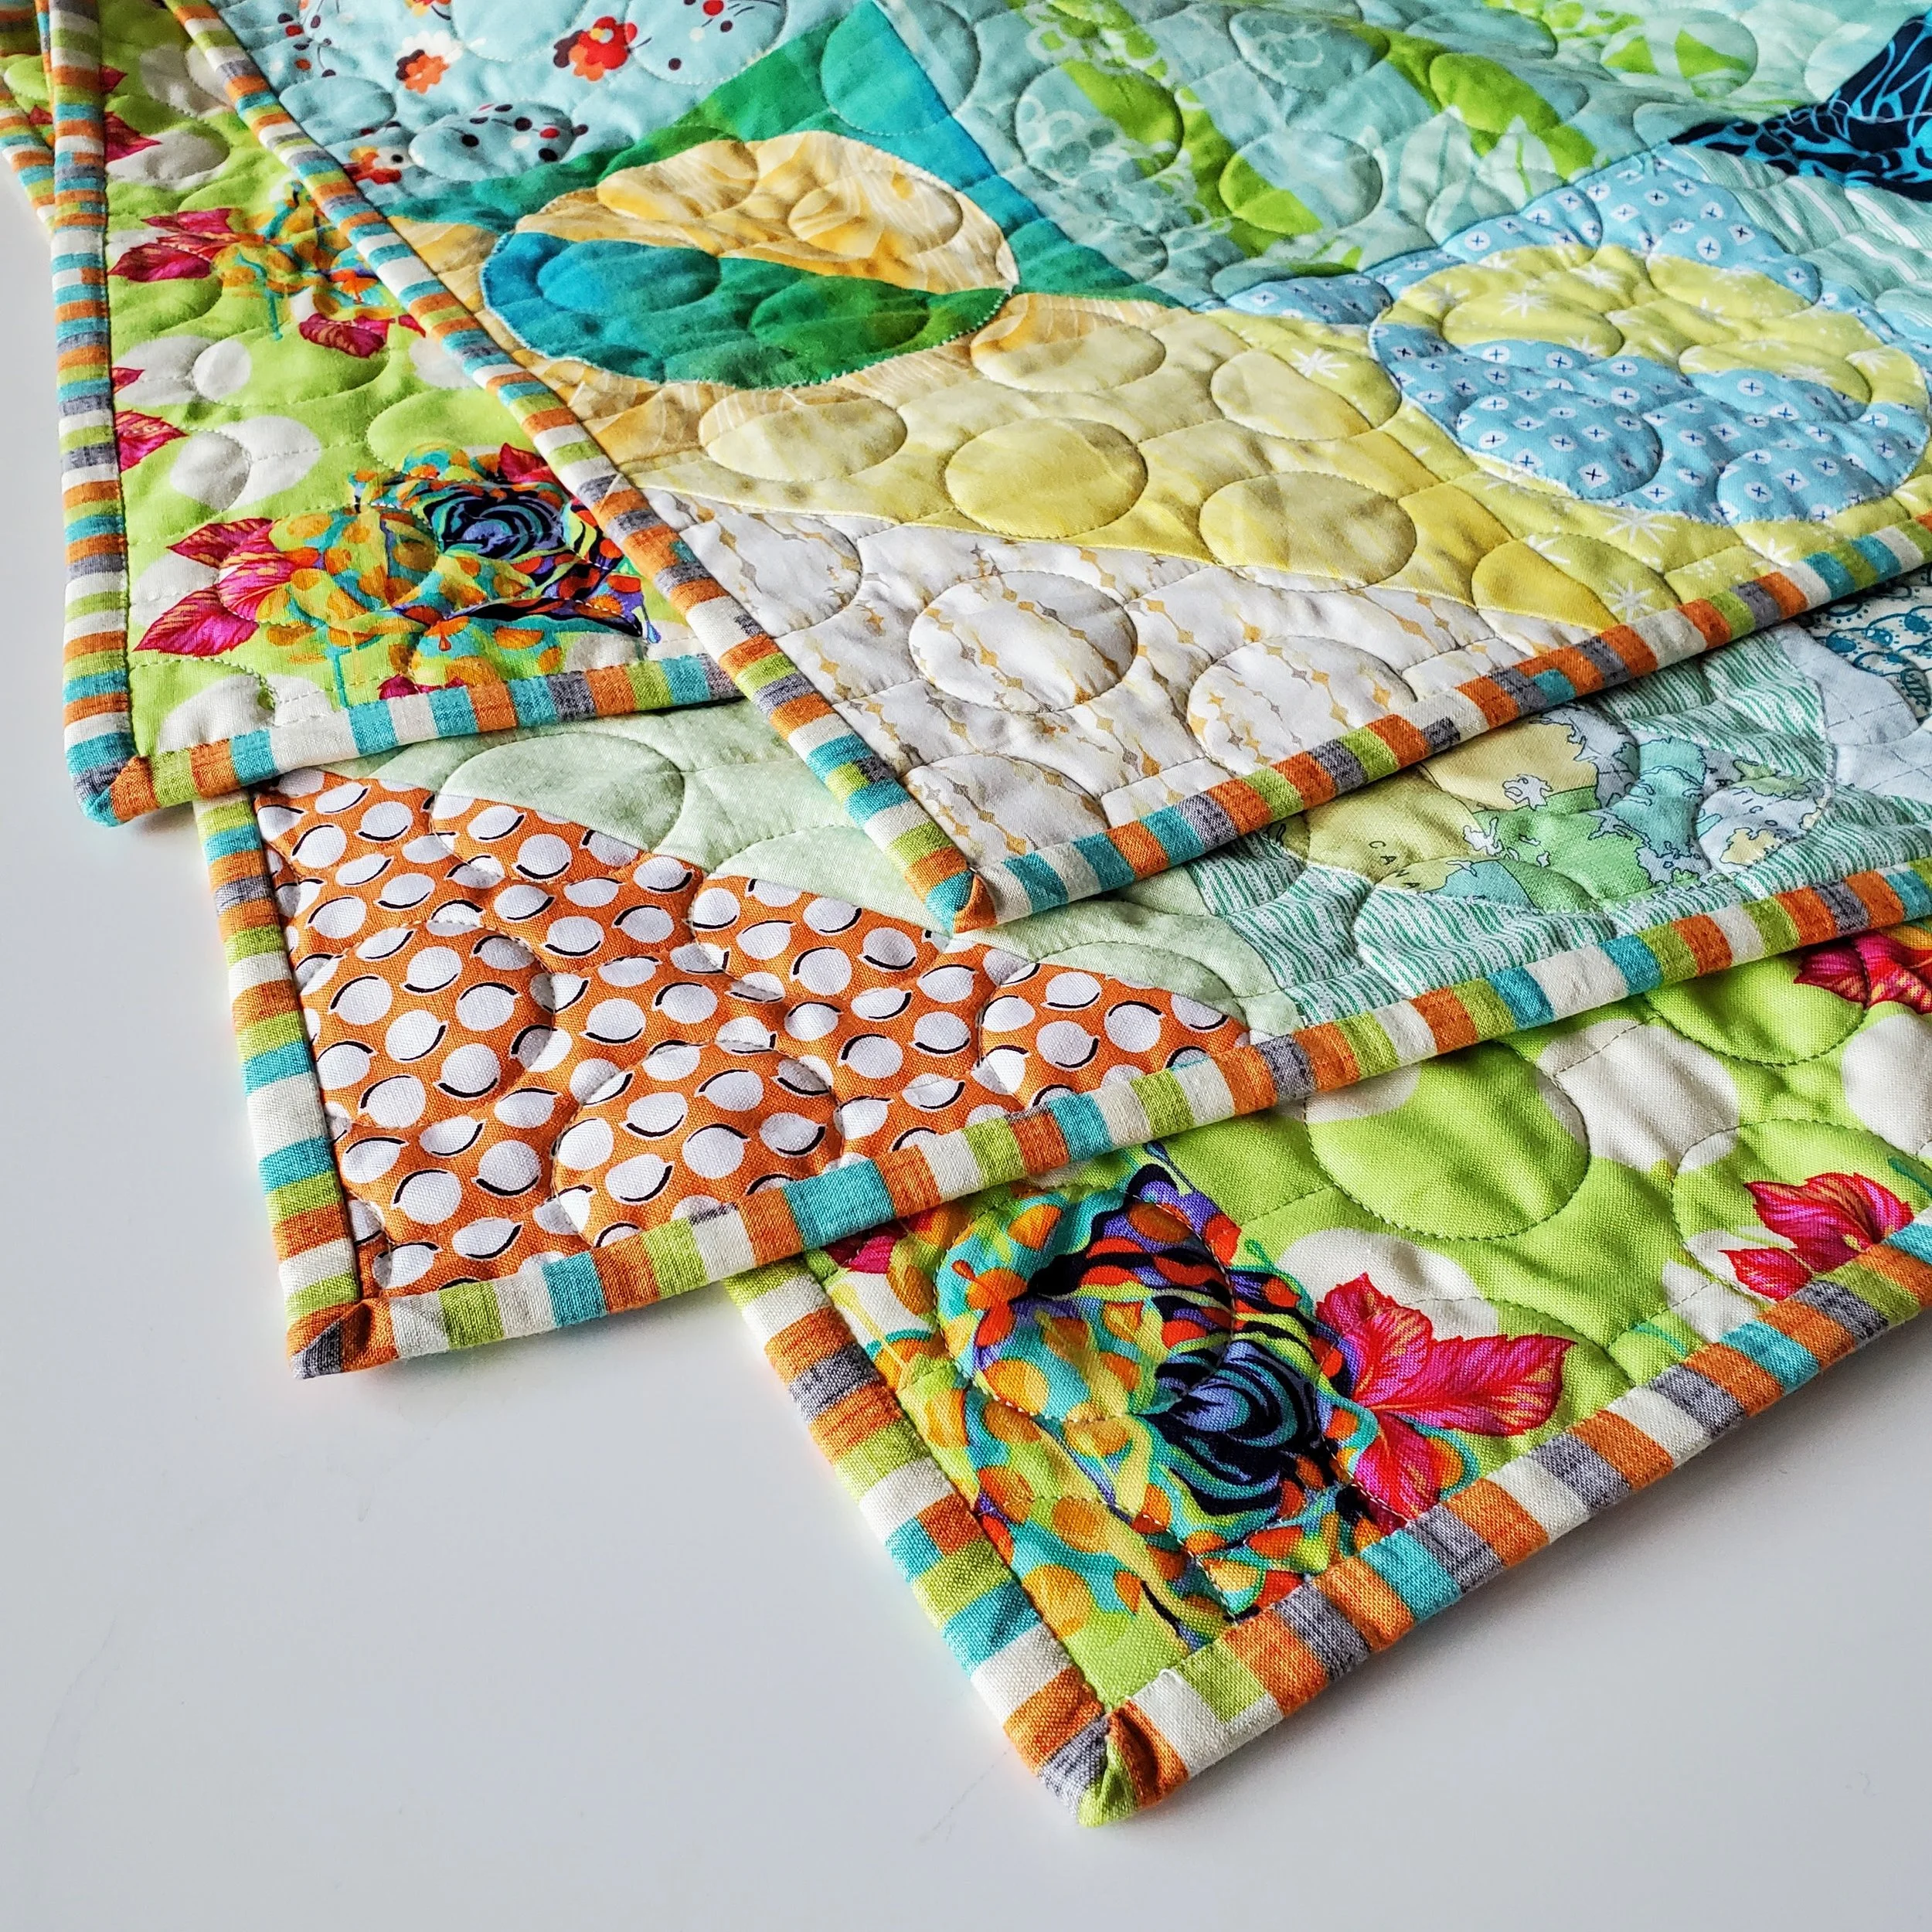
My original plan was hot pink binding and that was before I picked out the backing fabric! When it came down to it though it didn’t look right. We know I like a contrasting binding but it just wasn’t the right thing to do here. I found this fun strip in my stash that ended up being just perfect. Like it was meant to be. Perhaps like that sunbeam?