"tips and tutorials"

Yes, You Can Change Your Mind While Making a Quilt

Collection of rectangular quilt blocks in scrappy, multicolour layout
Multicoloured Scrap Quilt Blocks

Did you know that you are absolutely allowed, even encouraged, to change your mind while making a quilt? Far too often folks think that because they started down a certain path in the quilt making process they are not allowed to veer from it. This isn’t school and standardized testing. Or, as my husband likes to say when the children complain about him changing his mind: I’m an adult and I can do whatever the eff I want!

Definitely applicable to quilting.

These blocks started as class samples. I use them in my Scraptastic class as one option for when you are playing with scrap strips. I make one in a class, put it with the others and move on with life. I had zero plans for the blocks, they served as a teaching tool.

Last month I was teaching a virtual workshop with the Thompkins County Quilters’ Guild out of New York. I had a pile of these blocks on my cutting table and starting arranging them to show possibilities. Quite quickly I was struck by a certain layout of 8 blocks. I don’t think I even had 8 blocks at the time, but I could see potential.

After the class, I finished up those 8 blocks and quickly sewed them together. Smitten, I decided to make more blocks. A lot more blocks. My initial plan was that top picture there. Every 8 blocks sewn together with them all assembled in an alternating layout. In my mind it was perfect.

Not so much on the design wall. My seemingly brilliant idea looked a hot mess.

When I am lecturing and teaching about using scraps one of my big messages is about finding order. When people complain that scrap quilts look messy it is often because they do, because they are lacking order. You can find that order with colour selection, playing with value, or through shape. My blocks are multicoloured, improvised, and made without regard to the value placement of the fabrics. That meant that shape matters the most.

Now my initial blocks - an improv variation on the Prairie Braid - are all trimmed to the same size. That helps. I thought the block layout made with 8 blocks would be totally fine in repeat. As you can see in that top photo, I was wrong. Even with the repetition of the original block shape/size and the repetition of making the larger square block, it still looks messy.

Here’s the thing, nothing was sewn together or set in stone. Even if it was, I would have taken it apart. If it’s not working, it’s not working. If you subbed salt for sugar in your cake would you still eat it? If you installed a bathtub too small for the space you framed, would you just live with it? No matter what, you aren’t tied to finish something that isn’t working.

So I tried something different. I played around and realized the second layout was much stronger, way less messy. Better yet, it used the exact same amount of blocks that I had planned to make!

That is, until I changed my mind again.

Unquilting

Sigh… Big sigh.

Last week I was all excited because I gave myself a day to quilt. It’s been a stressful few months and I needed a day to myself. I also needed a quilt finish or two in order to clear my brain. So I booked a day on the long arm, got a few quilts all prepped, and went in to My Sewing Room to hang out with Emily, who runs the long arm department there. She helped me load my first quilt and thread the machine - the two tasks I always forget how to do. Otherwise I feel pretty comfortable on the long arm. I started up and went along merrily.

Yes, I checked my tension - once - at the very beginning. Admittedly, it was hard to see as it was yellow thread on a yellow part of the backing, but it looked okay. And so I rambled on. Nothing fancy with my quilting, just loops and stars all over. I was listening to some upbeat dance music and in my groove. Emily was doing her thing and left me as I felt more than confident.

Overconfident.

About halfway through I noticed that the tension was off on the stitching. I saw the blue fabric of the background as it wound around the bars and I could see my tension was off. I made some adjustments on the computer of the long arm and continued. Folks, it did not get better. Finally, I conceded to my mistake and called Emily over. I should have stopped there but I decided to proceed, after she made more adjustments. Bad move. Long story medium, we never fixed the problem. I pulled the finished quilt off the frame and set it aside. Maybe it will get fixed with a wash? I foolishly thought to myself.

Emily tinkered with the machine - the bobbin casing was a bit off - and we loaded the second quilt. This time I pulled out an extra bit of fabric and tested the tension before I touched needle to my quilt. Much better! I proceeded to quilt the second quilt without any problem and in the course of those few hours accepted what I needed to do on the first quilt. While waiting for me to finish Emily graciously started the job of ripping stitches for me.

Pile of discarded yellow sewing thread on the back of Uppercase magazine

It’s been a long time since I made a mistake like this. I don’t blame Emily, even though I was renting and she was technically supervising me. I know enough, and made that clear when starting that I should have caught this myself. It would be easy to get really frustrated and beat myself up. Or I could get angry and blame Emily too. Neither action is going to help. The only thing to do is let out that big sigh, find your favourite seam ripper, and sit down to rip. It’s just a mistake on a quilt, it isn’t life threatening or even life changing.

Ripping stitches when the tension is loose on one side is actually quite easy, just very time consuming. This quilt measures over 60” square and I have a tendency to quilt things to death, so there was a lot of ripping to do. Thankfully, my son and I have been rewatching Ted Lasso so I sat with him and ripped, and ripped. He would fiddle with the pile of thread that grew with each episode. Therapeutic for both of us in many ways. It took me the entire third season and almost all of the Netflix series One Day to finish ripping. I only put one hole in the backing so that will be an easy fix.

It was all just a mistake, it happens. I know many of us would get ourselves quite worked up over this. Maybe call ourselves a few names? Cast blame and shame? Perfectionism is a nasty beast. Of course we want to improve, not feel like we are wasting time, and get things finished. That’s normal and understandable. But making ourselves feel bad over quilting? Totally uncalled for and unnecessary. Shit happens. Acknowledge it, clean it up, and move forward.

Time to rebook in to the longarm. This time I will remember to bring an extra piece of fabric for testing tension. I will also not be so cocky and use the resources there (Emily) to make sure I am doing things right.

Toque Block Swap

Improvisational sewn toque quilt blocks in a snowy spruce tree

Have you heard about the Toque Block Swap?

It’s a fun, playful swap that came out of the Quilters’ Playcation Adventure Sewalong. I made a toque block one week and by the end of our weekly live I had committed to organizing a swap!

Anyone can sign up. You can make 1 block or you can make 20, it’s up to you. Mail your blocks to me, I will swap your blocks for the same number made by other participants and send them back to you. The tutorial to make the block is here, but feel free to individualize things however you like.

Sign up now, deadline for mailing blocks is January 10, so I hopefully receive them all by January 20, 2023. (So you can get through the holiday season without any sewing stress from this, and maybe even relieve some stress by playing.) Then my plan is to get all swapped blocks mailed out by the end of the month.

Sign up here.

Label Your Quilts!

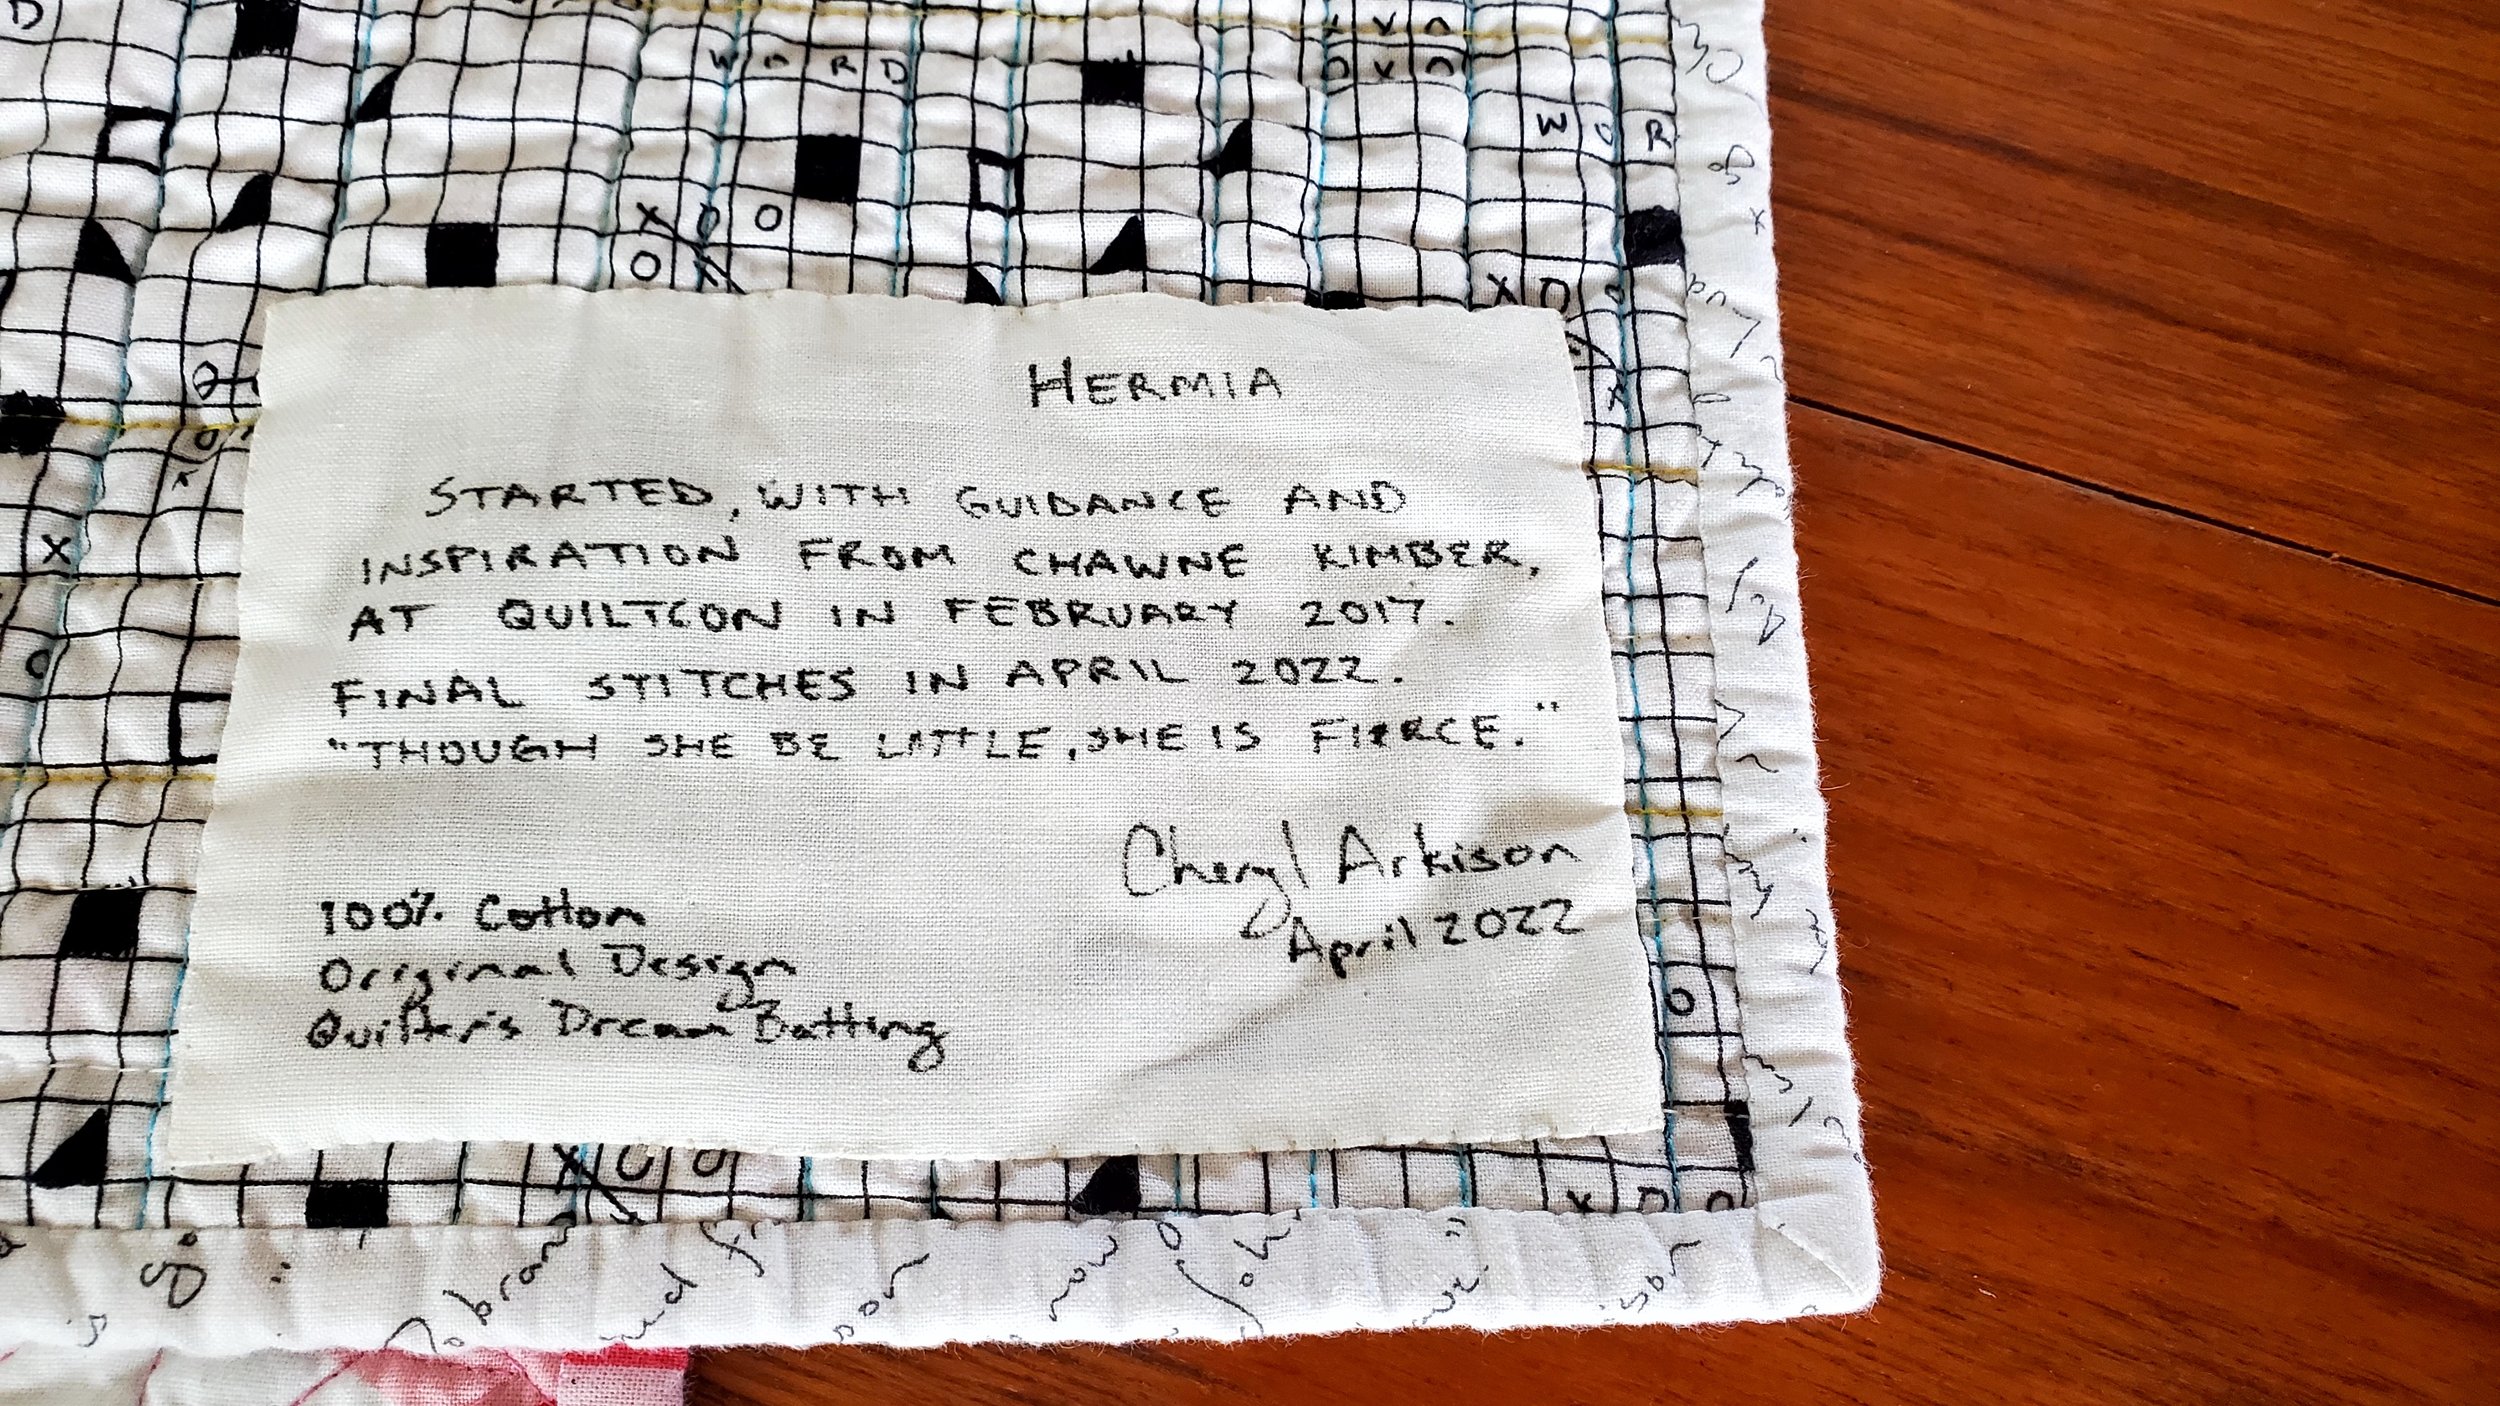
The corners of three quilts, from the back, with hand written labels

Everyone has a different approach to labelling a quilt. Some don’t do it at all, others design and make embroidered labels. Some simply sign it with a marker, others screen print fabric and make it part of the back. Some just add a ‘signature’ bit of piecing or binding, others have custom labels made and sew them in. Truth be told, there is no right or wrong way to do it. What is most important is that you put your name to the work.

For one, be proud of the work you did. You made that! Put your name to it, on it, in it.

Secondly, give your quilt the history to live beyond you.

There are various schools of thought about what should be included on a quilt label. Here is what I think should be on it:

  • Your name

  • Date the quilt was made/finished

  • Material make up

Anything else is just gravy. And gravy is good, so I include other things. I like to name my quilts so that is always there. If there is a specific inspiration or starting point, then that gets included. If I used a pattern I acknowledge it. If it is a gift, I like to put the recipients name on there too (and wedding/birth date if it is for that.)

Your name and the date is important. This is the history part. Should your quilt live beyond you or be separated from you (by choice or not) there is a record of the maker. If your grandchildren uncover the quilt one day they will want to know! So will the historian, the neighbour, the treasure hunter, the buyer.

Material make-up is very useful information for care instructions. I work almost always with cotton, including cotton batting and thread, so this helps any recipients present and future know how to wash it and care for it. If I use something different, then I include that. You could get super detailed here and list the thread used, batting chosen, and even fabric lines. The level of detail here is personal, but at least include material make up.

I know that labelling is a pain. We are so excited to finish the quilt, to wash it, to cuddle with it that we very often skip this system. Including myself in that majority. But I always label a quilt before gifting it. And lately I’ve been feeling the guilt of not having all my quilts lately. Might be the Covid stress and fear of the unknown - what quilts will outlive me? The solo show I had recently forced me to label a bunch of quilts as I did not want them going out into the world with no record.

As for ways to make labels, there are as many ways as there are quilts. I’ve seen people screen print fabric and sew it into the back of the quilt, embroider and stitch on a label, write right on the back of the quilt, sign the front, get custom labels printed, and appliqué something. Myself, I’ve done fancy ones where I’ve used leftover fabric for framing before stitching it onto the back, printed ones with special papers, intricate traced designs, and plain writing on white fabric. The last one has been my go-to of late. I use scraps of white fabric and a Micron pen to write it. Every now and then I might decorate the label with fabric markers. Nothing fancy, easy, and gets the job done. Unobtrusive too. Most importantly, it is there.

One last thing, a little tip I learned years ago. If you are gifting a quilt that will be used in a public setting like a dorm or care home, undo the binding and write some info on the inside of the binding before stitching it back up. Labels that are stitched on can be removed if someone really wants to claim the quilt as their own. But having a signature hidden in the binding then ownership can always be proven.