"improvisation"

Euroa Quilt Update

Remember this one? I barely did. In the last year and a bit I think I’ve made 3 little blocks, just 3. I need 100 for the whole quilt, so that doesn’t exactly amount to much progress. Full transparency: I started this quilt in 2016. Frankly, I just wasn’t in the mood. I had other things to play with (shiny object syndrome).

Lately, however, I’ve been wanting to sit in the quiet. Maybe some music, maybe a show, but mostly just sitting still. The season for slow stitching returns. I pulled this out of the closet, hung up what I have finished, and got excited to stitch again. Sure, I’ve always been sewing, but the desire for this English Paper Piecing was gone. After those two hand work projects of 2023 I wanted more of that slow stitch time.

Turns out I only need 26 blocks to finish this. That means I am 3/4 of the way through. That isn’t that much, really. I’ve never timed how long it takes me from start to finish on one block, but I would venture that it is a few hours. That includes picking the fabric and prepping the pieces, basting, then stitching the block together. After that there is stitching block to block to block to block (I use 4 to make a larger, mega block). Then I have to assemble rows. Finally, add rows to each other. It’s all done by hand. I would guess I have at least 120 hours of stitching in front of me. Now, if I could sit down every day for hours a day, well, it wouldn’t take that long! But this, like most of my quilt making, is a side project to life.

Actually, this kind of slow stitching is life. No, I don’t mean that I am living for it. More that it is a big part of me and what makes me whole, calm, and living creatively. So yeah, it’s time to come back to this.

A Year of Stitched Self Portraits

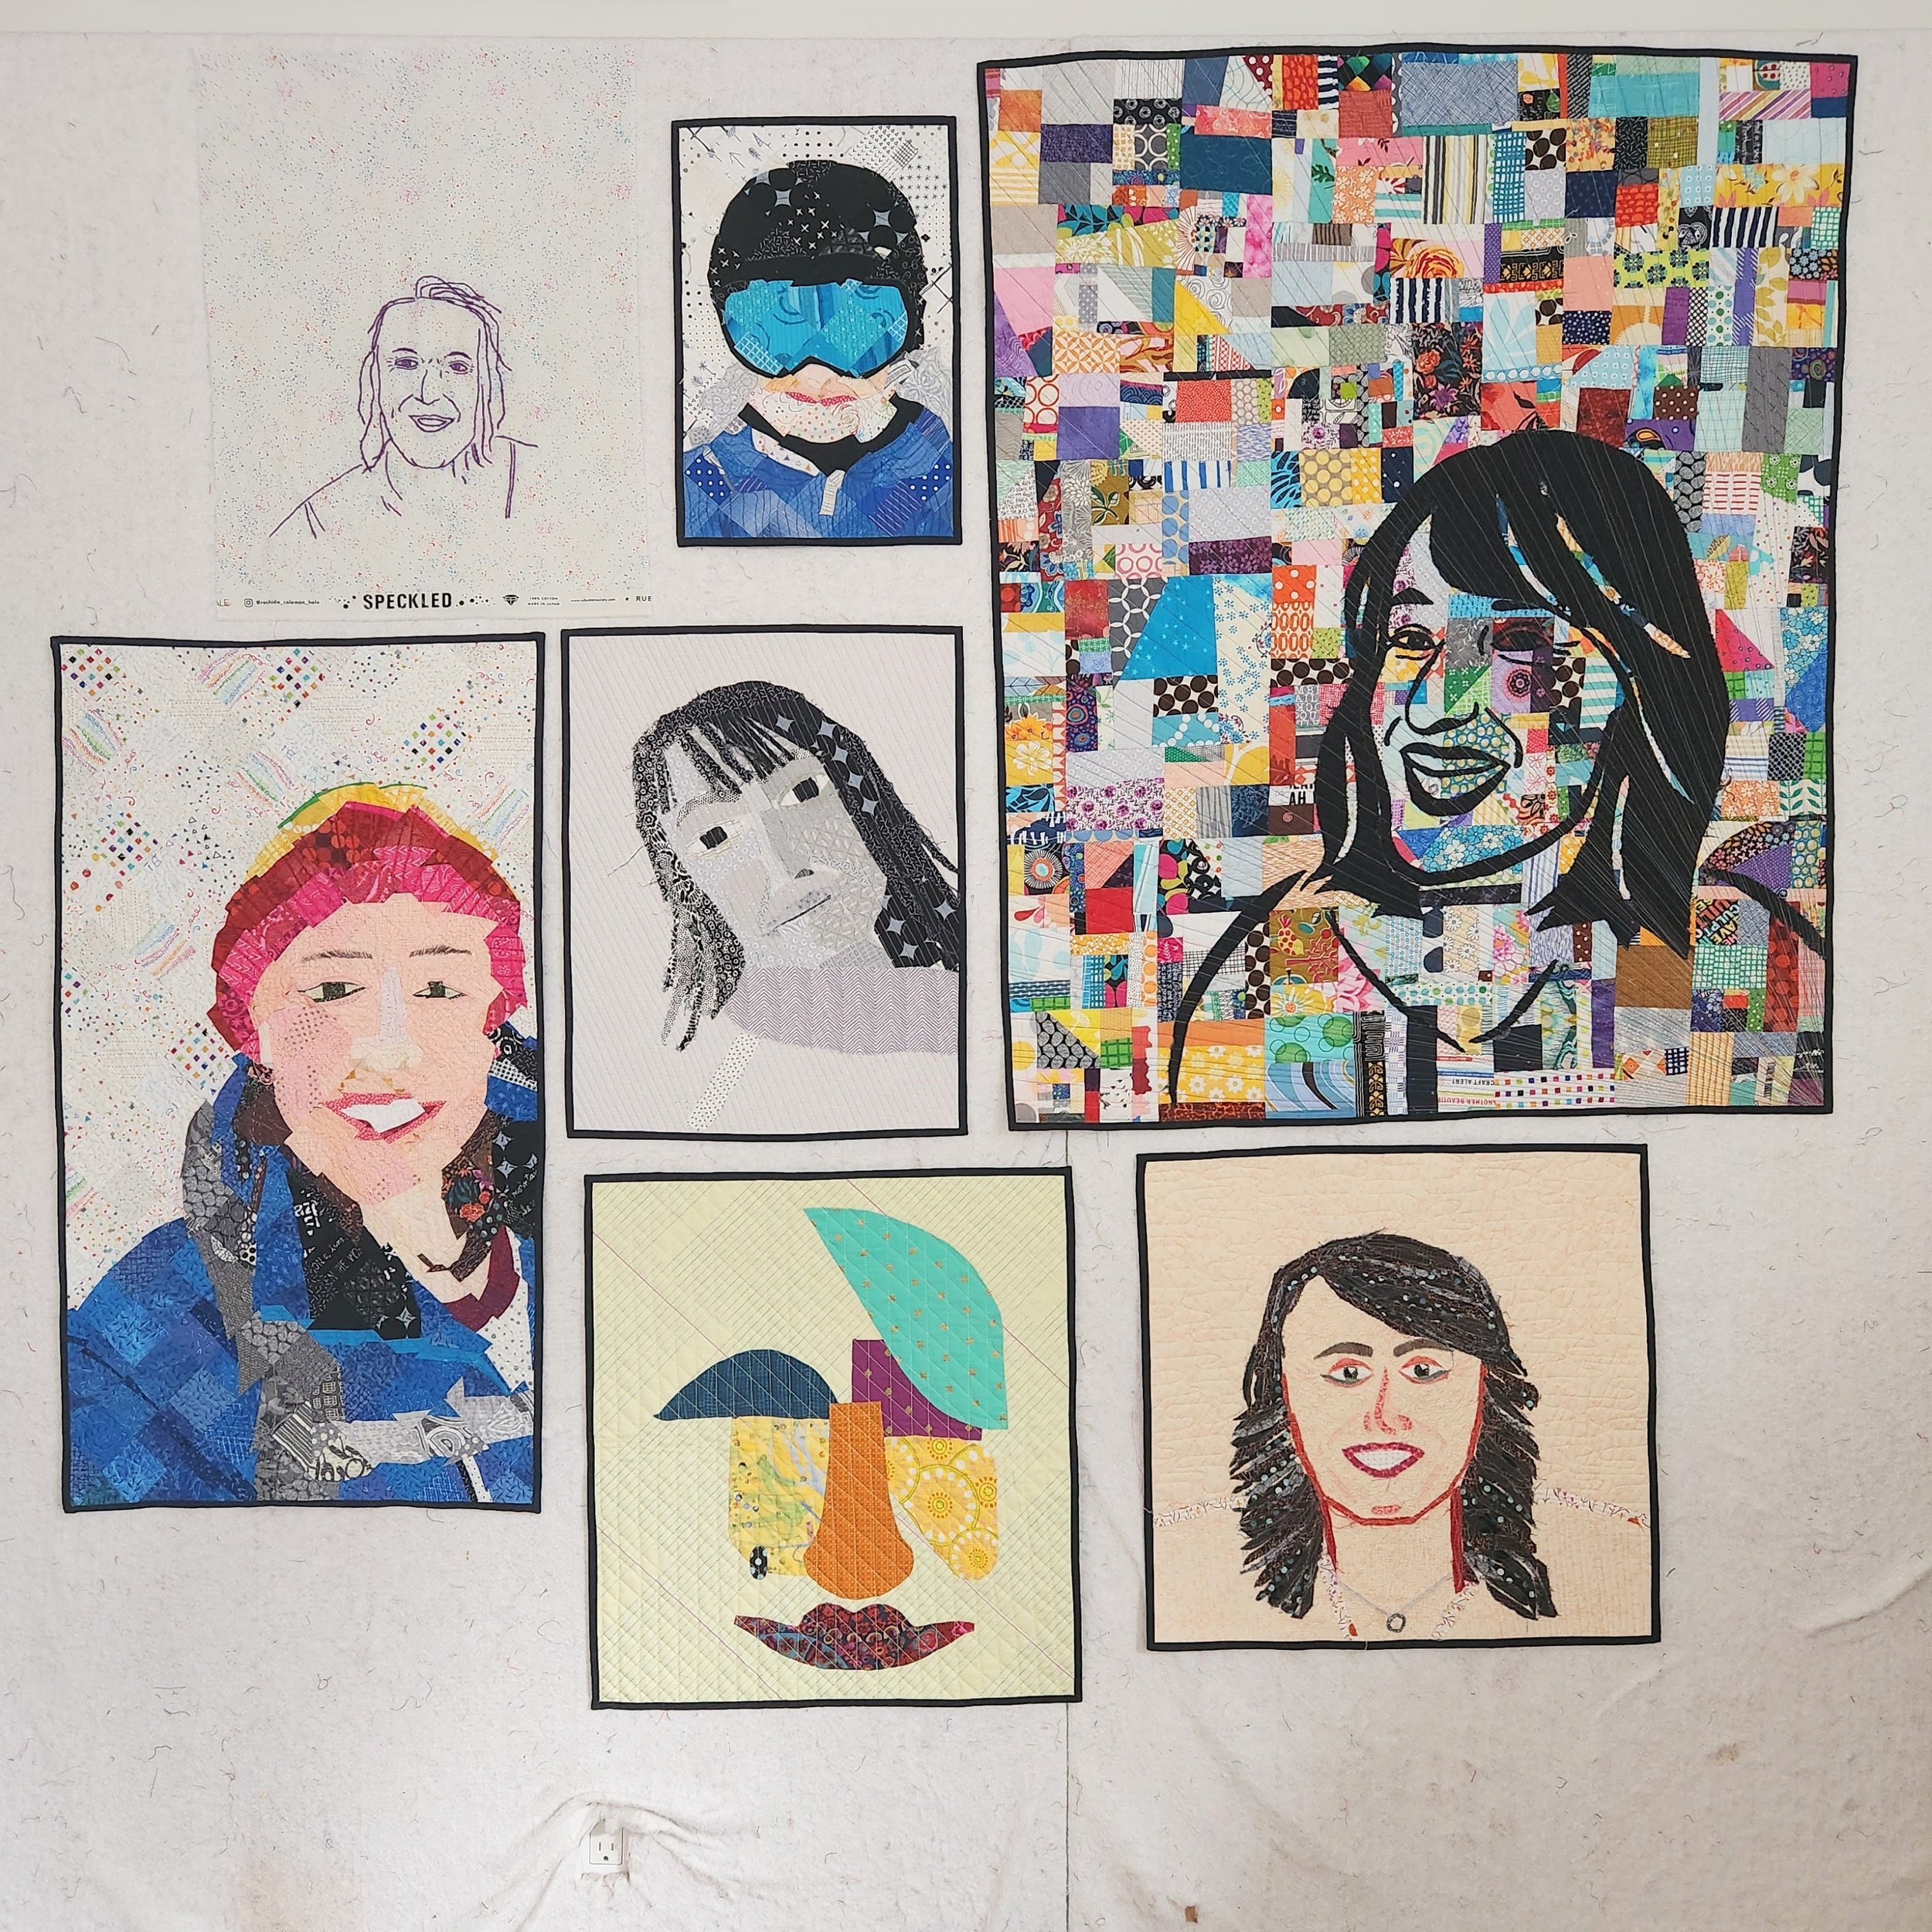
A year of Morning Make.

Each day, before tea and clothes and the news and my phone, I make. In 2023 I spent all the time making and remaking myself. Mostly figuratively, but the process required a lot of self reflection. It can’t not when you spend a portion of your day staring at yourself, stitching and making. Truth be told, I’m kind of sick of myself at this point!

Clockwise from top left:

  • Embroidered line drawing, based off a painting I did of myself based off a pic from the beach in San Diego last March.

  • Skiing selfie done in Tina Tarr’s Stitched Mosaic technique.

  • Raw Edge Applique on a crumb background - this one feels the most me in terms of a quilt.

  • First one I did, based off of the headshot here on my blog using Melissa Averinos’ Making Faces in Fabric book and her process.

  • Cubist applique. Saw a video about a cubist artist and felt inspired. Just freehand cut shapes and stitched.

  • Based off a selfie I took on winter hike, this time I adapted Tina Tarr’s technique for improv piecing versus applique. Hand stitched the whole thing to quilt it.

  • Another one using the Melissa Averinos’ technique, but playing with a black and white photo. Nailed the values, but boy do I look dead!

Here and there over the year I would draw and paint too. Nothing to share there, just experimenting and exploring. Always self portraits.

It was a great exercise in self reflection. Not only did I fall in love with the dimple I never really noticed before, but I learned to look at myself without criticism. Not necessarily with love, but without criticism.

All of this was a personal exploration. I did nothing in the way of classes or lessons. Where it was someone else’s technique for the quilts I used a book or online class. What I did not do is actually learn how to draw or look at people. I also had a number of ideas for different kind of quilt techniques for portraits. That’s why I am continuing this portrait exploration this year as well. There is a still so much to do!

Only now, I feel somewhat strong enough to at least sketch some other people. Let’s see where 2024 takes me.

Radha - An Exploration in Scale in Quilt Design

Radha

80” X 80”

Just 16 large blocks. They literally took me an hour to sew. And then hours contemplating their layout, but that is beside the point. When you want to play with scale, going big is the easiest way to do it!

To make this quilt I took roughly 2 meters of a black on black fabric and 2 meters of a white on white. I split it all into even squares. Depending on the width of your fabric that ends up about 21” on each side. (A meter is about 40” so I used a bit more than that to get them to be squares.) After making pairs of black and white I sliced through each pair on the curve, freehand. This improv curve technique is a comfort and a classic to me. After sewing each set back together I was left with 16 blocks.

Then they sat. And sat. I thought I was going to use them for one thing, then another. Then, this spring, I was hunting my stash for ideas. Our oldest nephew was getting married and of course I was going to make him a quilt! In conference with my mother in law and niece it was determined that black would be a favourite colour in a quilt. Not my norm, but I could do it. Then I remembered these blocks!

Once uncovered, pressed, and measured it was clear they weren’t all the same size. rather than trim everything down to a smaller size I decided to add some strips to make those few blocks bigger. And what better option than neon solids? I added them randomly based off of what I had available.

Then I spent hours over days trying to come up with a layout that worked. You can see some of the ideas here. In the end I went with something that felt more black. Perception is everything, right?

Continuing with the neon theme I quilted the whole thing with a bright peach thread. A few episodes of Revisionist History while on the long arm rental at My Sewing Room and it was finished. Then the mad scramble to get binding on before I left on our big summer trip. The wedding was the first weekend we were away.

Normally, I don’t get too fussed about finishing wedding presents on time. Maybe I should? That’s another story though. But I was feeling a bit guilty that my daughter and I were missing the wedding so I really wanted to have the gift available on time.

The backing is a combination of Tula Pink neons and that great green whose name I cannot remember. The Tula was perfect not only because the colour but both my nephew and his bride are big animal lovers. Now it has the black side and the bright side.

If you’ve been at a trunk show with me over the years you’ve heard me tell the story of how my first quilt was made after I found out my future sister in law was pregnant. It gave me permission to try quilting. My first quilt ever was made for this same nephew. Well, when I was binding the quilt I realized I still had 1 scrap from that very first quilt! It fit perfectly on the binding. I adore this full circle moment in both family and quilting.

Quilters' Playcation Adventure Sewalong 2024 - Getting Started

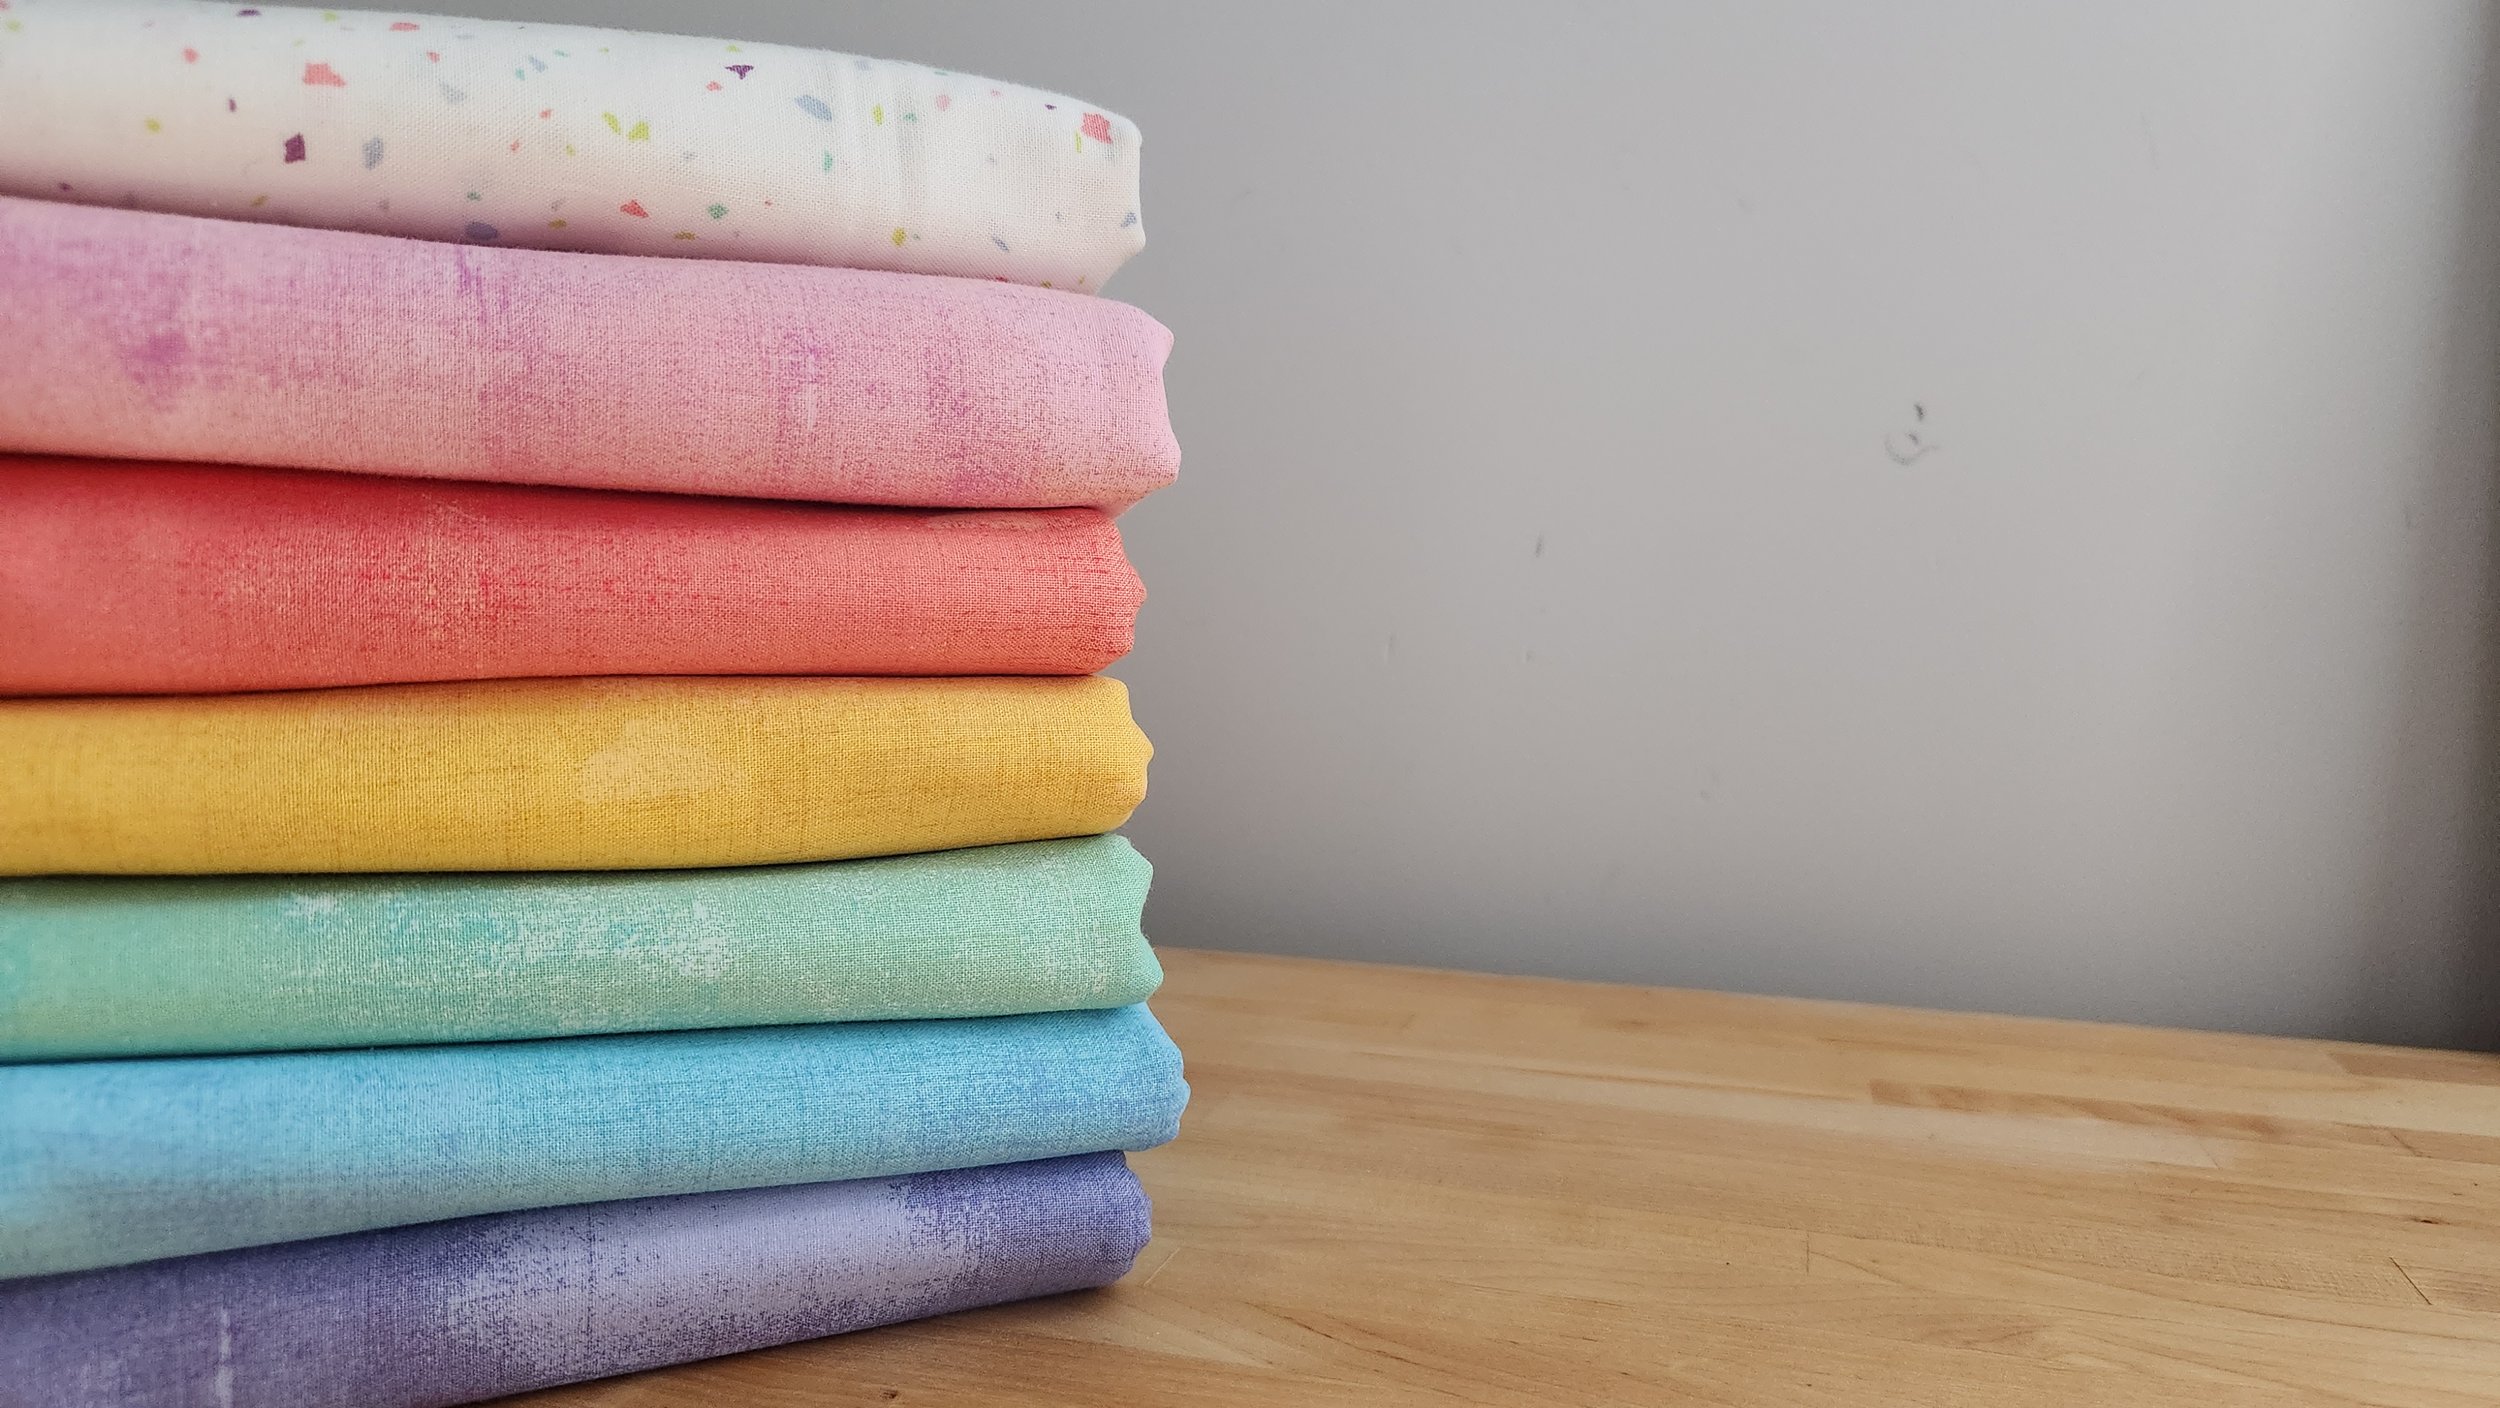
Stack of pastel rainbow fabric with Adventure Sewalong dates

It’s back!!!

The 2024 Quilters’ Playcation Adventure Sewalong starts next Tuesday, January 9. Weekly, for 49 weeks, I will lead you through a free, live improv quilt block tutorial. Like 2023, this year’s instalment of the Adventure Sewalong has a theme. Rainbows will be our inspiration, our guide, our joy on this playful adventure. Seriously, who doesn’t love a rainbow?!

DETAILS

Tuesday

10 AM Mountain

Starts January 9

Live on Instagram @cheryl_arkison

Saved to You Tube each week

COLOUR SCHEME NOTES

With a rainbow theme the colour scheme seems kind of obvious. That doesn’t mean you have to go with the obvious though. Not all rainbows have to be deeply saturated. Those are gorgeous rainbows, for sure, but you have a lot of other options.

  • Pastel or low volume in rainbow order

  • Neutrals

  • A colour combo you love, not even in rainbow order

  • A favourite fabric bundle that deserves to be used

  • Monochromatic in value gradiation

  • Analogous colours like red, pink, and orange, for example

  • Use your scraps as they come to you

You will need a background colour as well. It doesn’t necessarily have to be white or black, either. Think about this background as a good complement or highlight to your rainbow.

Solids or prints will both work, you always have that choice. I would simply recommend that you use one or the other, not both. The exception being that your background can work as the opposite, as strong frame for your rainbows.

FABRIC REQUIREMENTS

The total fabric needed will depend, in large part, on your block size. The bigger the block you make, the more fabric you will use. We will take advantage of any scraps as much as possible, so know that you will be maximizing your fabrics.

Start with 1-2 meters/yards of each of your rainbow fabrics. Mix and match, as needed. Same for the background.

If you buy fabric for this sew along, as I did for one of my versions, take note of any fabric colours or names. Save them somewhere you won’t lose them. Then, if necessary, it will be easier to repurchase fabrics.

SIZING

One of the reasons I went with 49 weeks this year is that 49 blocks gives us a nice 7 x 7 quilt block layout if you make square blocks. You don’t need to make all the blocks, but if you do, then this is what you will end up with.

How big you make your blocks is up to you. As you will hear me say many times, you will want to make at least a handful of blocks before you decide on a final size. But if you want to aim for a certain size finished quilt (at some point) then here are some sizing suggestions for you:

6.5” blocks = 42” square quilt

8.5” blocks = 56” square quilt

9.5” blocks = 63” square quilt

10.5” blocks = 70” square quilt

12.5’ blocks = 84” square quilt

Simply use this as a guide. It’s pretty easy to do the math, or even ignore the math, no matter what size you blocks end up being!

Like I always say, come to play without the expectation that your make HAS TO BE SOMETHING. So come, have fun, make a block or not. You are under no obligation to turn what you make into anything.

This is what I am going to play with for version 1 of my own rainbow. I’m already working on a different saturated rainbow quilt so I decided to go pastel. After a survey of my stash I realized that I didn’t have what I wanted on hand so I went shopping. I had a stack of solids in my hands, I did, then I got distracted. First I went to a tone on tone mix. Then my fear of the fabric running out got strong so I changed gears slightly. I picked out all the Grunge options in the store and made myself a pleasing pastel rainbow. Yes, I took my own advice and took note of the colour names just in case I run out. My background is this fun, creamy terrazzo print. I debated a denim, but decided to lean in to the fresh and soft look of the pastels instead.

The second version I am going to make all comes from my stash. My one and only fabric collection - Tag - came out back in 2017. I keep using the fabrics, but when you get a bolt of each, you have to work to use it all! So I decided to make a monochromatic gradiation with the fabrics. The bold, large scale print on top will be the background.

These are going to give me two very different rainbow themed quilts. I am very excited to see where I end up! That’s improv for you: starting without knowing where you are going to end up. So let’s have fun on this year’s Quilters’ Playcation Adventure Sewalong!