cookies

Caught in the Act

Have you ever considered boycotting the entire notion of Christmas baking? Frankly, I'm sure most of us have at one time or another. We're so busy during December and stopping to bake a couple of dozen cookies for a swap, a party, or simply to steal from the freezer for the rest of the month is the last thing we want to do.

Then we see the covers of the magazines and every single one is a Christmas tree arrangement of glittery cookies tempting us back into the grocery store for butter and sugar. Our kids/partners beg for a batch of shortbread or some esoteric treat their mom used to make. Or the guilt hits.

Every year I swear I'm not going to do it. Maybe a batch of Chewy Chocolate Gingerbread or Peppermint Bark. But THAT'S IT.

And every year I bake 3 or 4 more kinds of cookies. Then I pretty much eat them all myself. What a Ninny.

So this year I vowed I wouldn't do it. I swore to my husband and my jiggly tummy that I wouldn't even buy the butter.

Then The Monster started prepping for the concert at school. It was all about The Gingerbread Man. In fact, a reenactment of the story. She's been walking around reciting the damn thing non stop. Then she asked to bake. I suggested gingerbread men. This brought on tears, full can't catch your breath sobs out of fear that our gingerbread men would run away after we baked them. We settled on gingerbread penguins and moose. Thank goodness there are no stories about runaway moose. At least none with catchy songs attached.

I pulled out the icing sugar, sprinkles, and ridiculously fake food colourings. It was craft time/kitchen time/treat time as far as the girls were concerned. It was a messy way to kill an hour. That's how I approached it at first. Still a Ninny.

The messier it got, however, the happier we all were. Grandma was visiting and happily iced the requested purple and pink penguins. We eventually laughed at the number of sprinkles underfoot, joking that one of us was going to wipe out like it was a pile of ball bearings and we were in a cartoon. My counters are stained and my kids ate more icing than cookies. There wasn't a single tantrum, by them or me.

No longer is Christmas baking about a pile of cookies in the freezer for the guests that might pop by. It isn't even about treats to share with the neighbours over tea. It is about process, the act of making. Baking and decorating cookies with the girls is like Jackson Pollack at a canvas.

Who cares that the cookies will likely not be eaten for lack of enough icing or the wrong sprinkles? They'll make me a little more Santa like, in spirit and with my jiggle.

For the record. We used this recipe from Julie for the cookies. The only change I made is that we cooked them for 10-11 minutes so they would be a bit softer.

Peppermint Chocolava

Christmas baking has begun. In my world nothing Christmas can come before December 1st. Even that is pushing it. Then again, we are a house that leaves the tree up until at least the second week of January (for Ukrainian Christmas). A 6 week season is a bit much.

This month I have a cookie feature and a holiday potluck article in the Holiday 2010 issue of What's Up. Included are these Peppermint Chocolava Cookies. Along with some Hazelnut, Cherry, and Cocoa Nib Shortbread and Lemon Sugar Cookies. Pick up the issue for a fun treat, along with tips for holiday baking with your kids.

Love = Chocolate Chip Cookies


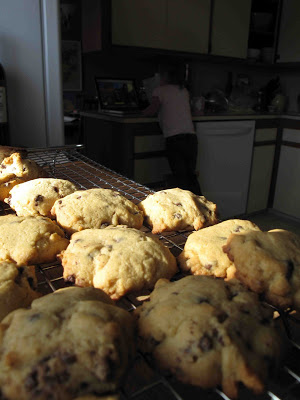
For the record, a chocolate chip cookie is not just a chocolate chip cookie. Put aside the preferences for chewy or chunky, nuts or pure, cocoa or not. A chocolate chip cookie at its most basic is pretty much love.

Growing up they are the special treat doled out by Mom, whether she made them or not. Our first forays into adulthood are filled with Mom's replacements where we can get them on the occasion of loneliness, break-ups, girls' nights, and stress. When we get our own kitchen we bake them for our boyfriends and girlfriends and friends to give them comfort and happiness and a morsel of love wrapped in chocolate in butter. Then we have kids and we start the cycle all over, baking together and for them to pass on the love.

No one ever answers cinnamon pinwheel when asked what kind of cookies we should bake.

When the controversy over this post, by a pastry chef no less, blew up on my Twitter Feed all I could think about was chocolate chip cookies. It seems other felt the same way too. Check out this post from Abby Dodge, one from Gail at One Tough Cookie, and another one from Jennifer Perillo.

For days all I thought about were chocolate chip cookies. But Mama's had a bit too much love lately, if you know what I mean. Then Jennie responded and I couldn't not make cookies. And if you're going to to do it, then do it with this recipe and do it a few times.

I've been meaning to test out this concept of letting cookie dough rest since the 
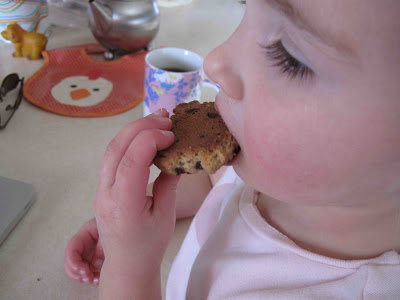
original New York Times piece came out. Frankly though, there is never a world where I can make cookie dough and not bake it right away. Mama needs her love, as do little girls who helped make the cookies and fully expect one RIGHT NOW.

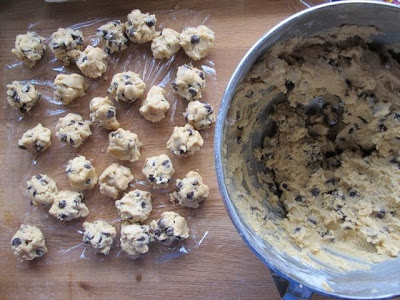
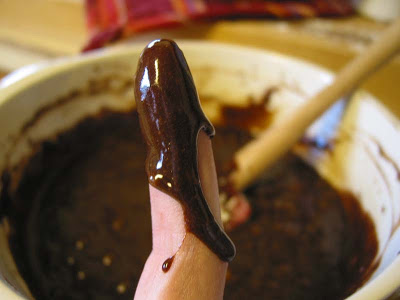
So, I planned a little experiment. One night, after the girls were asleep, I made the cookie dough, using this recipe from Jennifer Perillo. By far it is the best recipe I've ever made and she's happily letting me share it here.

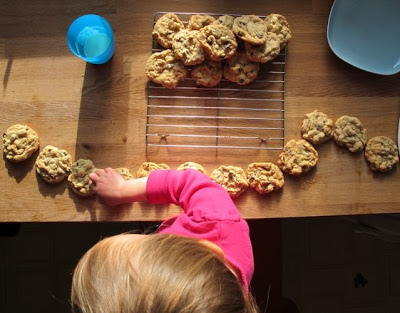
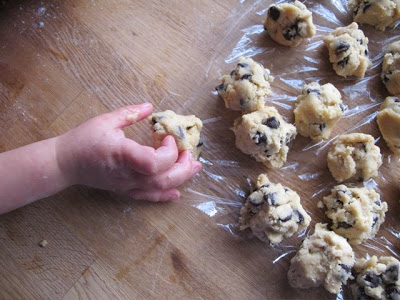
All but two chunks went into the fridge for their little rest. Seriously, who can make dough and not eat a cookie? Waiting is the hardest part of baking chocolate chip cookies. I baked off two chunks for a late night snack.

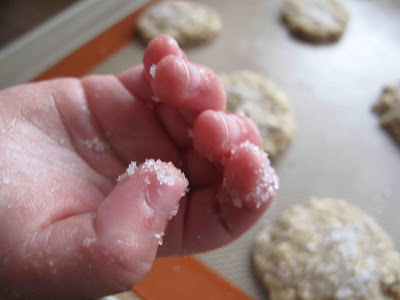
Those two cookies, however, were not going to be enough to let me know the difference between a fresh dough and one that has rested for 36 hours. But they were tasty! That meant another bowl of dough was made. I used the exact same recipe and made them the exact same way. The only difference is that I had a 2 year old helping me the second time.

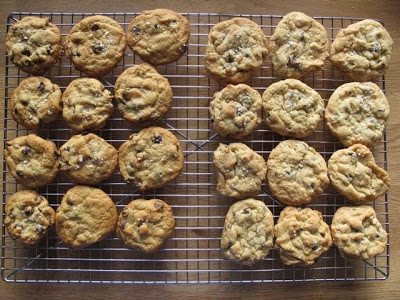
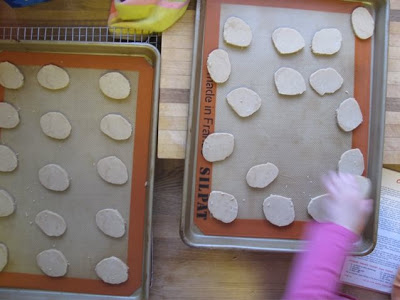
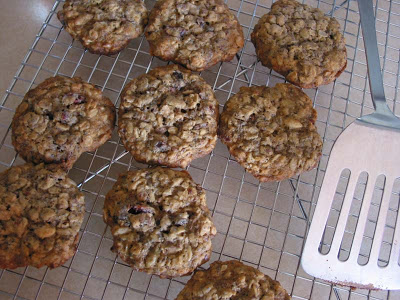
While The Monster was at preschool we baked trays and trays of cookies. I was worried about telling them apart, but it turns out that isn't a problem. The rested dough gets more golden in the oven and doesn't spread as much as the fresh dough. Difference #1.

Now I certainly don't need 6 dozen chocolate chip cookies in my house. We took most of the cookies to the playground for an after school treat, and an experiment. I walked around to all the parents and the teacher, asking them to try one of each cookie. I wanted to see if they could taste a difference and if so, which one they preferred. (The kids got some too, but they didn't care at all which bag they came from.)

The first surprise to me was that everyone could tell a difference between the two cookies, by taste alone. It was a subtle difference to me when the cookies were warm, at home. At the park, however, the difference was more pronounced. The fresh dough cookies taste sweeter. Difference #2.

People were trying to guess the difference and the guesses ran from the addition to honey or more sugar to potentially more butter in the freshly baked dough. The people who preferred these ones all thought they tasted more rich.

The people who preferred the rested dough cookies, however, often called them more decadent or gourmet. Personally, I found the difference was the cloying sweetness and that the fresh dough was almost a bit acidic, tasting it at the back of my tongue more than anything. The flavour, overall, of the rested dough is more sophisticated and frankly, mature. Difference #3.

What makes them technically different? Resting allows the liquids in the dough to be better absorbed. This results in a drier, firmer dough that bakes better. Hence, less puddling in the rested dough cookies. And a better texture overall when you bake the cookies to a precise just underbaked. It also encouraged better caramelization of the dough.

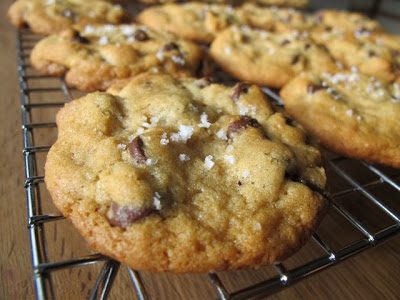
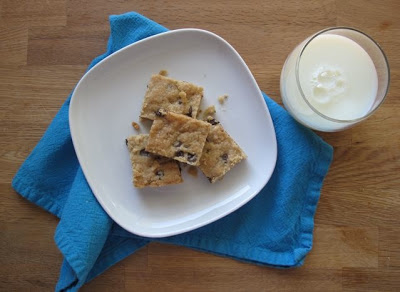
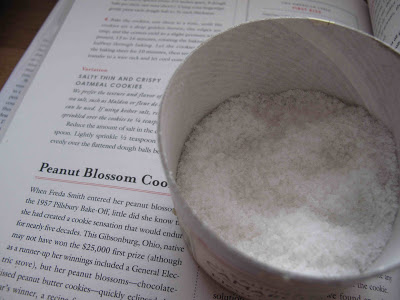
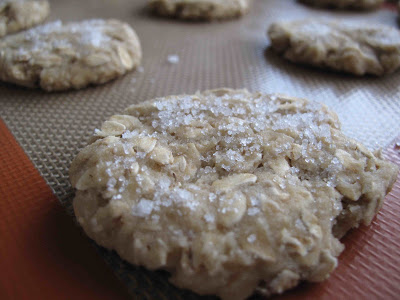
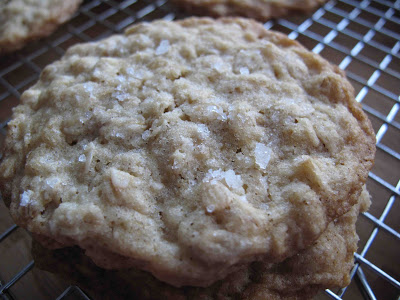
The remaining dough in my fridge (from both batches) was baked off the next day, topped with a sprinkling of fleur de sel. By far, my favourite version.

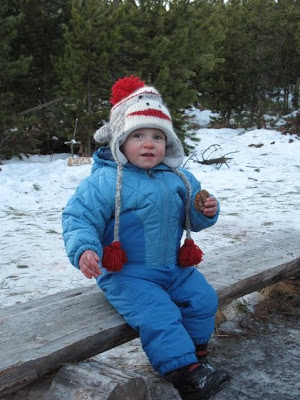
It's winter here now, I'm single parenting again, and I already have dough resting in the fridge for some post school and snow romp love.

Jennifer Perillo's Very Best Chocolate Chip Cookies
Makes 36 3 inch cookes (or 4 dozen slightly smaller ones)*

4 cups flour (18 ounces)
1 tsp baking soda
1 tsp salt
2 sticks butter, softened (8 ounces butter) (1 cup)
2 cups sugar (15 ounces)
2 tbsp molasses
3 large eggs, room temperature
1 1/2 tsp pure vanilla extract
12 ounces bittersweet chocolate discs (or chocolate chips)

In large bowl whisk together the flour, baking soda and salt. Beat butter, sugar and molasses until light and fluffy. Add the eggs and vanilla extract. Beat until well mixed. Add the flour mixture and mix until just combined. Stir in the chocolate discs (chips). Let sit in the refrigerator overnight before baking, and may be stored this way for up to two days. Yes, I realize this is the very hard part.

When ready to bake, preheat oven to 350 degrees F. Line baking sheets with silicon mats or parchment paper. Gently form dough into 1 1/2 to 2 inch (1 to 1 1/2 inch) balls and place 2 to 3 inches apart on prepared baking sheet. Bake for 15 minutes (13 minutes in my oven) on middle rack. Remove from oven and let cool on pan for 2 more minutes. Transfer cookies to a rack to cool completely if you have any will power left.

*The notes in italics are my personal changes due to ingredients on hand, preferences, and my oven.
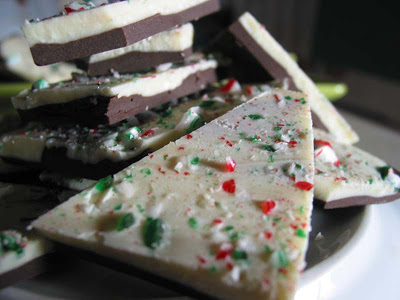
Cookies, Cookies, and More Cookies


You might not consider it a downfall, but one of the downfalls of freelance food writing is developing stories totally out of season. Today I made a spider cake for Halloween, sugar cookies, meringue cookies, and hot cocoa with marshmallows. On at +25C day. Good times.

In truth, dinner was a plain old cheese quesadilla and a handful for cherry tomatoes to soak up the sugar. Despite all those cookies though, I reserved a few of these for a post-the-girls-finally-fell-asleep-and-I'm-exhausted-after-two-weeks-of-single-parenting chocolate chip cookie snack.

These are the first things I ever learned how to make. I may have been about 9. My mom worked fulltime and we three kids were competitive swimmers. Food was about fuel - how much could we get in at any one point, how much could mom buy and cook to hopefully get us through the week. Fed up with purchased cookies I asked if I could make cookies myself. No clue who found the recipe or where it came from. But I was left alone in the kitchen.

I found the entire experience both comforting and empowering. Woohoo, I was in the kitchen and left to my devices! There was butter and chocolate involved. It was the start of something great.

From that point on these were my go-to cookies. My go-to sleepover cookies. My go-to watch TV in the rumpus room cookies. My go-to console a friend whose boyfriend dumped her cookies. My go-to chick-flick cookies. My go-to rainy day and single parenting cookies.

At 35 I have to find people to share these with - I do not need a cup of butter to myself. Thank goodness my kids are happy to help me with that. Now they've become my go-to get in the kitchen and bake with the girls cookies.


Chocolate Chip Slab Cookies
Makes 1 9 x 13 pan

1 cup butter
1 cup brown sugar
1 tsp vanilla
2 cups flour
1 cup chocolate chips.

1. Preheat oven to 350 degrees F. Grease a 9 x 13 pan.
2. Cream butter and sugar. Add vanilla. Stir in flour and chocolate chips. Press dough in pan.
3. Bake 2-25 minutes until lightly browned. Cool slightly, but cut when still a bit warm. Cool some more before you dig in.

(This post is also a part of Gluten Free Girl's round-up on the first foods we learned how to make.)

If It Wasn't For Her

Today it is all about my Nanny. And in two weeks it will still be all about my Nanny.

It may come as a big surprise to you, but I am not so independently wealthy that I get to do nothing but make ice cream and write blog posts. I only wish. Alas, I am in the office 4 days a week, freelancing and teaching on the side, and oh yeah, raising my two little ones. I could not do any of this without my Hubby, of course. And none of it would be possible without our Nanny.

Emily watches the girls while I'm at the office.  She is outside with them everyday, regardless of the weather, she brings them treats like ice cream bubbles, she cleans the house (even taking out the garbage), and most importantly to me, she bakes. Not only am I happy that my girls get even more time in the kitchen, but it is glorious to come home at the end of the day and have fresh cookies waiting for you.

The two most used cookbooks for cookie recipes are good ol' Martha and, more frequently, Julie's One Smart Cookie. The girls are never afraid to try a new recipe, despite The Monster's usual request to bake chocolate chip anything. When I came home the other day though, these raisin cookies greeted me at the door. My first question was which book they came from?

No book, it was Grandma's recipe.  And Emily has made it so many times she has it memorized. She graciously allowed me to share it here.

To be honest, I'd never thought I would obsess over raisin cookies. But these are moist, sweet, and chewy, with a hint of spice. A chocolate chip fan myself, I can safely say these are one of the best cookies I've ever had. Thank-you Emily, and thank-you Emily's Grandma.

Ridiculously Good Raisin Cookies
makes 4-5 dozen

2 cups raisins
1 cup water
1 tsp baking soda
1 cup butter
2 cups sugar
3 eggs
1 tsp vanilla
4 cups flour
1 tsp baking powder
1 tsp cinnamon
1/4 tsp nutmeg
1/2 tsp salt

1. Preheat oven to 350 degrees F.
2. In a small sauce pan boil water and raisins together for 5 minutes. Cool slightly and stir in baking soda.  Set aside.
3. Cream together butter and sugar. Add in eggs and vanilla.  Combine well. Stir in raisins then add in dry ingredients.
4. Drop by teaspoonfuls on a greased cookie sheet. Bake 12-15 minutes.

Things That Make Me Tired and Happy

This blog was only meant to be a hobby. A few recipes snuck in on my quilting blog, but I wasn't really thinking of going back to the food world in any way other than as a dedicated home cook and mother. And what was I thinking, a working mom maintaining two blogs in my copious amounts of free time? Apparently, I was thinking of the future without even knowing it.

After a year or so I started to think about writing, especially food writing, as a career option. Despite working in catering kitchens, running my own muffin company, and dropping out of journalism school it wasn't something I considered before. But the more I wrote here the more I wanted to write.

Insert some amazing mentors, loads of inspiration, and a serious lack of sleep and I am now a two job lady. A tired, but happy two job lady. I am now writing as Food Editor for What's Up and doing a little freelancing and teaching on the side. The day job stays, and I'll always be a mom, but my little hobby is turning into something exciting. And I couldn't be happier.

And when I'm happy (or sad or mad or glad) I like to bake. That's why I'm sharing this cookie recipe for you. The combo of chocolate and dried cherries is better than any chocolate box cherry, and guaranteed to fix any emotion you've got. (This recipe actually appears in the Spring issue of What's Up, along with more on Litterless Lunches.) So come on, celebrate with me!

Chocolate Oatmeal Cookies with Cherries
Makes 2 1/2 -3 dozen, depending on the size of the cookie

3/4 cup butter
1/2 cup white sugar
1/2 cup brown sugar
1 egg
1 tsp vanilla
1 cup flour
1 cup oats
1/4 cup cocoa, sifted
1 tsp baking soda
1/2 tsp salt
1 cup chocolate chips
1 cup dried cherries

1. Preheat your oven 350 degrees F. Grease your cookie sheet or line it with parchment paper.
2. Cream together butter and sugar for a few minutes. Add egg and vanilla, mix well.
3. Stir in the flour, cocoa, oats, baking soda, and salt. When it is all together as a dough add in the chocolate chips and cherries. 
4. Drop by teaspoonfuls on a prepared cookie sheet. Bake for 10-12 minutes until lightly firm around the edges. Let cool a few minutes on the cookie sheet, transfer to a wire rack, and let cool completely.

Backseat Adventure - Chopping Your Own Christmas Tree


You would think that after a trip where we got lost in the forest and ran out of gas on the way home in minus 30 I would be smart enough not to want to ever chop down my own Christmas tree ever again. You would think that after not checking the Junior Forest Warden's site and mistakenly assuming that the chopping spot was in the same location you've been to three times to discover it is an hour away we would take the girls and dogs back home. That would be a safe conclusion, but our annual Christmas tree chop is the one holiday tradition that I simply can’t do without.

The tradition is an inherited one from my husband’s family. They would load everyone into the classic Aspen Wagon and trek out to the forest on the last weekend before Christmas. Following a romp through the woods there was the inevitable debate over just the right tree. Was it full enough? Were the branches strong enough for all the lights and ornaments? And, most importantly, was it tall enough?

With more than a few years experience of tree chopping under my belt, and subsequent decorating, I can safely tell you that the answer to those questions in the forest always seem to be no, but they are a resounding yes once you get home.

Your first clue that the tree is just a bit too big is when the branches hang over the sides of the car when you strap it down and you are required to put a fluorescent orange strap to the end of the truck so the cars behind don’t hit it. Oversize Load.

Then you get it home. And it’s at least 6 feet too tall for your living room and you have to remove more than the side table to just find a spot for all the branches. So you cut off about half of what you brought home (from the bottom so you preserve the integral shape of the tree) and plunge into decorating. And if it’s my house you eat cookies and watch Will Ferrell in Elf while you do it.

Even if you do run out of gas and are left running from farm house to farm house to call the other party – hey, this was a few years before everyone had a cell phone – the exuberance of running through the forest on a single-minded mission is worth it. It is worth it for the long-standing and memorable family tradition. It is worth it for the freshest and most local tree you can get. And it is worth it for the hot chocolate and cookies that come at the end of the journey.

Aside from a few new and old favourites I tried the trendy Butterscotch cookies I've been eyeing in my original Five Rose Cookbook. To me, they were a perfect dough and a lovely fireside and snowsuit compliment to our day.

Butterscotch Cookies
(Adapted from Five Roses Flour Cookbook)

1/2 cup butter
1 cup brown sugar
1 egg
1/2 tsp vanilla
1 1/2 cup flour
1/4 tsp salt
1/2 tsp baking soda
1/4 tsp baking powder


1. Cream together butter and sugar until fluffy. Add egg and vanilla, mix well.
2. Sift together dry ingredients. Add to wet and mix well.
3. Roll into a log and chill in fridge 1 hour - overnight.
4. Preheat oven to 375 degrees F. Slice cookies from log roughly 1/4 inch thick.
5. Bake for 8-10 minutes.


In The Zone

This past week was the second one in the Kitchn's Kitchen Cure.  Our task this week was to organize kitchen equipment.  A rather large task in most cooks' kitchens.  For me that meant two drawers of utensils, a drawer with pots and lids, a plastic storage container drawer, my baking supplies spread round the kitchen, and one random corner cupboard filled with extra spices, a colander, our turkey frier pieces, and a bunch of other crap.

The first step was to pitch any and all duplicates.  After that I got rid of supplies I never use, like the old cookie sheets and pots that were broken or had no matching lid.  These went into the pile for Goodwill.

My second step was to take anything out of the kitchen that isn't used on a regular basis - springform pans, lobster eating utensils, and the aforementioned turkey frier accoutrements.  These all went to the cold storage section of the basement.  That has to be another organizational task before we frame the basement, but not for now.

After the purge and the subsequent clean it came time to reorganize things.  With PBS Kids on for The Monster and The Smilosaurus napping I took a step back to evaluate how I really use the kitchen.  Truly, I have zones that I work in: baking/prep, clean-up, stove, and serving.  Sure, the kitchen isn't designed this way and it takes some creative thinking, but my brain thinks it works.

The stove section includes the pots, cooking utensils, all our oils and spices on open shelves.   Clean-up includes the sink and recently installed dishwasher, with dish storage right above. The serving section is the countertop below the dish and pantry storage.  And by serving section I mean a space of uncluttered countertop closest to the table.

Finally, I created a baking station.  We bought some freestanding cabinetry a few months back. Smilosaurus started crawling and was getting into everything on our open storage units.  When the dishwasher went in we also lost some existing cabinetry.  These new units were great - large, sturdy, and full of storage potential.  But I just dumped stuff in them without really thinking about it.  This exercise forced me to take a step back and think about how to use them most effectively.  

It's no secret that I love to bake, as does The Monster.  So I took one unit, filled it with all the baking utensils and pantry ingredients, and parked the little chair she stands on next to it.  Now everything is in one spot.  We have a large countertop space, only interrupted with the knife block, cutting board, and the Kitchen Aid.  It is still my prep station, after all.  But we can mix, roll, cut, and generally making a mess and it all stays confined.  Hubby can be at the sink, Smilosaurus can crawl around, and none of us are falling on top of each other.

One of the changes I made was taking my baking pans from the tall cabinet by the sink.  It always made sense to have them there, standing up.  There was, however, this stupid hook thing hanging from under the counter.  Pans were constantly getting caught on it.  Yes, I could have taken it out, but that wasn't the only problem with the cupboard.  There was just too much stuff it and it wasn't easy for The Monster to get things from there.  Considering that our baking generally revolves around cookies and muffins, I needed a better option.

With the focused baking center I got that.  I took one drawer and put in all the well-used baking supplies.  And yes, the largest item - the cookie sheets are on top.  Who wants to pull out all the pie plates, measuring cups, loaf pans, and spoons to get to the cookies sheets?  So much easier now.  Of course, after all this I need to giving Hubby an orientation.

Well, PBS Kids is nearly over and its time to bake.  I think we are going to try oatmeal cookies with cranberries and the white chocolate chips I found while cleaning.

Is there anything better?

This morning I decided that one of my favourite activities in the entire world is baking with The Monster.  She is intrigued by the process and will dive right in making a mess, if only to lick the paddle at the end of it all.  I have a million pictures of her devouring the sticky dough left on that paddle.  But today I took pictures throughout the process.  I don't think there is much more to say today.  Pick you favourite recipe and bake.  Pull up a chair for the kids, make a mess, and watch some Yo Gabba Gabba while the cookies cool.  

A personal stash of chips keep little hands busy while the cookies are in the final mix.

Everyone wants in on the action.

Fresh from the oven and into the mouth.

Cooling cookies and watching Tony Hawk on Yo Gabba Gabba.

The crumbs she swept into my hand, off the table, because they were getting in the way of eating her orange.

All is quiet, but not clean (see that bowl?) during naptime.

Today we made an old recipe for me.  These make a cakey, crumbly cookie.  I'm not normally one for anything instant, but the pudding mix does work nicely here.  You can use vanilla, chocolate, or even butterscotch (my fave). You can also play with the type of chocolate chips. I learned how to make these when I was a little girl. I think the recipe came from a church cookbook.  Really, a duotang filled with photocopied sheets.

Secret Ingredient Chocolate Chip Cookies
Makes about 4 dozen

1 cup butter
1/4 cup white sugar
3/4 cup brown sugar
1 tsp vanilla
1 package instant pudding mix
2 eggs
2 1/4 cups flour
1 tsp baking soda
1 cup (or more) chocolate chips

1.  Preheat oven to 375 degrees Celsius.
2.  Cream butter and sugars together.  Add vanilla and pudding mix.
3.  Beat in eggs, one at a time, until mixed well.
4.  Slowly add in flour and baking soda.  Stir in chocolate chips until well blended.
5.  Drop by teaspoonful on to a greased cookie sheet, about 2 inches apart.  Bake for 10-12 minutes.  Let cool and enjoy with your favourite monsters.

Friday Favourite - Salt

Hubby is addicted to salt.  Seriously.  Almost nothing is salted enough for him, he loves salt and vinegar chips, and actually licks his finger and dips it in the salt pig.  One Christmas I nearly bought him a salt lick as a joke, until I realized that I would be the one stuck finding a real home for it.  In true fatherly generosity he passed this love on to The Monster.

Daddy salts his food, she wants salt on her food.  Mama seasons the sauce, she has to season the sauce.  We've developed the fine art of faking it for her.  She is a wickedly smart girl, but somehow the motion of salting her food satisfies her, even if she doesn't see any salt crystals falling from our fingers.  We're either that tricky or she's only two.
With the past few weeks filled with a lot of sick days we've turned to baking as a way to keep her engaged and away from Yo Gabba Gabba (she is a child obsessed).  When she asked to bake cookies this week I inquired as to what kind.  

"Salt."

Yup, salt cookies.  In a freaky twist of fate, I had pulled out my Cook's Country cookbook and had it open to the cookie table of contents.  Wouldn't you know, they have a recipe for salty thin and crisp oatmeal cookies?  Considering it was a real recipe and all, I figured we had a better chance than last week, when she requested salt muffins.  In case you didn't know, salt as a crunchy topping on a banana muffin is okay, but not something I have a desire to repeat.  Salted oatmeal cookies are another matter entirely.


Crispy, thin, and with just a touch of salty crunch.  These are good cookies for people who don't like sweets.  Such a change from dense and chewy oatmeal cookies.  Equally delicious, and I'm not a big fan of salt.


Salted Oatmeal Cookies
(adapted from Cook's Country)
Makes 2.5-3 dozen cookies

1 cup flour
3/4 tsp baking powder
1/2 tsp baking soda
1/4 tsp table or kosher salt
14 tbsp unsalted butter (2 tablespoons less than a cup)
1 cup granulated sugar
1/4 cup packed brown sugar
1 large egg
1 tsp vanilla
2 1/2 cups rolled oats (not quick or instant)
fleur de sel or Maldon salt

1.  Preheat oven to 350 degrees.
2.  In a medium bowl whisk together flour, baking powder, baking soda, and 1/4 tsp salt.  Set aside.
3.  Beat together the butter and sugars  until fluffy.  Scrape down the bowl.  Add the egg and vanilla and beat until fully incorporated.  Slowly add the flour mixture until just blended, then stir in the oats until well mixed.
4.  Roll cookie dough into balls about 1.5 - 2 inches around.  Place them 8 to a cookie sheet and press down with your palm.  Cookies should be about 3/4 inch in thickness.
5.  Sprinkle with fleur de sel or Maldon salt, a generous pinch per cookie.
6.  Bake for 10-12 minutes until the cookies are spread out and lightly golden.  Let them cool completely on the cookie sheet.

If You Can't Buy Shoes...

Stay-at-home moms don't get Christmas parties. Especially stay-at-home moms married to a self-employed men. There is no reason to go shopping and buy a fancy dress and wickedly sexy shoes. There is no babysitter to find and pay a small ransom. There is no mediocre prime rib dinner and boring dance. There are no door prizes, cheezy centerpieces, and someone embarrassing themselves.

Okay, it isn't all bad. But a night off is nice. My girlfriend Tanya to the rescue (she is so good at that)! She invited a few of us over for treats, gossip, and Grey's Anatomy. We all brought more treats too. That way none of us was really cooking and all our little girls stayed home with Daddy (or were already asleep).

We had a fantastic time. What a treat to talk without interferences from little girls demanding our attention. We ate way too much sugar and talked about everything from Barbies, pajamas, colo-rectal surgery, vacations, bilingualism, waxing, and politics. There was no need to watch what we said, and no reason to watch how much sugar we ate. Oranges gave us some semblance of feeling healthy.

My contribution to the night was peppermint bark. Williams and Sonoma be damned, make it yourself. I am by no means a chocolate making expert, so anyone can do this. If you know how to temper chocolate (to make it solid again at room temperature and a little but shiny), great. I don't, but I try. Either way, it is ridiculously easy and highly addictive. Just keep it in the fridge and no one will know the difference.

Peppermint Bark

4 candy canes
16 ounces semi-sweet or dark chocolate
10 drops peppermint extract
16 ounces white chocolate

1. Prepare a rimmed cookie sheet by lining it with parchment paper.
2. With candy canes still their wrapper bash them lightly with the handle of a knife or a wooden spoon. Don't bash too hard or you will have candy cane dust everywhere. Unwrap them over a bowl.
3. Chop semi/dark chocolate coarsely. In a bowl set over a pot of simmering water melt chocolate slowly. Pull off the heat just before it is fully melted. Stir to finish melting. Let sit, stirring occasionally, for a few minutes, until it is still warm, but not hot. Stir in the peppermint extract. Pour and spread around prepared pan.
4. While the semi/dark chocolate is resting, coarsely chop the white chocolate and melt in a bowl set over a pot of simmering water. Pull off the heat just before it is fully melted. Stir to finish melting. Let sit, stirring occasionally, for a few minutes, until it is still warm, but not hot. Pour directly over the semi/dark chocolate.
5. Sprinkle the candy cane bits over it all.
6. Cool in the fridge until hard. Break into bite size pieces.

The Emotional Eater

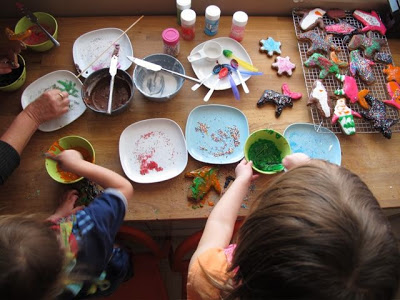
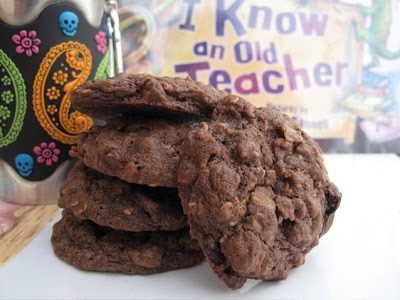
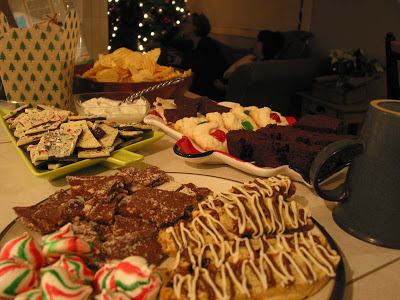
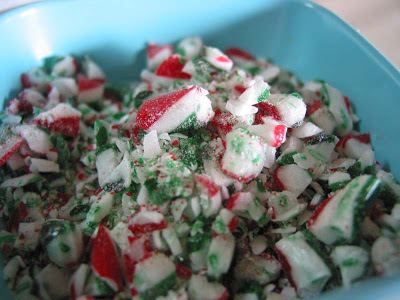
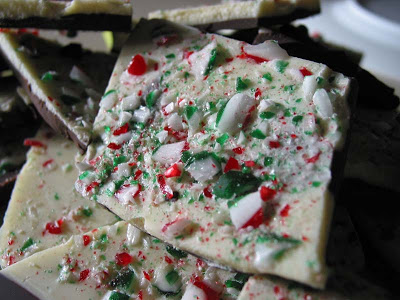
The perfect brownie can make anyone feel better. I've been feeling the need to eat a lot of brownies lately. Not that I need more things brown in my life, what with the mud flat currently surrounding the house. And the mud piles in the backyard and the muddy paw prints and footprints littered over the hardwood... But these brownies really do make you feel better.

They are dense yet still a bit cakey. They are fudgy but not heavy. They are a hug in a square crumbly package. With a glass of milk at lunchtime or a stiff scotch at bedtime they fill you with love. Sure I have a great Hubby and the girls can do that too, but the perfect brownie is just for me.

It's hard to not feel better when you start with chocolate and butter. Seriously, not much gets better than that, on their own or melted together in fantastic richness. I need to make them without the Monster around or else she takes them both and messes up my measurements.

Okay, maybe it's not just her who snitches tastes along the way... Somehow it is naughty when I dip my finger to lick the chocolate, and just messy and fun when the Monster does it.

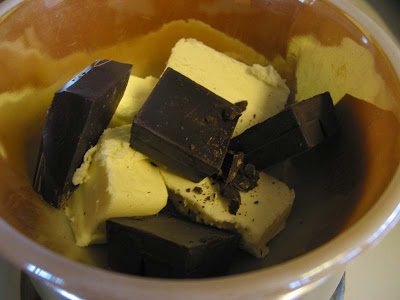
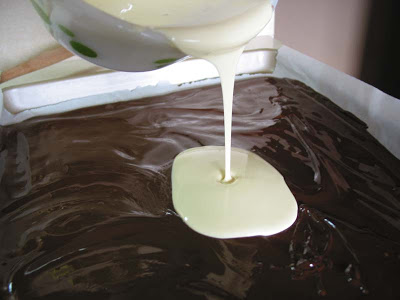
When all is said and done and the oven brings out the chocolate scent the hugs begin. It is almost painful to wait for them to bake and cool. Warm brownies are more fudgy, but I prefer them cool and dense. A good brownie can make you feel comforted and warm, a bad one leaves you cold and cranky.

About 13 years ago I worked at a health food store with a bakery in it. Beyond the granola and ultra-healthy food, we specialized in items for people with restricted diets. At one point that summer the chef and I took on a mission to create a healthy brownie. We tried multiple substitutions like carob for chocolate, fake eggs, brown rice syrup, and more. None of them worked. This was before some good gluten free recipes were readily available. Eventually we decided that we would go back to basics and make a recipe with real food - butter, eggs, chocolate, brown sugar, and unbleached flour. This was before the slow food movement or Michael Pollan. You know what? They were amazing brownies! Sadly I lost the recipe in the post-university moves.

After experimenting with many recipes I finally found The One. It never fails me, it's fast, has only a few ingredients, and results in a perfect brownie. The recipe comes from a cookbook I picked up on a trip to New York. Broke and spending an afternoon with a quilting friend in Brooklyn I picked up The Brooklyn Cookbook. Really just a hardcover community cookbook, the book is filled with personal anecdotes and recipes from locals. The perfect brownie comes from this book.

What makes a bad brownie? To me that means anything that is not chocolate related inside. No nuts for me, I hate the sudden change in texture when you bite into a brownie with nuts. I don't like glaze or icing because it changes the mouthfeel. On a cupcake yes, but not on a brownie. I've added chocolate chips, even mint ones, and raspberries before, but it's not my favourite. Just a plain, simple brownie, thank-you.


The Perfect Brownie

(adapted from The Brooklyn Cookbook)


4 ounces unsweetened chocolate
1/2 cup unsalted butter
3 eggs
1/4 tsp salt
1 cup sugar
1 tsp vanilla
1/2 cup flour

1. Preheat the oven to 350 degrees and grease an 8 inch square baking pan.
2. Melt the chocolate and butter together in a bowl set over a pan of simmering water. When melted set aside and let the mixture cool.
3. Beat the eggs with the salt until foamy. Gradually add the sugar and vanilla, beating until the mixture is creamy. Quickly stir in the cooled chocolate mixture, then the flour. If you are going to add anything like chocolate chips or nuts (!) this is the time to do it.
4. Pour into the greased baking pan and bake for 20-25 minutes, until the center is set but still a bit giggley. Cool before cutting.

Backseat Adventure - Glamorgan Bakery

When you return to the memory of tastes it is easy to be disappointed. Too often the memory is linked heavily to the event or the circumstances of the taste. The brioche aren’t as rich as they seemed when they were a luxury in your days with a limited student budget. The meringue cookies you cherished on your bakery visits are more sweet than blandly crisp, more cloying than any adult should enjoy. Then there are the dinners, marked by romance, birthdays, or trips that can never be replicated. But sometimes, just sometimes, something is as good as you remember.

My brother-in-law, B, and I had this discussion over the weekend. A birthday present for my mother-in-law brought Hubby’s family to Banff for a weekend of eating and laughing at the children, with some swims and a hike thrown in. With a need to get my girls out of the house I decided to take them to Glamorgan Bakery, to stock up on B’s favourite cheese buns for the weekend.
Glamorgan Bakery is a Calgary institution. Since 1977 the owners have been churning out buttery goodness to Southwest Calgary. Hubby’s family grew up a relatively short bike ride away and took advantage of that quite regularly. It wasn’t until B and his then girl-friend and now my preggo-sister-in-law came to visit us shortly after we moved that I was properly introduced.

All I can remember B talking about was the cheese bun. How it was filled with cheese and butter to such an extent that the bread dough involved seemed superfluous. For a man who practically survives on any variety of cheese on bread – pizza, grilled cheese, melted cheese on bread dipped in ketchup – the Glamorgan Bakery cheese bun was his idea of perfection.
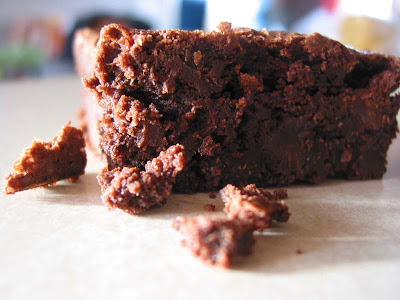
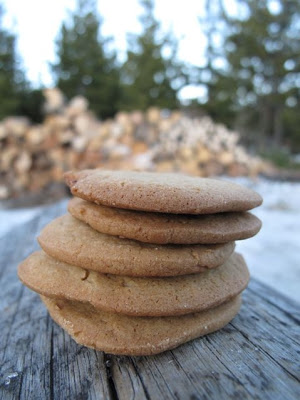
Then came the sugar cookies. We came for the cheese buns and we will return again and again for the sugar cookies. He says that he remembers eating them as a child, although I find that hard to believe because my mother-in-law is a fantastic baker. But then, fueled by a childhood memory, he went back to bakery and tried the sugar cookies, . Shockingly, they were better than he even remembered.

The Monster was enthralled by the selection of the bakery -colorful cupcakes, the overwhelming scent of butter and chocolate, and too much selection in the cookie department. I went straight to the counter for the cheese buns and she went straight to the sugar cookies. More precisely, the brightly coloured dinosaur cookies. How can you say no to a happy 2 year old? She got her cookie, promptly sat down on the floor, and took a bite. And then another and another. Two men were enjoying their coffee at the tiny counter for that purpose, oblivious to the joy of a sugar fueled toddler at their feet.
The dinosaur cookie was bigger than the Monster could handle so sadly I had to help her finish it. Let me rephrase that, I thought the cookie was too big and too good so I forced her to share it with me. Seriously, these are the best sugar cookies I’ve ever had. Not so much cookie as sweet butter that someone like Ferran Adria or Heston Blumenthal decided to serve in a crispy form. 
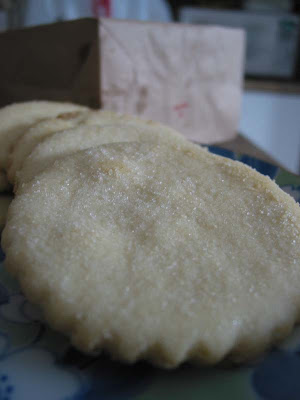
So I went back yesterday and bought more. Some for me and some for a girlfriend who was hosting us for tea in the afternoon as Little Miss Sunshine and I escaped the mess at home. By the time I got to her house the butter had stained the brown paper bag they came in and one cookie was missing. Good thing I bought more for dessert.

Eating Injury and Recovery


Barring a bizarre accident with a sharp knife and raw chicken, feeding your kids should not cause you injury or illness. Or so I thought. It seems that this nursing mama has developed mastitis. Fun times.

In order to give myself a chance to recover from my fourth illness (and definitely the worst) in the last month I decided to call in reinforcements. My mom came down for a few days to help us out. Today she made turkey stock from the Thanksgiving carcass, cleaned up my garden (which she planted in the first place after Little Miss Sunshine was born), took the Monster for walks, and baked cookies. Yum, cookies.
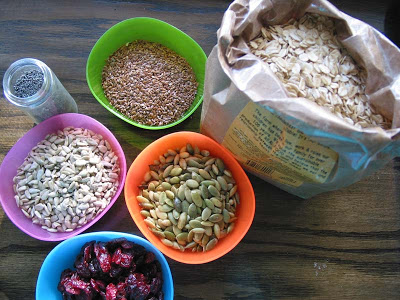
Okay, so I posted an oatmeal cookie recipe last week but these are amazing. Soft and chewy but with a little bit of crunch. Nutty without any nuts. Sweet without being cloying. Mom created the recipe after we tried some from a vendor at the St. Albert Farmers' Market a few years ago. That market is only open for a few months, so we needed to recreate them in order to continue the yummy love. After a few tries she came up with this recipe - even better than the original.

My theory is that you could make it with less sugar, but they aren't nearly as sweet as you think they might be. When I make them for myself I think I will try it with only a cup of sugar.

When it comes to your seeds, make sure they are fresh. Poppyseeds can go rancid easily when stored, so check any that you use before you stir them in. With regard to the pumpkin seeds, you can go with raw ones as well - with no change in flavour. Today we used roasted, salted ones because those are the most common ones found in the grocery store. We found the salted ones make no difference to the taste either.

Birdseed Cookies
(makes about 4 dozen)

1 cup butter
1 1/2 cup brown sugar
2 eggs
1 tsp vanilla
1 1/2 cups flour
1 Tbsp baking powder
1/2 tsp baking soda
2 cups rolled oats
3/4 cup sunflower seeds
3/4 cup roasted pumpkin seeds
1/4 cup flax seed
1/4 cup poppy seeds
1/2 cup finely chopped dates
1/2 cup chopped dried cranberries

1. Preheat oven to 350 degrees F.
2. Cream butter and sugar together.
3. Add eggs and mix well. Mix in vanilla.
4. In a separate bowl stir together the flour, baking soda, and baking powder. Slowly add to the butter mixture.
5. Add oats and mix until just combined.
6. In a separate bowl combine the sunflower seeds, pumpkin seeds, flax seeds, poppyseeds, dates, and dried cranberries. Stir into the cookie mixture until well combined.
7. With wet hands roll a heaping tablespoon of dough into a ball. Alternatively, use a small ice cream scoop to form balls. Press down slightly on the cookies.
8. Bake for 8-10 minutes until lightly browned.