circles

Lilac Lovely - Improv Curves


Not a spec of white in this quilt top! In fact, quite the opposite of low volume for me. It is so rich and saturated in its colour. I absolutely love it.

As much as I love a perfect circle, I adore improv curves. Then again, improv is my language. There is something absolutely freeing about cutting a random curve and making it work. It requires letting go of sewing expectations. Frankly, that is the best part, in my opinion.

This particular quilt top started with a stack of 20 fat quarters, a rotary cutter, and a large ruler for squaring up. It comes together much faster than you think it does.

If you are interested in learning more about this technique join me at My Sewing Room this summer. I'm scheduled to teach this a few times and would love to have you join me.

July 10 6-9 pm
August 9 1-4 pm

Call 403-252-3711 to register.


Playing With Circles in Quilting - For the Love of the Half Circle


This design has been stuck in my head for months and months. I had grand plans of making this quilt for Valentine's Day - for obvious reasons - but work deadlines got in the way of quilting for fun. I found myself with few immediate deadlines this week and a free morning. Et voila!

Beyond the design itself, I also wanted to make this quilt for another reason. I wanted to showcase some half circles in a design. So often I see two quarter circles used when the quilter could have easily made a single block. The construction is exactly the same, so why shy away from half circles? Is it fear? The unknown? Pure comfort with a quarter circle? I know that the final result is the same, but if you can avoid a seam, why wouldn't you?

There were some insanely gorgeous and creative quilts at QuiltCon, for example, that used quarter circles when half circles could have been used easily.  It might just be me, because of my circular predilection, but I think we need to bring the half circle the attention it deserves.


That focus is going to start with a pair of lips. Or hearts, depending on your viewing angle. That was kind of the point with this design. One big smackaroonie. And all the love for a half circle block too.

This quilt is scheduled to be in a quilt show in a month so I better get it off the rocks and under my machine. I see some free motion text in my future.


If you want more details on making a half circle block you can check out my Craftsy class on Inset and Applique Circles by Machine or pick up Lucky Spool's Essential Guide to Modern Quiltmaking.


Playing With Circles in Quilting - Part 2


Ride the Waves
50'' x70''

Improv curves are fun. In a fit one day last year I pulled out a playful and lovely combination of fabrics and made a whole bunch of blocks. It was just one of those quilts that came to be with no rhyme or reason. I'm pretty sure I had it done in just a couple of days. Then it sat. The moment passed and there was little motivation to finish it.

Then you realize that someone needs a pick me up, a hug as much as possible. And in your head you kind of realize that these fabrics are so her. So her, in fact, that you may have picked them with her in mind. You may have stuck with this size of quilt because it is the perfect size for her.

And then you finish it with big lines of loops because they are fun and everyone deserves a bit of fun. And she deserves a finished quilt so the loops make that happen too. So does binding it among a stack of quilts you feel you just have to get done for Christmas. That way you can give it to her when she most needs it.

Then she texts you that night to say how much it is helping in the dark and lonely moments and you realize that this is indeed why we work hard to make quilts for people we love. This way, love is all around them.


Even her dog approves. Then again, there is no accounting for taste.

The improv curves are easy to do and totally take any mystery out of curved piecing. There really are no mistakes with this technique. You can see that sometimes I doubled up the curves and other times they are just simple. All together they echo quarter circles. Which means you can use them like you would any other Drunkard Path block. I chose a setting that creates diagonal lines of movement across the quilt. Simple, fun, and effective.

Overall, that's what the quilt is - simple, fun, and effective. Design wise, yes. but also in spirit.


All year I am going to be posting more and more circle techniques. This is some time to play with circles and there are so many things to do beyond the basics. Join me for the monthly series, Playing with Circles in Quilting.

If you want more details on making circles or any of the techniques I introduce here, check out my Craftsy class: Inset and Applique Circles by Machine or my workshop in the book, Lucky Spool's Essential Guide to Modern Quiltmaking.

Playing with Circles in Quilting - Part 1


What happens when you use pieced blocks for your circles?

I've experimented with improv blocks, for both the circle and the background, with good success. This time I wanted to try some precision pieced blocks, to see if there is any difference. I was also interested in testing out the new machine with my trustworthy technique.

These were orphan blocks I found in my closet. I didn't make any of them and, to be honest, I'm not sure where they came from. Perhaps extra donations from the Just One Slab charity quilts? They seemed perfectly appropriate to experiment with.

The small circles were regular appliqué circles. I had some old templates out and they were just the right size. The technique works great, but next time I would just make new templates. My guess is that I set these templates aside because something about them wasn't quite round. Not to mention that freezer paper loses its crispness after a while. As a result, my circles aren't terribly round. But, the idea of this with the pieced blocks works great.

The big blocks were made with the Reverse Circle technique I teach. I thought it best to try this with the big ones for a couple of reasons. One, new freezer paper. And two, I suspected these would end up looking better. The seam allowances of a pieced block don't make the edges of the circle bulky. My suspicions were confirmed. I kind of love these blocks.

If you do use pieced blocks for circles keep in mind that part of your piecing will be cut off. You can lose points of a star, or entire sections of a rail fence. This isn't necessarily a bad thing, but it is a design consideration. I actually think it could look cool if you had a quilt of chopped off blocks, but each block was chopped off differently. Or maybe you take an entire quilt top that you don't like, and make circles out of it. Then piece the circle blocks together in the order of where they were cut. It would be like portholes into another quilt. Whatever you cut off are generally useful scraps too, so don't be afraid of wasting fabric.


All year I am going to be posting more and more circle techniques. This is some time to play with circles and there are so many things to do beyond the basics. Join me for the monthly series, Playing with Circles in Quilting.

If you want more details on making circles or any of the techniques I introduce here, check out my Craftsy class: Inset and Applique Circles by Machine or my workshop in the book, Lucky Spool's Essential Guide to Modern Quiltmaking.

Savor Each Stitch (Weekend Reads)


It's been a while since I posted about a book. I've been reading, that's for sure, but so busy that I haven't had a chance to stop and post about any of them! But I HAVE to tell you about this book. 

Savor Each Stitch is the recent publication by Carolyn Friedlander. It is a beautiful book and full of so much information. The book is a glimpse into Carolyn's life and the way her brain works as she makes quilts. That doesn't mean it is only a book about Carolyn though. At its core it is a quilting book, a resource.

When we write quilt books one of the first questions asked during the proposal process is who the audience is for your book. Of course we want to say that the book is for everyone! I wonder what Carolyn said when it came to her book? My read is that her fans will love it, the new or beginner quilter will be inspired, and the established quilter will look at the design and process with new eyes. I can say that the latter happened to me.

Instead of running through techniques or colour theory in a standard way, Carolyn talks about different aspects of design. She explains the concepts, then uses quilts to demonstrate what she is saying. All the projects have multiple iterations to further illustrate the concepts. 

While the book is clearly a reflection of Carolyn, her aesthetic, her process, and the quilts reflect that, it is more than that. I found it tremendously inspiring and informative. It got me thinking about fabric in some new ways, about combinations I never would have thought of. It also has me looking at my older quilts and the ones I'm working on for my intentions. Have I articulated what I wanted to with my choices, my seams, my process? This is precisely why Carolyn speaks of Mindful Design.

It isn't about tearing into a new project like a bag of potato chips - hands in, crumbs everywhere, and pure enjoyment without consequence. If we take a moment to evaluate, internally, our selections and intentions we can savour the process as much as the result, maybe even more so.

You know already that I love Carolyn's work and find it inspiring enough to work with both her patterns and fabric frequently. So it should be no surprise that I jumped at a project from Savor Each Stitch.


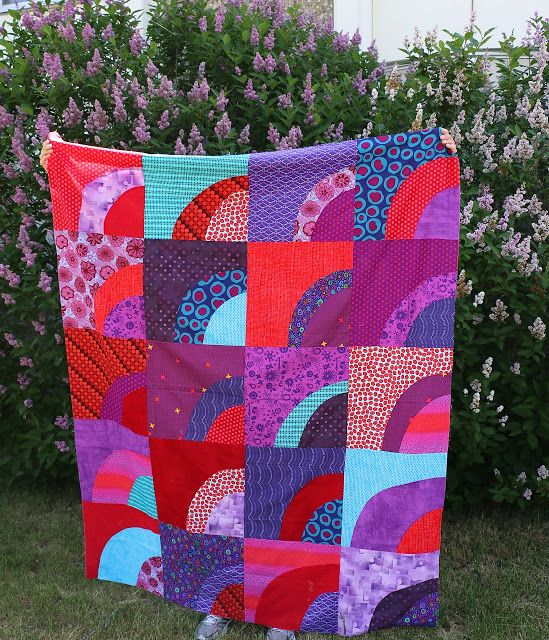
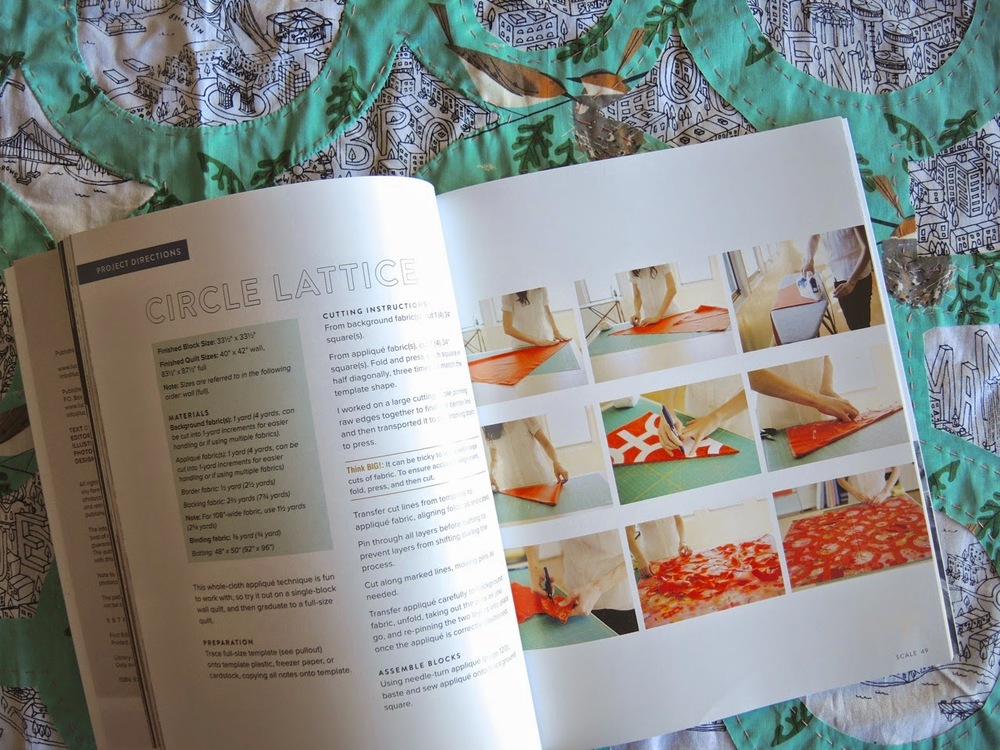
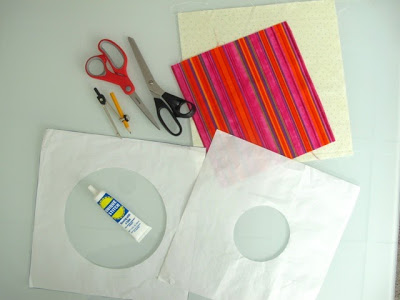
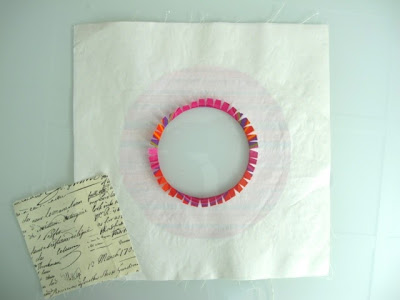
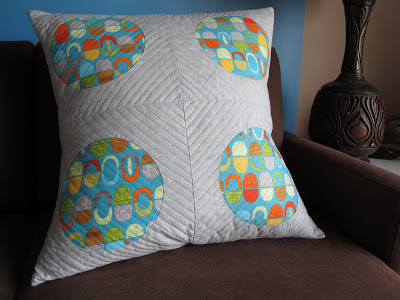
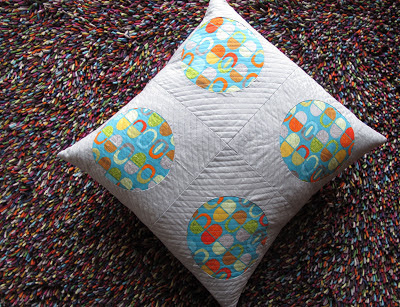
Having finished my Alturas top I was searching for another appliqué project. I was going to try and design my own little graphic block, but I couldn't ignore how completely awesome Circle Lattice is. This project is from Savor Each Stitch and Carolyn uses it to demonstrate the concept of Scale in the book.

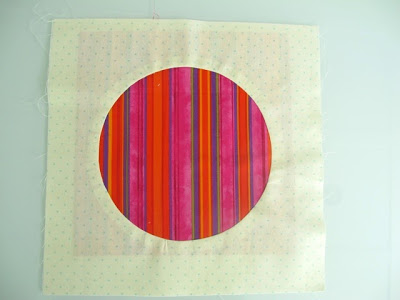
It happens to come together quite neatly, like a paper snowflake. This makes it even cooler.


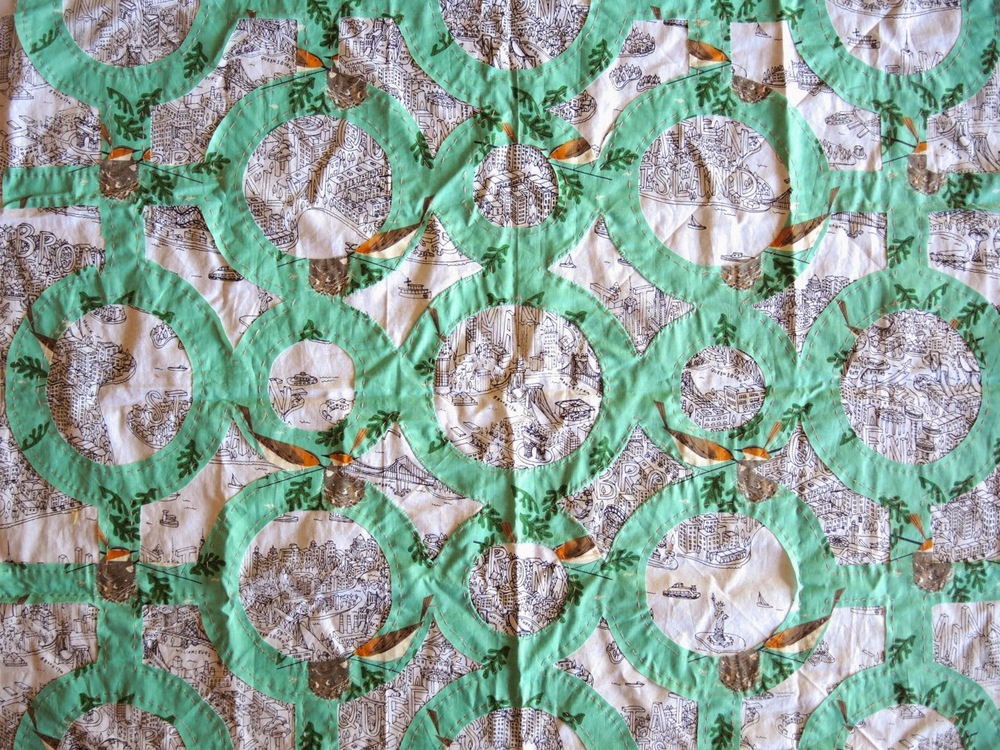
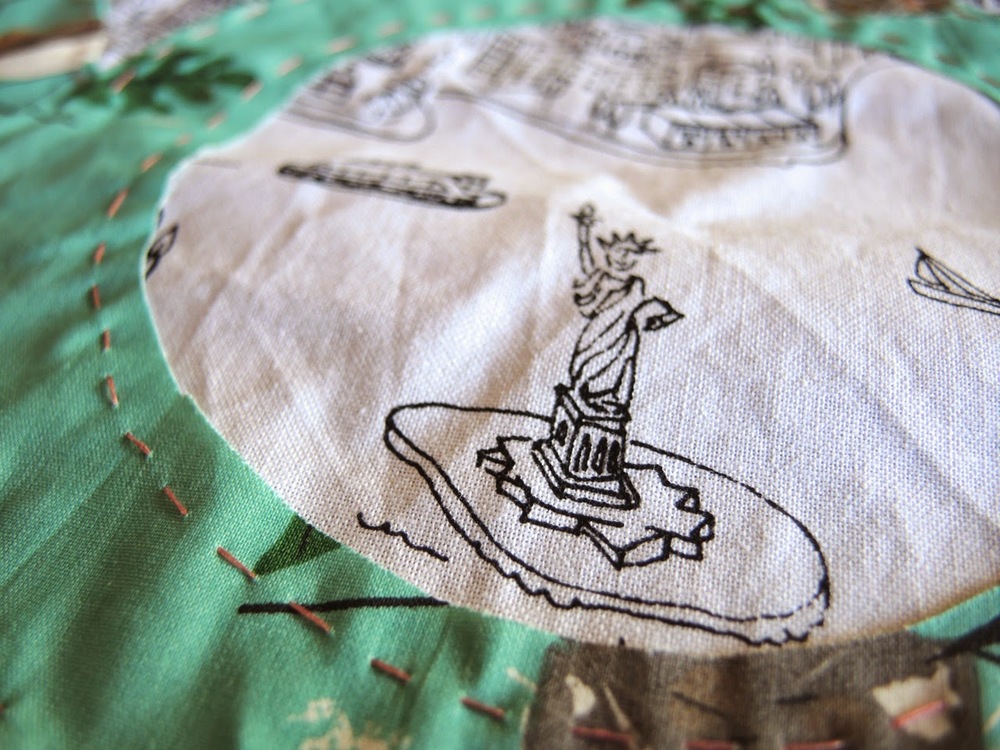
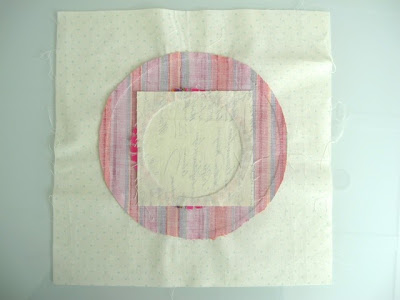
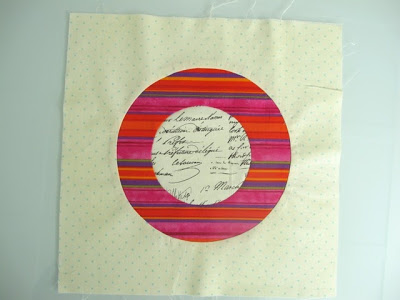
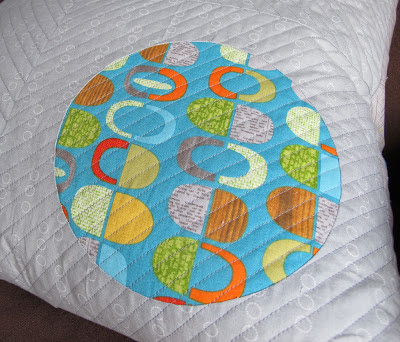
I chose two completely disparate fabrics. My background is a drawn illustration by 
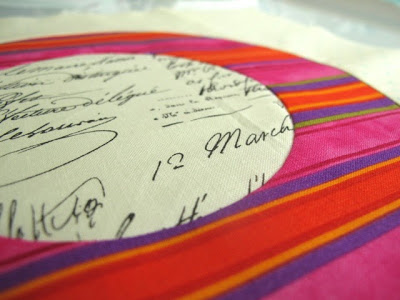
Samarra Khaja, made by Timeless Treasures. There are so many little details in the fabric that it is rather fun to discover things as I stitch. I did nothing to prepare the fabric in terms of fussy cutting, so little treasures like Lady Liberty shining through here are a treat.

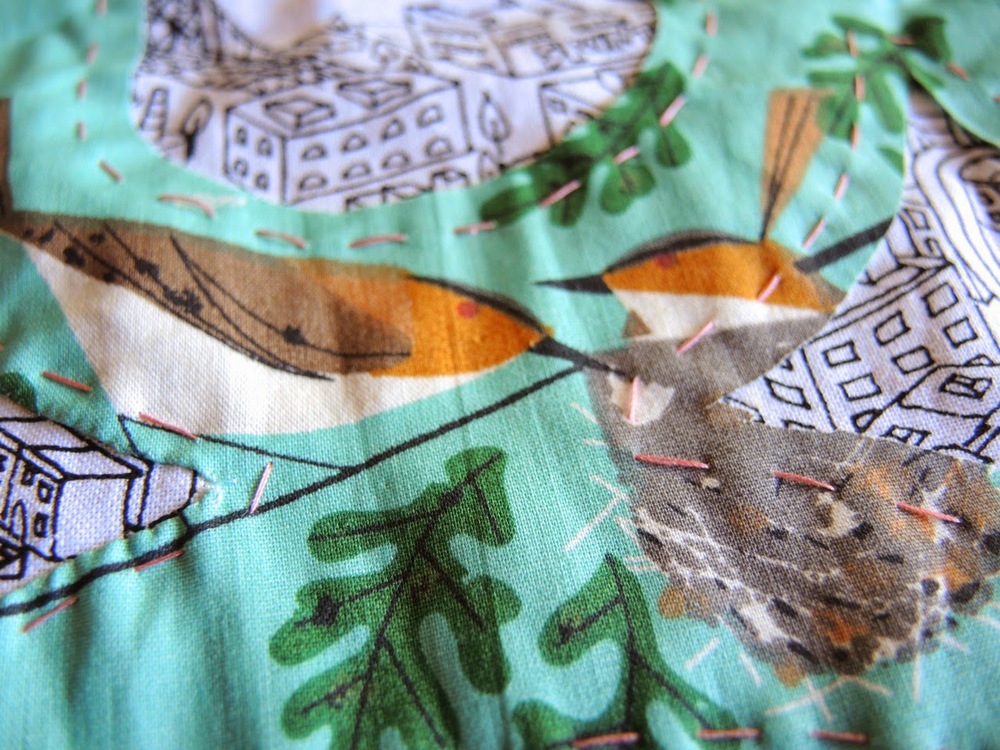
For my appliqué I chose one of the Charley Harper fabrics from Birch Organics. I've been hoarding it, frankly, so it was good to pull it out. As much as I love the fabric and its birds, I love that elements come and go in the empty spaces. And sometimes the birds are exactly where they need to be.


This one block will be a labour of love. It took me about 6 hours just to hand baste the thing. I thought about glueing and/or machine basting. But it seemed more cumbersome. Something about the hand stitching called to me. So I loaded up Anne of Green Gables, and the sequel, and basted away. I'm on to the needle turn and it seems faster than the basting. It's certainly more enjoyable. I'm glad I followed Carolyn's directions for basting too. It seemed redundant to go on both sides of the appliqué as opposed to down the middle, but it is making the appliqué a breeze. See, even an old pro like me has a lot to learn. And I'm glad I've let Carolyn be my teacher in Savor Each Stitch.

Now, about that missing U...

Ring Tutorial


In my Craftsy class: Inset and Applique Circles by Machine I had a request for a short tutorial on making a ring, instead of a circle. It's an effective design and a great adaptation of a single technique.

1. Gather Your Supplies
Paper scissors, sewing scissors, compass, freezer paper templates, fabric glue, and fabric for the background, ring, and inner circle.
I've made this a 12 1/2'' by 12 1/2'' block. So my background fabric is cut to the same size, as are my freezer paper templates.

2. Make Templates
For this ring I've used an 8'' circle and a 4'' circle. You need two separate templates. From your 12 1/2'' by 12 1/2'' squares draw and cut out your circles.


3. Insert The Circle
For this block we are using the Reverse Circle technique reviewed in Lesson 3. This technique achieves the look of an inset circle with no headaches and consistent results. Use the first template, the 8'' circle, to start the block.
You can see in the photo above that I haven't trimmed my excess circle fabric after sewing it in place. Do so before you move on to the next step.


4. The Second Circle
Apply the template for your smaller circle to the block of the block, after trimming, from Step 3. Prepare for sewing the same way your did the first circle: cut out and opening - leaving seam allowance, fringe the seam allowance, press back, glue, apply fabric, then sew in place. Only this time your background is actually the first circle.


Here is what it looks like from behind, before trimming.


And after trimming.

What a great effect, right? Don't hesitate to adapt this technique. You could try off center rings, circles within ovals or vice versa, and maybe even multiple rings. The design possibilities are endless!


Love the example, but want to learn more about the technique? Don't forget you can sign up at any time for my Craftsy class: Inset and Applique Circles by Machine. Access it on-line, anywhere, whenever you want!


Graphic Circle Pillow - Or How I'm Using my Craftsy Step-outs


A simple pillow with great impact. Fun for my living room and I used up blocks, unfinished blocks, laying around the sewing room. Win-win!

I had these blocks from filming my Craftsy class. They were the step-outs from the Reverse Circles lesson. So I took a few minutes to finish all the blocks and turned them into this pillow. I can't lie, I chose the fabrics for the filming so that I could do this afterwards. These fabrics are a perfect match for my living room!


This Reverse Circles technique is one of my favourites. It achieves the look of an inset circle without the stress of doing a full inset circle. The finished block is clean, crisp, and flat. This is perfect for showcasing some really awesome fabric. (Mod Century by Jenn Ski, for example, with some Aneela Hoey.)

And the whole pillow is perfect for snuggles on the couch reading and for climbing adventures by the baby boy.


Details: 24'' by 24'' finished pillow cover size with a 26'' pillow form from Ikea stuffed inside. It's perfect this way. Just an envelope closure on the back with more Mod Century. Straight line quilting with Wonderfil Konfetti.

Full Circle Announcement


Look at those pretty circles. All sorts of Liberty goodness in my not-quite-patented process.

These are being whipped together courtesy of the new Liberty Lifestyle fabrics and my impending teaching schedule. I've got a Perfect Circles class coming up and guess where it is?


I am beyond excited to join the faculty at Quilt Con. Such esteemed company (Lotta Jansdotter, Denyse Schmidt, Jacquie Gering, Lizzy House, and more!) and what looks like to be an amazing event. You can come and take half and full day workshops, attend lectures, see a couple of quilt shows, and even shop.

My Perfect Circles class runs twice over the course of the event. We will run through all manner of circle techniques - from sizing, creating, placing, and sewing your circles. Circles, circles, everywhere! And we all know how I love my circles.

See the complete line-up here. Registration opens August 30, 2012.

And big thanks to Stash Books for sponsoring my class!