Mayhem and Peace
Circle Mama
 I call this one 'Circle Mama'. It is my plan to use this as a class sample - once I convince a store to let me teach! I tried all manners of creating and attaching the circles, including templates, fusing, dryer sheets, aluminum foil and a hot iron, and on and on. There is a clear winner, in my mind. Expect a tutorial soon.
Finishing this was a good end to the weekend. Okay, it was a few days after the weekend and I did work those two days, but in my mind this was a mini weekend day. The real weekend was  wonderful too. Hubby came home on Friday night from two weeks working up North. That meant I spent some valuable time by myself, sans Monster, on Saturday. After a family trip to the market for groceries I took a long walk in the cold, grabbed a pedicure, and did some junk store shopping. And of course I HAD to let my toes dry for an hour while I chatted and read at the nail shoppe. Sunday we ate blintzes for brunch and walked the dogs. It doesn't get any more domestic than that.
Grapefruits, key limes, olive oil, balsamic vinegar, and maple syrup
Sweet Comfort
Here It Is!
Before?
Check Out That Heiny
There are the schools of thought that piece leftover fabric from the front. I've done this, but not been happy with the seemingly haphazard look - if you just use chunks of fabric. Rather, I like to actually have a design on the back. Often it is dictated by the fabric, as you can see in the first example below. Sometimes I am replicating a design used for the front. And sometimes it is just a simple design that showcases a couple of fabrics. I encourage you to step out of the neutral, solid backing and add some design to your heiny.
This weekend I lived up to my name and with the help of a quilting buddy I got the backs to two tops finished and ready for the long-arm. Here are the fronts and backs.
Circles and Stripes - Front, then Back
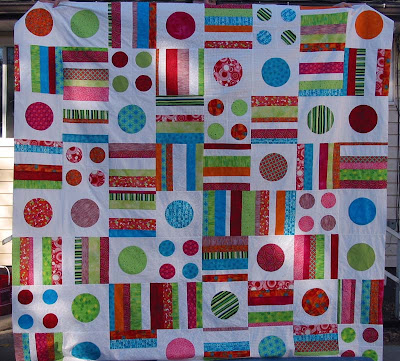
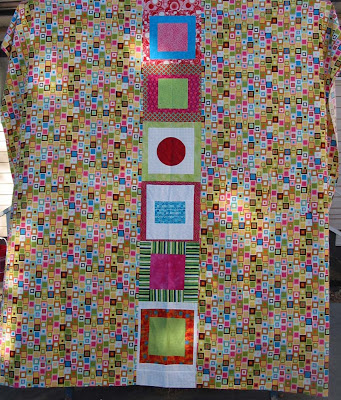 Black and White Retreat Quilt - Front, then Back
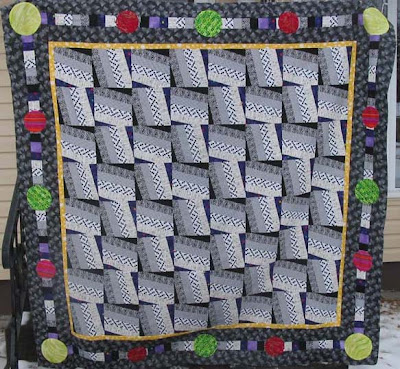
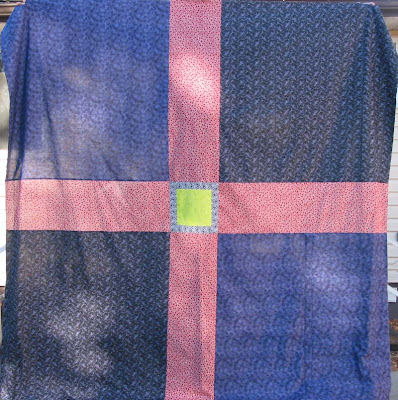
Now, I can't wait to get these quilted and put the labels on. I am making progress on the albatross of projects I have.
Hansel and Gretel
My flours and sugars are in glass canisters, coffee is stored in the freezer, and tea gets its own cupboard. No room in my current, awkward kitchen for the breadbox. The weekly loaf or two are simply left on the counter by the toaster. Not pretty, but handy.
Between the nanny, my late night peanut butter and honey sandwichs, and my Monster's love for bread and butter the loaf is usually gone in a few days. But this week we cut out bread from the Monster's diet due to yeast issues. I now know just how much bread she actually eats! There was a lot of stale bread come Friday.
In my mom's house there was always an old baking pan in the bread box filled with stale bread, drying for future use as bread crumbs. Rather than dry things out I prefer to blitz the days old bread in a food processer or mini chopper. I get crumbs that are then stored in the freezer for use in many yummy ways. Sure, I could blitz a fresh piece of bread, or even buy the fancy panko crumbs that so many professionals rave about. Let's be honest, though, the average home cook - a mother with kids - doesn't have the time or energy for that. Sure, for special occasions or the right piece of trout I will gladly break out the wallet and splurge on panko. But for homemade macaroni and cheese topped with crumbs and melted butter, or binding lamb meatballs, I will gladly use my frozen multigrain crumbs - as i did when making food for the freezer this weekend.
Tonight I made comfort food. It was a snowy day, filled with swimming lessons, groceries, and gate building. We needed something to fill our bellies and put a smile on our face as we watched This Old House. It required meatloaf, mashed potatoes, and buttered brussel sprouts - one of my favourite meals of all time. Unfortunately the Monster hasn't fully learned to appreciate brussel sprouts so she had some steamed peas. But the meatloaf was the star.
Okay, no photo of the dinner itself. Plating is NOT my forte. Here it is right out of the oven.
Bison Meatloaf
1 medium carrot
1 medium onion
2 stalks celery
1-2 cloves garlic
1 tsp olive oil
1 pound ground bison
1 beaten egg
1 tbsp ketchup
1/2 to 3/4 cup bread crumbs
A couple of good dashes of worcestershire sauce
Salt and Pepper
Glaze:
1 tbsp ketchup
1 tsp brown sugar
Dash of worcestershire sauce
1. Preheat oven to 350 degrees Celcius.
2. Peel the carrot and onion. Cut the carrot, onion, and celery into 2-3 cm chunks. Mince, along with the garlic, in a food processor or mini chopper.
3. Cook the carrot, onion, celery, and garlic in the olive oil for 5-10 minutes. Most of the water should be evaporated. Set aside and let cool for 5 minutes.
4. Once cool, add to remaining ingredients in a bowl and mix with your hands. A spoon just won't do, you need to mush it all together with you hands. You don't want to overmix, so stop once it is incorporated.
5. Shape into a mound in a meatloaf pan, or pat into a loaf shape on a parchment lined, rimmed baking sheet.
6. Mix glaze ingredients together and spread on top.
7. Bake for 45-50 minutes.
Enjoy!
Halloween Apples
Here is my Monster, in her lion costume made my moi (even though we know I hate sewing clothes). Nothing fancy. Just some decorator trim basted to an American Apparel hoodie, a tail pinned to some brown pants, and fake fur ears tacked on the hood. But damn, she looks cute. The cutest was when she would actually do her own baby "Roar".
Trick or treat!
Vacation
That being said, we did have a good time. Storms that crashed against the steel roof of the cottage, walks on the beech to collect sea glass and pretty rocks, forays into the lame tourist ventures of the area, relaxing in the ocean front hot tub, and lots of lazy dinners and wine with friends and family.
Here are the highlights.
 Hiking through Sugar Moon Maple Farm.
 Ocean front hot tub.
The Lazy Days of Fall
We've had the fabulous benefit of travel for work. Whenever I got to go somewhere interesting and my hubby had some time we went together. Usually we got the chance to spend a few extra days exploring another city or visiting friends. This method of travel has taken us to New York, Chicago, Toronto, Ottawa, Halifax, San Diego, and even the booming metropolis of Saskatoon. September and October were always busy times. Conferences, speaking engagements, and meetings took me all over. It was a great opportunity to travel a bit on (mostly) someone else's dime.
Alas, with the Monster now that travel has lost its appeal. The hubby can't necessarily leave and I don't want to be away for long. And now our trips are taking us to small towns in Alberta and Saskatchewan. Great people but usually bad or even horrible food and not much to do.
But tomorrow takes us away. We're leaving on a jet plane... do know when we'll be back again. We are spending Thanksgiving - my all-time favourite holiday - in Ottawa with some of the hubby's family. Then we go to Nova Scotia for nearly two weeks. It is a second home for us, where we would live if we could both find jobs there. I am salivating at the thought of wandering the South End and Point Pleasant Park, at exploring the nooks of the Halifax Farmer's Market, and at spending a week at an oceanfront cottage. Reading, good wine, lots of chatting with friends and family, having my daughter see the ocean for the first time, collecting sea glass on the beach, leaf peeping, and maybe a little writing. As long as we survive the long flight this will be heaven for the next two and a half weeks.
The reluctant seamstress
 The outside is made of that gorgeous green boiled wool. My Monster has hazel eyes (green/grey) so the color looks wonderful on her.
 The kimono ties inside and with the shoulder ties. I ended up making it a bit bigger than I anticipated, but it should carry her through the rest of fall, chinook days in the winter, and into spring.
I made the whole thing double layered, with one of my favourite Amy Butler fabrics as the lining. It is so soft and makes wearing a wool coat bearable for a toddler.
The Lazy Gardener

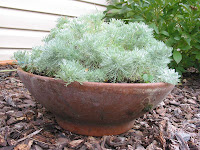 I may not be an expert, let alone someone who should be giving out garden advice, but here is my one garden tip. I have a lot of things in containers, in my case a big collection of terracotta pots. This includes some perennials. To overwinter them I bury the container, with the plant, in the ground. I did this last year with great success and I am doing it again this year. There is, of course, the risk that your pot could crack, particularly with frost heaves. When I dug out one of these pots this spring a bit of one had sheared
  off. I didn't mind so much as the plant was in great shape and the pot got some extra patina.
Some Things Scream Fall

We loaded up the dogs and the Monster and met with a friend in Lacombe. Lunch in town and then off to the Maize. This is a great maze. We only finished about a third of it and it took us 45 minutes. The Monster wasn’t going to be happy in the backpack for more than that. Off to the petting farm and games. She started walking a week ago, so she was busy chasing the goats and other kids all around. We saw pig races, played on the slides, fed the goats, and rode a tractor train around the corn field.

To be honest, we thought it would be one of those things that sounds fun but ends up being rather lame. But we had a blast. I strongly recommend a visit to your local maize.
Our only disappointment: there was no corn to buy. Wouldn’t you think that corn would be available at a corn maze? I wanted to make this. Instead I went to the market on Sunday to get groceries. It was a bit of a blustery day, so soup was in order.
I made this soup with what I had on hand from the market and the garden. It hit the spot, with a few blue cheese croissants. It is really easy, just some chopping to start. To puree I use a hand blender right in the soup pot. You could boil all the veggies, but the flavour won’t be nearly as rich. And this weekend I used water to thin the veggies. Our nanny is a vegetarian and I wanted her to be able to have some for lunch.
1 large sweet potatoe – peeled and cut into 1 inch chunks
1 large butternut squash – peeled, seeded, and cut into 1 inch chunks
1 onion – peeled and cut into quarters
1 large or 3 small cloves of garlic – peeled
¼ cup olive oil
Salt and pepper
3 tbsp fresh thyme/1 tbsp dry
Water, vegetable, or chicken stock
Garnish – fresh thyme leaves and cream
1. Preheat oven to 375° F.

2. Put all veggies onto a large, rimmed baking pan. Toss with olive oil and season with salt and pepper.
3. Roast veggies in oven for 45 minutes.
4. Puree veggies and thyme in a soup pot with hand blender or in a standing blender. Add water or stock to thin as desired.
5. Serve hot, with a little bit of cream poured in each bowl.
Tackling the mess
Okay, so it doesn't look like one of those ads where all the wooden hangers are equally spaced with all colour-coordinated clothing hanging freshly pressed and sweaters folded exactly alike. I always think it is a good idea to have the shoe box with the polaroid taped to the end so I know what's inside, but the boxes would take up way too much room (I have a lot of shoes) and I don't have enough shelves to keep them neat. I'll admit, it is my dream to have that. But let's get real folks. We all don't live in an ad.
The difference between real people and those ads:
1. We have more than 5 shirts.
2. We iron just before we wear the shirt, not as we put it away.
3. We don't put family photos, lights, or coffee table books in our closets.
4. Most of us have attemped organization, but it involved plastic or wire shelving units from Ikea or the hardware store.
5. We hardly have enough time to clean our bathrooms, let alone our closets.
I am only partway through my clean up, there are still some storage things I would like to get to help keep it neat. Like these great sweater organizers and more of these fabulous boxes to keep the shelves and the bottom of the closet neat.
Here are a few tips for clearing out and cleaning up that closet.
1. Take everything out. And as you do it do an initial sort into garbage - recycle - give away - launder - keep.
2. Grab the vacuum and clean all shelves.
3. Take everything you said you would keep and go through it again - looking for repairs needed or style upgrades required.
4. Sort your keep stuff by season and type of clothing.
5. When rehanging things put the hangers all the same way. Even if you don't have fancy hangers this will go a long way towards having it all look neat.
6. Place the items you use the most in the center of the closet. Shoes, coats, and dresses can be placed on the outer edges. (I wear skirts, pants, and blouses mostly).
7. Reduce the need to clean as often (who likes dusting their shoes?) by storing things in covered, paper or fabric boxes. Things can get musty in plastic or rubber.
8. Be ruthless. Okay, so I kept the saddle shoes I bought for fun back in university, but I am giving away 10 other pairs that I never wear anymore (clunky heels, square toes, bulky boots).
9. Don't be afraid to make it as pretty as you want. No one will laugh at you if you organize your clothes by colour. The truth is, we're probably jealous.
I will post a picture when I finish, but for now I want more boxes and I never got around to refolding my sweaters. But I can tell you that my efforts took less an hour and I felt calmer with every passing minute. And it was sure easy getting dressed in the dark this morning - I even match.
End of Summer Goodness
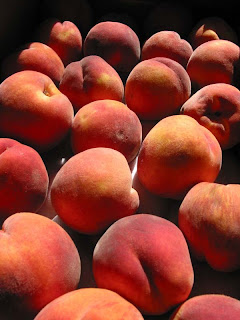 The end of summer always meant two things in my house when growing up. One, a trip to Saskatchewan to visit grandparents, the farm, and pick up more food than we could possibly need. And two, canning and freezing to deal with all that food.
My parents are both Ukrainian. That means food is central to our lives, as is the garden where it is grown. Now, as city kids and parents ourselves we still garden, but it isn’t on the same scale. My dad’s parents had a one acre garden. It was lovingly handwatered daily with pails filled from the slough at the front of the property. My garden is in containers so the dogs don’t dig it up.
Poppies lined the edges of my grandparents’ garden, and yes, my Baba dried the poppy seeds every year. The sloughs were on the front of the property, split by a long driveway. At the end of the driveway was the yard, with the house on the West side, and the original summer house right at the back. These were tiny houses, built by hand in the 50s and 60s. Originally they had no running water, no heat other than the wood stove, and no electricity. Over time my dad added a furnace, plumbing, and electricity to the main house. It made it a lot more enjoyable to visit, as kids.
On the West side of the yard the house essentially stood in the middle of the garden. All the vegetables were to the South, strawberries to the West, and raspberries and the clothesline to the North. On the East side of the driveway was another strawberry patch, a small grove of trees, and the corn patch. Finally, at the back of the property was another, larger grove of trees that had a bench and some old wood swings. It was a great place of imagination for us.
Baba and Dido grew the aforementioned strawberries, corn, raspberries, and poppies. They also grew onions, potatoes, cauliflower, broccoli, lettuce, dill, tomatoes, beets, peas, beans, cucumbers, garlic, and more cabbage than 5 families could possible ever eat – even if you make cabbage rolls almost weekly.
The end of summer trip always meant harvesting the garden, setting things up to dry in the attic or the cellar, and loading up coolers and boxes with food. Like all good Babas mine thought we were in perpetual danger of starving to death. As such we were sent home with a couple of coolers full of frozen strawberries, raspberries, peas, beans, and wild mushrooms. This was in addition to the jars and jars of pickles, beets, sauerkraut, head cheese, cherries, and juice. I can’t forget the bags of cucumbers, onions, and potatoes. Finally, there was the cabbage. Oh so much cabbage. An unbelievable amount of cabbage. The heads were always enormous and we never left with less than a dozen, more if my parents had made arrangements with friends to give it away.
The entire trip took place over a weekend and required two vehicles. Our big boat of a car carried the family and some stuff. And my dad would bring his truck so he could take all the food home. As we got older not all of the family made the trip. We also got smarter and only took one vehicle so there was less to bring home. “Sorry Baba, there just isn’t room,” we would slyly tell her to avoid all the cabbage.
Once we got home everything had to be dealt with. That meant canning and freezing. This was added to the canning my mom wanted to do of the Okanagan fruit. We always had dozens of jars of peaches and pears to provide summer treats all winter. And don’t forget the jam – strawberry, raspberry, chokecherry, and crabapple.
Now that all of us kids are older, and Baba and Dido’s garden is no more, we rely heavily on the farmer’s markets. My parents still can a lot but they’ve strayed from their Ukrainian roots. Aside from pickles the most requested item is my Dad’s salsa.
I’ll admit, I still defer to their efforts most of the time. And now, with my Monster underfoot it is a bit harder to find enough time to get the job done. That being said, I was looking at the shelves in the basement and decided I needed to take advantage of the last of the peaches this summer. I will be enjoying summer goodness again this winter.
 Homemade Canned Peaches
I like to clean my kitchen counters before I start. That way if I put something down without thinking about it I don’t have to worry about re-cleaning it. Anal, I know. Then I gather all my supplies and wash everything with hot-as-I-can-stand-it, soapy water.
Supplies:
Jars (size is a personal choice)
Rings and new lids, or rings with glass lids and rubber sealers.
Canner and tongs for placing and removing jars
Sharp knife
Wide mouth funnel
Dry and wet measuring cup
Large bowl, small bowl
Sharp paring knife
Large, heavy pot
Clean dishtowel
Clean rag (I found a baby washcloth to work best)
Ingredients:
Just rip or slightly under-ripe peaches
Sugar
Water
Clean jars in hot soapy water, then let them sit in just boiled water for 5-10 minutes. Drain and dry the outsides with a clean cloth. Do the same things with the rings.
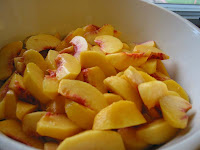
Peel and cut peaches. Reserving pits. (some people blanch them but I prefer to slice and peel as I go – I would rather have knife marks then the mushy edges of blanched peaches)
Put the lids in a bowl of just boiled water. Let sit until ready to use.
Fill jars with sliced peaches, almost all the way to the top. Make sure to include a pit or two in each one.
Using a ratio of 4 cups water to 1 cup sugar make a simple syrup. Boil water in large, heavy pot with sugar until sugar is dissolved. How much you need will depend on how many jars you are using. Plan on at least 2 cups of syrup for every 1 litre jar full with peaches.
Fill the jars full of peaches with syrup, leaving an inch from the top empty.
Using tongs, place the lids on jars and seal with rings.
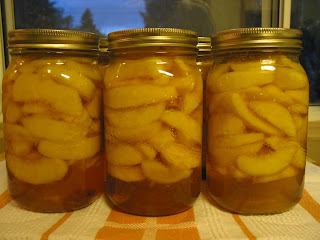
Place in canner with hot, almost boiling water. Bring to a boil. Process in a canner for 12-15 minutes, starting the timing once the water has come to a boil.
Remove and let rest on a thick cloth. You might hear popping over the next 24 hours as the jars seal. Refrigerate and use ones that don’t seal right away.
Happy Tuesday.
On My Creative Toes
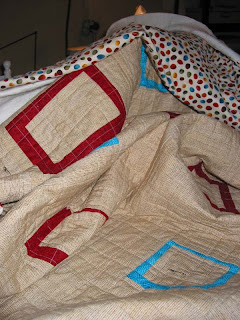 This is one that I am about three quarters done the quilting. I must admit, I started it almost 5 years ago. I had it planned for a few more years than that. Just as I started quilting there was an article on Denyse Schmidt in Martha. I instantly fell in love. Then I found these fabrics and the quilt was born. Now that I know more about design, trademarks, and having respect for a designer I feel a bit bad. It really is close to her designs. I will always give it credit as inspired by Denyse Schmidt. And as time as passed and my quilting designs have developed, I must give a lot of credit to her - a true inspiration for me. I am desperate to try and finish this in the next three weeks so I can give it to my hubby for his birthday. He's been asking me for years, "When are you going to finish the quilt I like?" It already has a name: Here It Is.
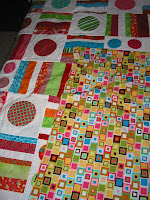 I am so excited to have finished the top to this quilt. I designed it a few years ago and started it probably in 2005. Like most of my quilts it was designed during some downtime in my desk job. The back of my work notebook is filled with sketches of quilts, blocks, and furniture arrangements. The colours were chosent to actually match our living room, which is essentially cyan blue and orange, with taupe/brown as a base. I just have the back to piece, using this great Robert Kauffman and some leftovers from the front. This quilt started my circle fixation.
 This quilt continues the circle fixation. I won the centre portion at a retreat for my Red Hat group, Garnet Gals. Four of us pieced it and then raffled it off among us. The centre portion is from a book by Maaike Bakker called, "Strip Pieced Quilts". It really makes you googly-eyed to look at it too long. I added the borders using the scraps from piecing. And because the one colored fabric we chose in the blocks had some coloured polka dots in it I had to add some to the border! The back needs to be pieced. Both of these quilts will then be sent out for quilting. I have pretty particular designs planned and they are both beyond both my skills and the ability of my machine.
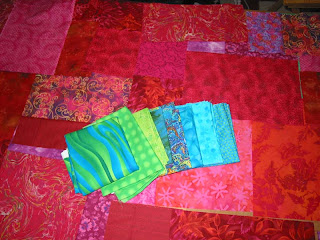 Okay, one more circle quilt on the go. I'm building this one as a potential class sample. In making all these quilts I experimented with a number of ways on how to make the perfect circle and how to attach it. And I keep finding other ways. In my efforts to build a quilting career I am going to try and teach. This quilt will be my first effort and hopefully those who read this can help me out when it comes to testing instructions... hint, hint. I have the blocks of the background pieced and the circle fabrics narrowed down to these blues and greens.
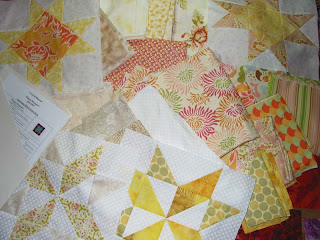 So when I get tired of doing all these circles I pull out some traditional piecing. This is also the project I go to when I need a colour break. As you can see, most of what I'm working on is pretty bright and vivid. This is a soft quilt. I'm in love with it. It started off as No Darker Than Sand, but that was a little too soft for me. Then I found Heather Bailey's Freshcut line. That did it. A few Amy Butler pieces thrown in and I had a colour scheme. The pattern is a block of the month from Planet Patchwork. Right now I am planning some curved, paper pieced borders, but we'll see. I'm not sure how big I want it to get.
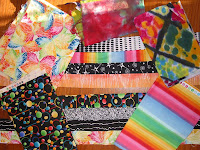 At the same retreat where I won the black and white quilt top we set ourselves up with a challenge. We sewed together some strips, threw in a few other fabrics, and departed. Each of us has the same set of fabric and strips. Here is what we started with. Since then I have started by cutting my strips for some half square triangles. I do have the quilt designed, but nothing more. I think I need to get a few other projects out of the way first.
 Cookie Monster

Bed rest put a kibosh on my cookie fetish. I wasn't allowed up long enough to bake and the diet nazi, a.k.a. my hubby, refused to buy me the cookies I wanted when he did the grocery shopping. He always told me I could thank him later when my ass didn't get too big. If it wasn't for the mom and mom-in-law coming down to help every week or two I would have been completely cookie deprived.
Now that my ass is back to its pre-pregnancy size, thanks to cookie and juice deprivation, I feel it is necessary to welcome fall with baking and some overdue cookie indulgence. Mom's group is also a good excuse to bake. This week I relied on my old standard, the very first cookie I learned how to bake: Chocolate Chip Slab Cookies. Yup, one giant, crumbly, buttery, and rich cookie. It is also the easiest cookie you will ever make. No wonder my mom trusted the kitchen to me when I was only 8 or 9.
I cannot lay claim to this recipe, for it comes from "The Best of Bridge" series of cookbooks. I have made it for over 20 years now - for sleepovers when I was a kid, for chick flick nights in my youth, for break-ups and sad songs in my twenties, and for just about any other reason. Try it once and you will be making it every time you just feel like some cookies. You can even halve the recipe, just bake it in a small, square pan instead.
Chocolate Chip Slab Cookies
Preheat oven to 350 degrees F
Grease a 9 by 13 pyrex or simple cake pan.
1 cup butter
1 cup brown sugar
1 tsp vanilla
2 cups flour
chocolate chips, M&Ms, skor bits, etc.
1. Cream together butter and suger.
2. Add vanilla.
3. Beat in flour, 1 cup at a time. Mixture will be slightly crumbly.
4. Stir in chocolate chips or other treat.
5. Pour all the batter into the greased pan and pat flat with your fingers. Personally, I also sample a little bit of the cookie dough at this point.
6. Bake in oven for 18-25 minutes until lightly browned.
7. Let cool 10 minutes then slice into bars.
The cooking time will vary depending on the pan you use and your oven. Please, please let them cool before you dig in. I can't tell you how many time my impatience resulted in a burnt tongue from molten chocolate.
Happy Baking!
Welcome... to no one

How many people have started their blogs with these cliches?
"If you build, it they will come"
"Bueller? Bueller?"
"Hello? Is anyone there?"
Not I. Well, okay, I guess I just did. It was all in clear sarcasm.
I am the naptime quilter. With a 14 month old daughter and a part-time job I do things when I can - at naptime. Lately this has been a lot of quilting and a little bit of gardening. You should see what I've actually finished lately and how overgrown my tomatoes are!
And speaking of naptime, it appears that it is now over...